


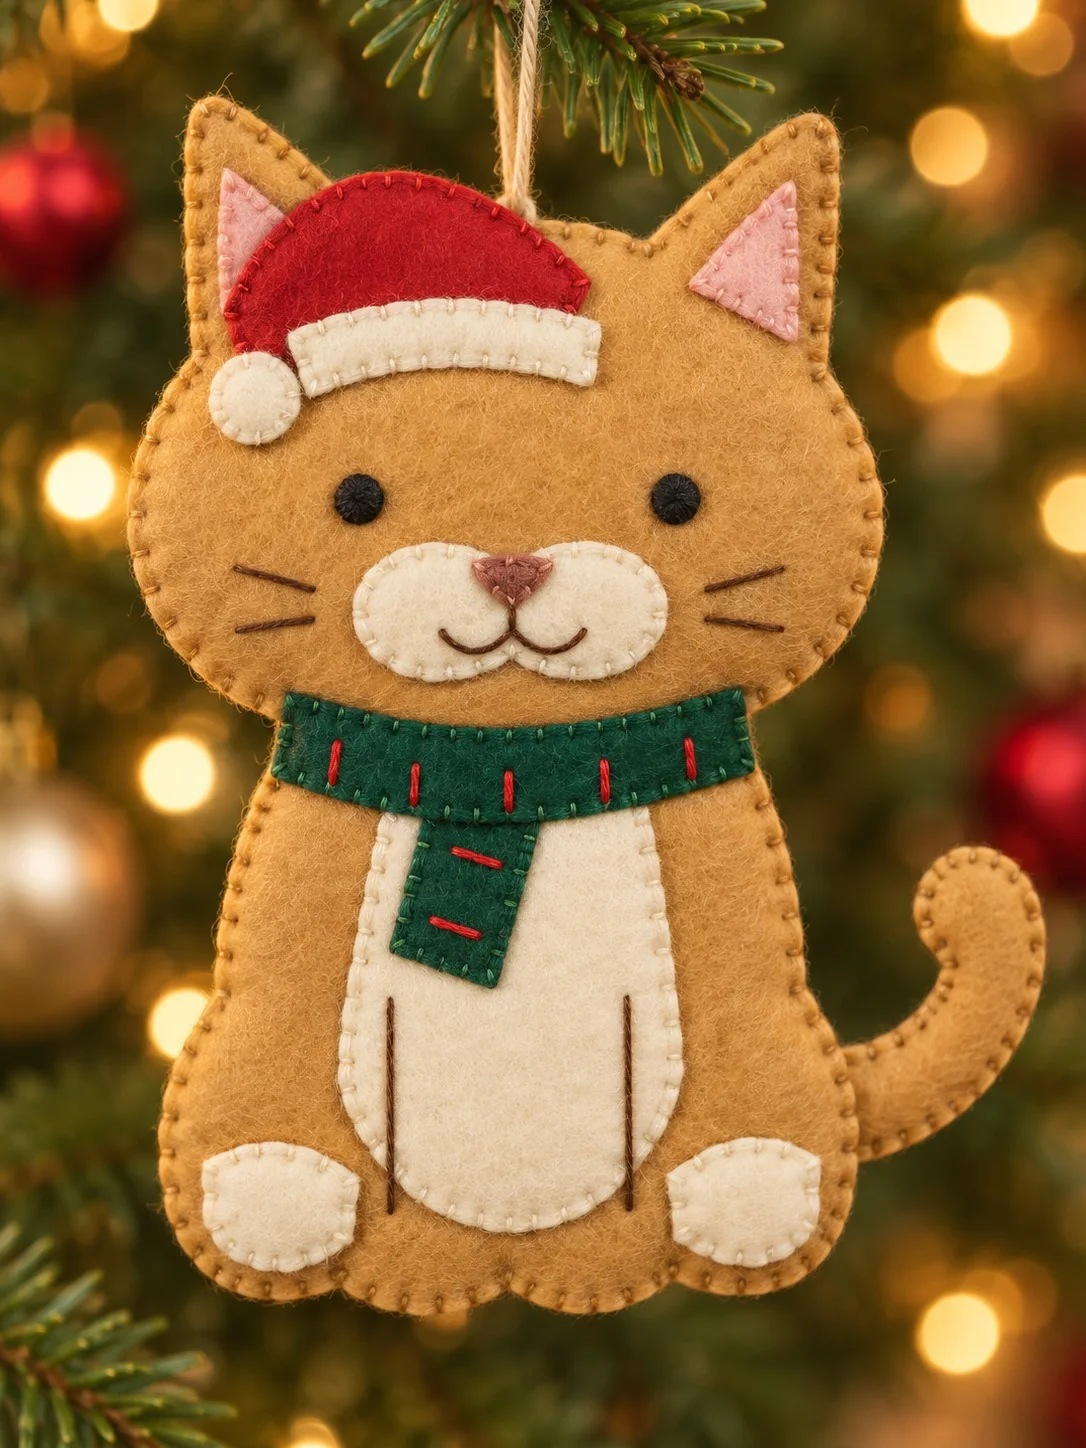
A little handmade cat on the Christmas tree always makes me smile. This one wears a tiny red Santa hat and a green scarf, and you can stitch it slowly over a cozy afternoon.
The ornament uses simple felt shapes and hand stitches. You can keep it flat or add just a little filling for a soft finish.
Below, I’ll walk you through the pieces, the face, and the final seam. The free printable PDF includes full-size templates, so you can follow along without guessing the shapes.
Christmas Cat Felt Ornament at a Glance
This little cat is about 14.5 cm tall without the hanging loop and about 11.5 cm wide when you include its curled tail. The pattern is suitable for a confident beginner. Set aside around three to five hours for your first one, especially if you like to take your time with the face.
The body can be left completely flat, which makes the ornament easy to pack away, or you can add a few wisps of polyester filling. Either way, the red hat and green scarf are flat felt appliqués. You do not need to wrap a separate scarf around the cat or attach a loose pom-pom.
Download the Free Christmas Cat Felt Pattern
Download the Christmas Cat Felt Cutting Templates (PDF) before you cut anything. The download has three full-size A4 cutting-template pages, labeled A, B, and C. Print all three pages at 100% or Actual Size, with “Fit to Page” turned off.
Measure the 20 × 20 mm test square on every template sheet. It should measure exactly 20 mm in both directions. If it does not, check your printer settings and print again. The solid outline is the cutting line, so you do not need to add a seam allowance.
Materials and Tools
- Golden tan felt, 1–1.5 mm thick: one A4 sheet for the cat body and tail
- Ivory felt: about 12 × 15 cm for the belly, muzzle, paws, hat brim, and bobble
- Red felt: about 6 × 5 cm for the Santa hat
- Green felt: about 8 × 6 cm for the scarf
- Pink felt: about 5 × 5 cm for the inner ears and nose
- Matching sewing thread or embroidery floss, plus black and brown floss for the face
- A hand-sewing needle, sharp fabric scissors, paper scissors, marker, ruler, and pins or clips
- 22 cm of thin cotton cord for the hanging loop
- A small handful of polyester filling and a blunt stuffing tool, only if you want a lightly stuffed cat
I like to lay out all the little felt parts before I thread my needle. It gives me a quick chance to check the colors and see whether anything is missing. For the neatest result, use one strand of six-strand floss for the small appliqués, two strands for the face and outside seam, and three strands for the red scarf details.
How to Make the Christmas Cat Felt Ornament
1. Print and cut the felt pieces
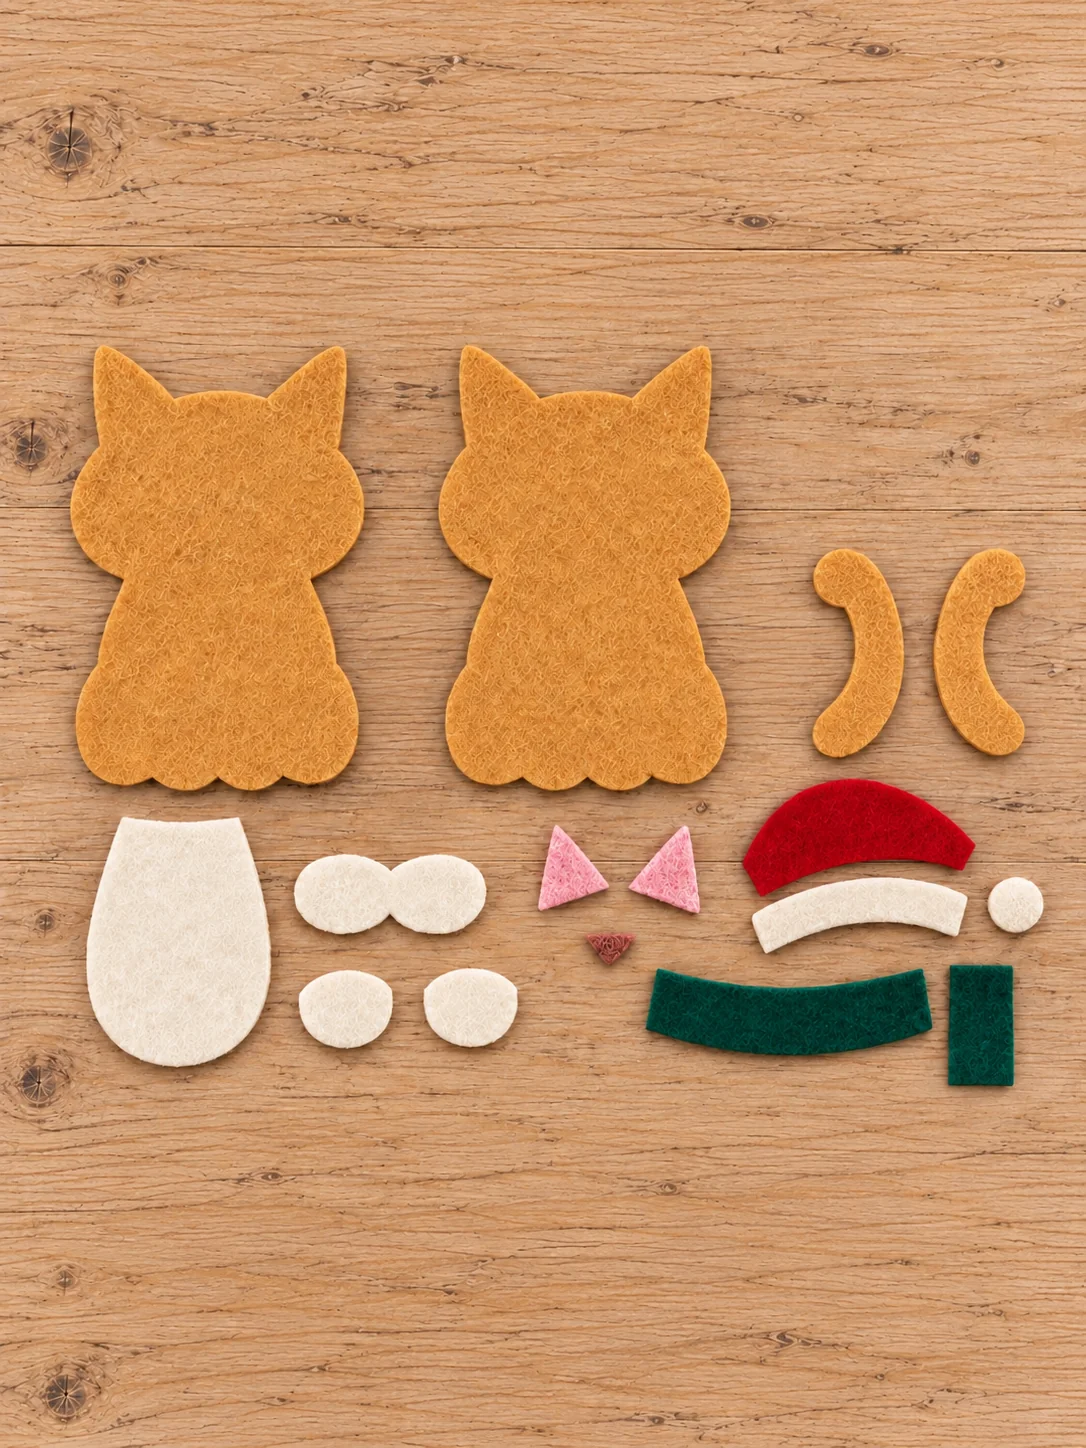
Cut two cat bases marked A and two tail pieces marked N from golden tan felt. Cut one each of pieces B through M in the colors shown on the PDF templates. If your felt has a clear right side, turn the paper template over when cutting the second A and N pieces. That way, the good sides can face outward when the ornament is assembled.
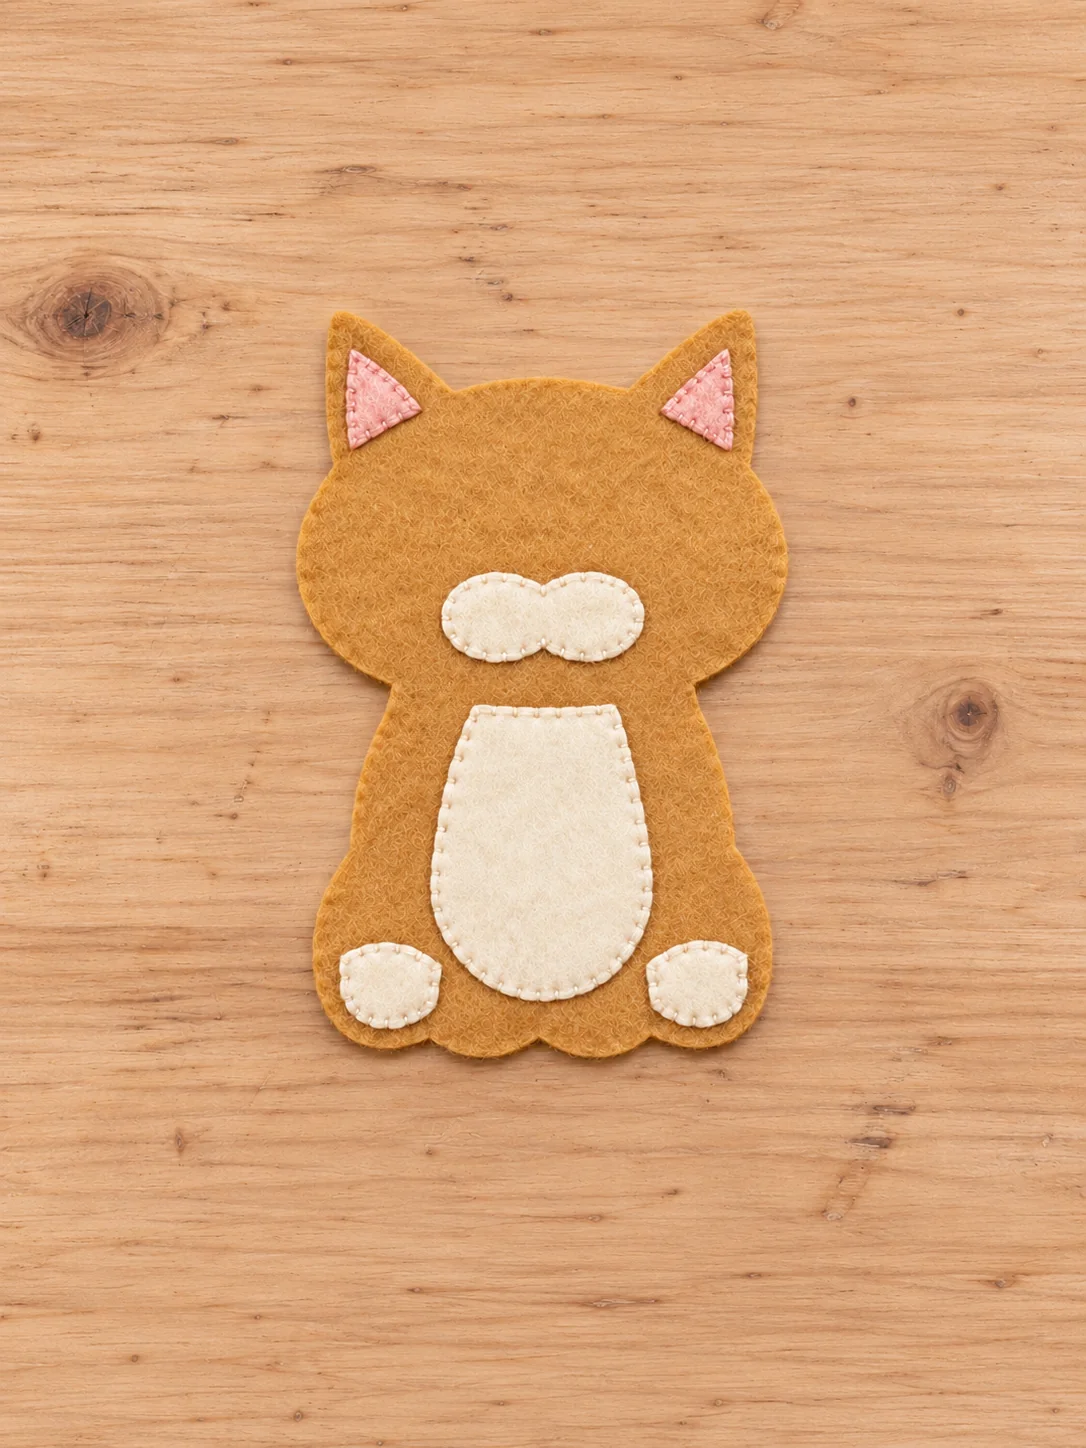
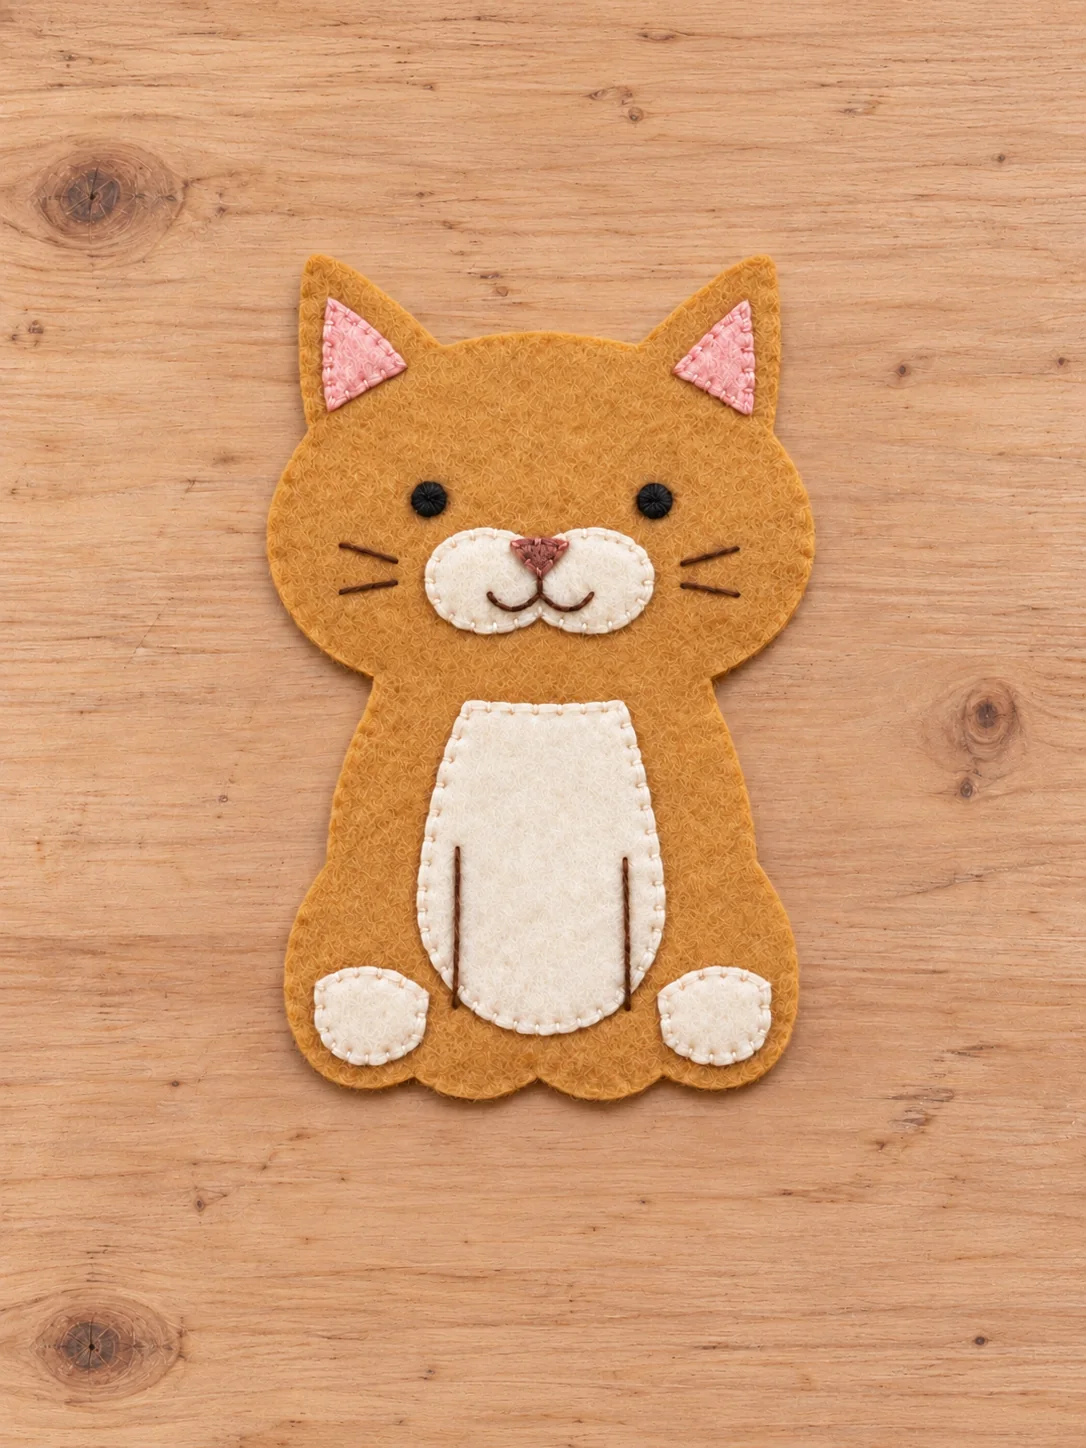
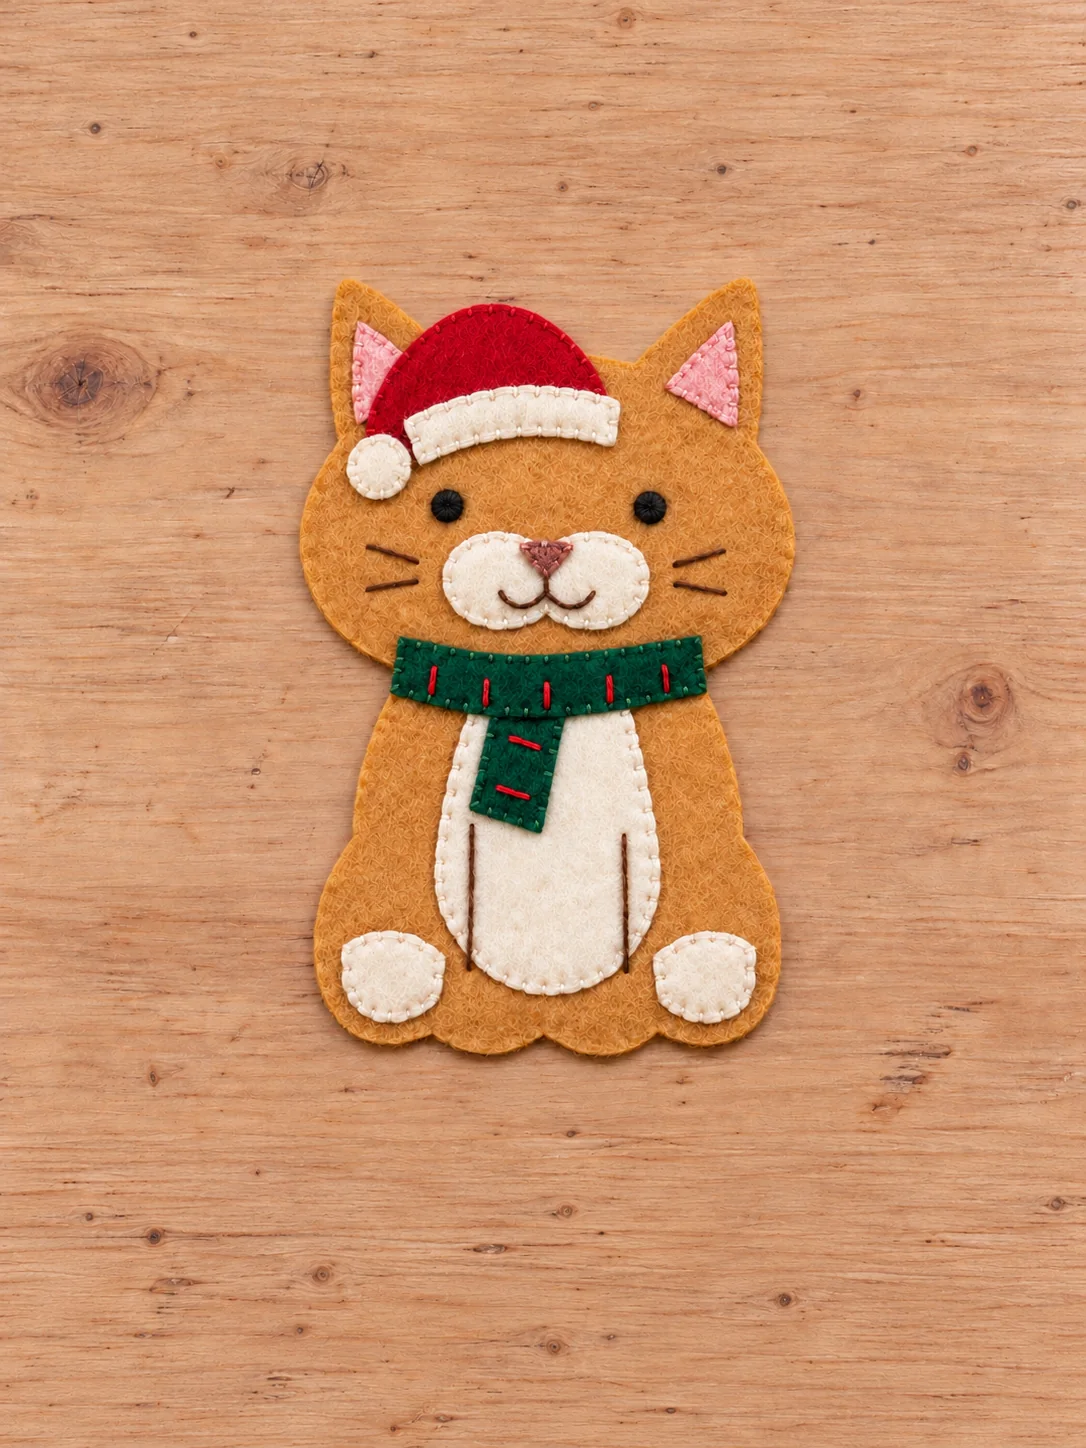
Keep the step photos nearby as you work. They show where the pieces sit on the front body. You will add the belly, muzzle, inner ears, paws, and nose before you close the outside seam.
2. Sew the first felt layers
Choose one A piece as the front of your cat and leave the other for the back. Place ivory belly B, ivory muzzle C, pink inner ears D and E, and ivory paws F and G on the front. Compare their positions with the step photo below, then pin or clip them gently so they do not shift.
Use a small whipstitch with matching thread around each shape. Hide the knot behind the front body. Bring your needle up about 1–1.5 mm inside the appliqué edge, take it down through the tan felt just beyond that edge, and move forward roughly 2–3 mm before repeating. Keep the thread snug enough to hold the pieces, but loose enough that the felt stays flat.
3. Embroider the cat’s face
Mark two eye circles about 6 mm across, matching the face photo below. Fill them with close black satin stitches. Add pink nose H above the center of the muzzle, then backstitch a short line down from the nose and sew the two curved smile lines.
For the whiskers, make two on each cheek with brown floss. Add the two leg lines over the lower body and belly. If backstitch is new to you, bring the needle up one stitch ahead, go back into the end of the previous stitch, and come up one stitch farther along. Tiny 1–2 mm stitches help the smile keep its soft shape. Tuck all thread ends into the hidden side of the front.
4. Add the Santa hat and scarf
Position red hat I over the left side of the forehead and ear area. Stitch it in place, then add ivory brim J along its lower edge. The little ivory bobble K goes over the drooping tip of the hat. It is a flat felt piece, so it stays secure and will not fall off like a separate pom-pom.
Next, attach green scarf tail L to the chest. Place green band M across the neck so its lower edge hides the top of the tail. Finish with short red straight stitches, around 4–5 mm long. I love how these few small red stitches make the scarf look festive without adding bulk. Your front piece should still be flat when this stage is complete.
5. Make the tail and hanging loop
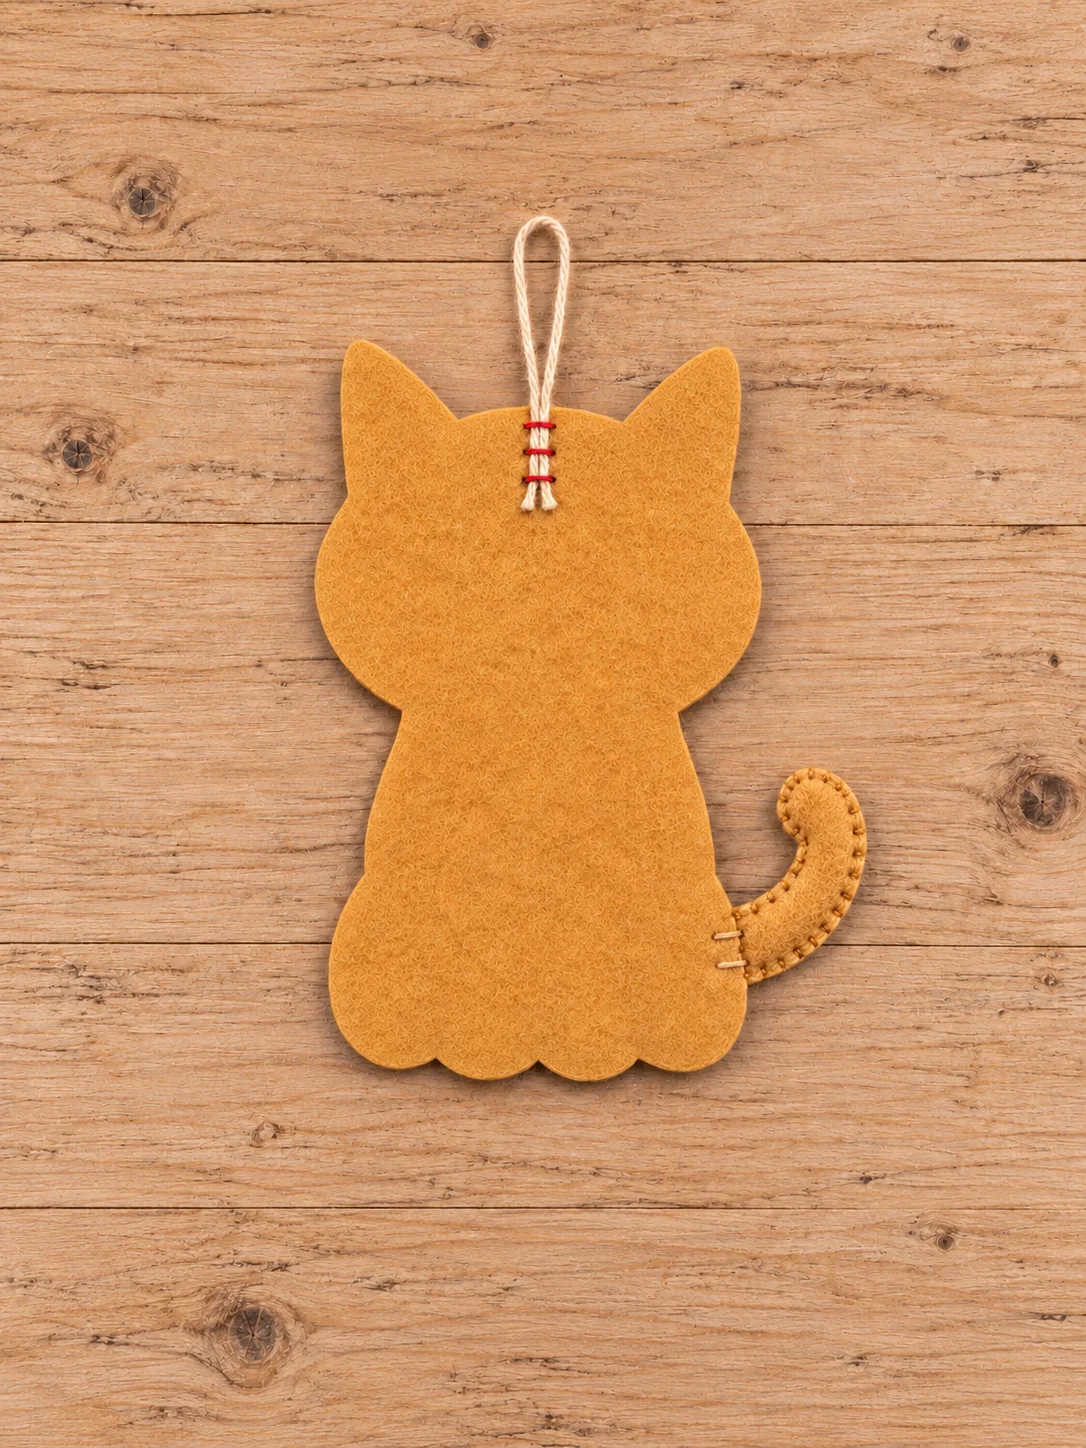
Place the two tan N tail pieces wrong sides together. Sew around them with a blanket stitch using two strands of tan thread. Leave the short root edge open because it will sit inside the body. Keep the tail flat and do not put stuffing inside it.
Lay the tail behind the front A piece so it curls to the right when you look at the cat from the front. Baste its root to the wrong side of the front with small hidden stitches. Fold the 22 cm cord in half to make a loop, place both cord ends 15 mm inside the top of the head between the ears, and tack them firmly to the wrong side. Give both joins a few extra stitches because they will carry the ornament’s weight.
6. Join the body and choose your finish
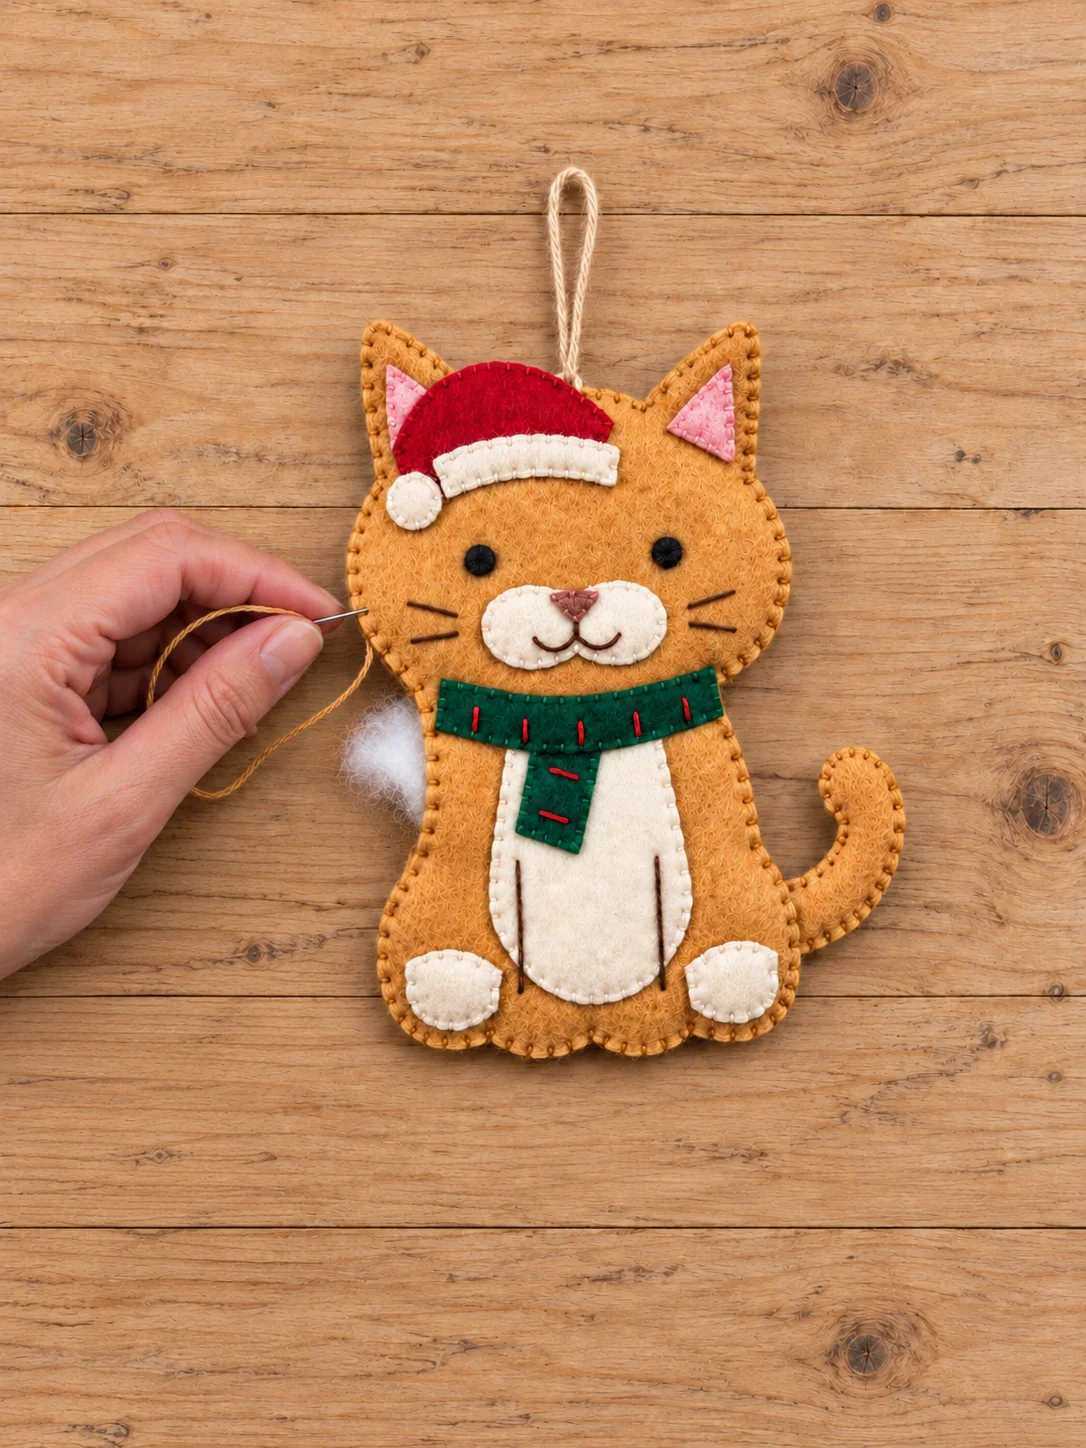
Match the front and back A pieces with their wrong sides together. Blanket stitch around the outside, placing the stitches about 2 mm from the edge and about 3 mm apart. Pass the needle through both felt layers and through the thread loop before pulling it snug. Shorter stitches make the small curves around the ears and feet easier to follow.
As you sew, catch the tail root and both cord ends securely in the seam. Leave an opening about 25 mm long on the left side. For a flat ornament, simply sew that gap closed. For a lightly stuffed version, add tiny wisps of filling to the ears, head, and body, then close the gap. Aim for a thickness of roughly 5–8 mm. Too much filling can distort the face, so I add a little at a time and smooth it with my fingers.
7. Check the finished ornament
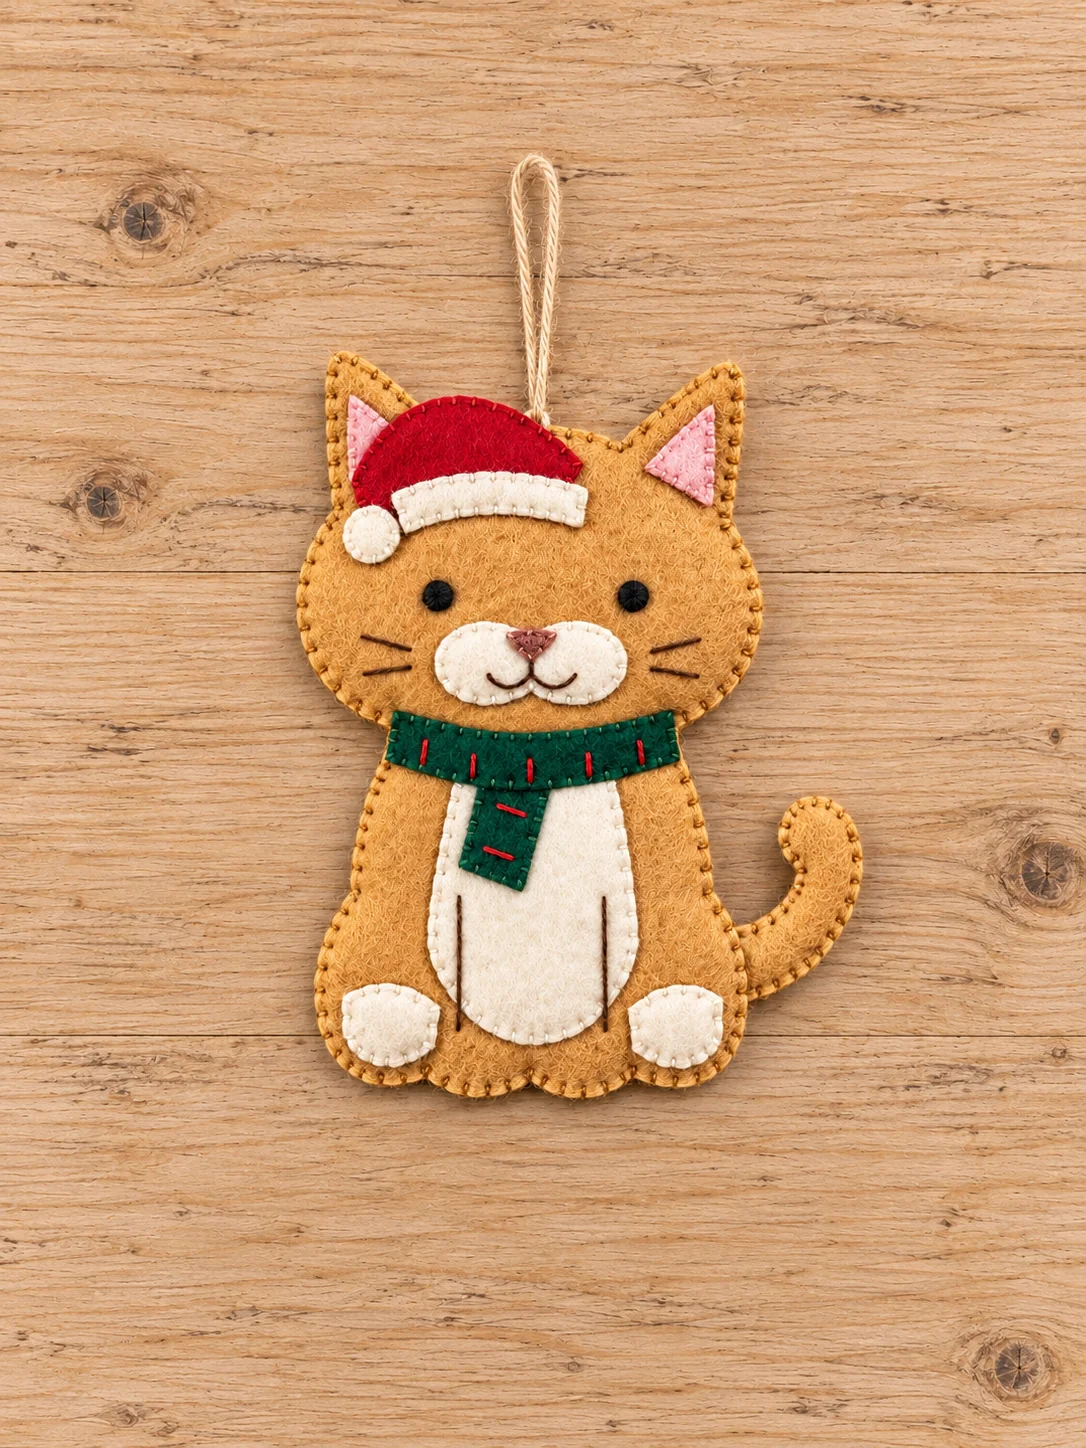
Hide the final knot between the layers and bury the thread end before trimming it. Remove any visible fabric marker. Look over the small appliqué edges to make sure they are secure, and check that no filling peeks through the outside seam. Give the hanging loop and tail a gentle tug to test the joins.
Now your Christmas cat is ready for the tree, a gift tag, or a handmade holiday display. The finished ornament is small enough to make from modest felt scraps, and the flat version is especially easy to mail with a card.
My Tips for a Neat Little Cat
Cut the small pink and ivory pieces slowly with sharp scissors. Clean edges are easier to stitch and make the face look tidy. Lay every piece in place before sewing, especially the hat and scarf, because a tiny shift is much easier to fix while the pieces are still loose.
Use thread close to the felt color for appliqué and the outside blanket stitch. Keep your stitch spacing steady, but do not worry if it is not machine-perfect. The charm of a hand-sewn ornament is seeing the little stitches. Work on the front in good light so you can keep the face even, then turn it over and hide the knots before you join the body.
If you are making several ornaments, cut all the A bases first and group each cat’s smaller pieces in a little tray or envelope. I would finish one face completely before moving to the next so the eyes, whiskers, and smile stay consistent. The step photos are handy when you return to the project after a break.
Care and Storage
Spot clean the cat with a barely damp cloth and let it dry flat. Do not soak it or put it in the washing machine. At the end of the season, store it where the ears will not bend and the tail will not be crushed. This is a decoration, so keep it away from babies and pets.
The step images are AI-made illustrations. Use the full-size PDF cutting templates for the exact cut shapes and the photos as a placement guide.
Frequently Asked Questions
Do I need a sewing machine for this felt ornament?
No. The cat is made by hand with small whipstitches, backstitches, satin stitches, and a blanket stitch around the outside. A needle, thread, felt, and scissors are enough for the sewing.
Can I make the Christmas cat without stuffing?
Yes. The PDF is designed for a flat or lightly stuffed finish. Leave the filling out and close the 25 mm opening to make a flat ornament that stores easily.
What size should I print the templates?
Print all three template pages on A4 at 100% or Actual Size. Turn off “Fit to Page” and check that the printed test square measures 20 × 20 mm. Do not add seam allowance to the solid cutting lines.
How do I stop the hanging loop from coming loose?
Put both ends of the folded 22 cm cord about 15 mm inside the top of the head and tack them to the wrong side. Catch the ends again as you blanket stitch the two body pieces together, then test the loop with a gentle tug.

Leave a Comment