



A little felt stocking is one of those Christmas projects I can happily make in an afternoon. The red felt, soft ivory trim, and tiny holly berries feel festive without needing many supplies.
This hand-sewn ornament is small enough for a tree branch, a gift tag, or a holiday garland. I love the visible stitches because they give it that warm, homemade look.
Below, I’ll show you how to cut and sew the pieces. There’s also a free two-page PDF with only the full-size cutting templates, so you can print it and get straight to the felt.
What Is This Felt Stocking Ornament?
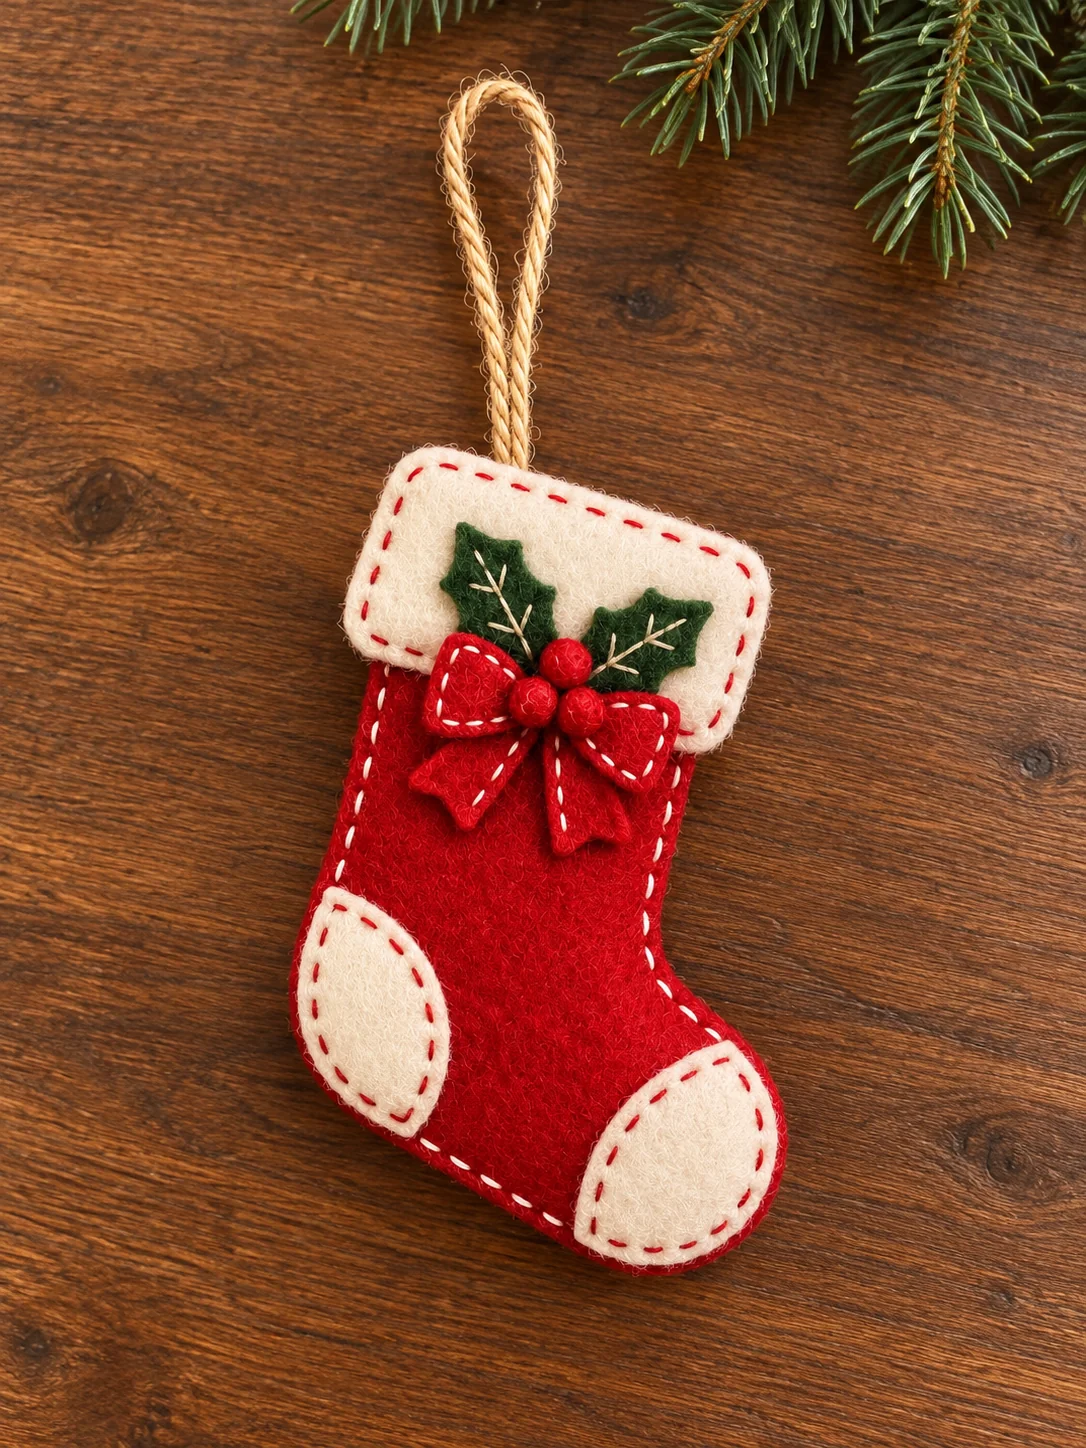
It is a miniature red felt Christmas stocking with an ivory cuff, heel, and toe. Two green holly leaves, three red berries, and a little red bow sit across the front of the cuff. A loop of natural twine lets you hang it on the Christmas tree. The look is based on the reference design, with the colors and handmade details kept together throughout the photos.
The finished stocking is about 13 cm tall and around 8 cm wide, without the loop. This is a decoration rather than a usable stocking pocket. You may leave it flat or add just a little filling for a soft shape. A confident beginner who is comfortable with a running stitch and blanket stitch can make one in a relaxed afternoon.
Free Printable Felt Stocking Templates
Download the Christmas Stocking Felt Ornament Cutting Templates (PDF). The two A4 pages contain only the pieces to cut: the red stocking front and back, ivory cuff, heel and toe patches, holly leaves, bow, and three berries. The natural twine loop and two short bow tails are measured in the instructions because they are simple straight cuts.
Print both pages at 100% or Actual Size. Turn off “Fit to Page” or “Scale to Fit.” Measure the 20 × 20 mm square on each page before cutting your felt. If the square is too small or too large, adjust your printer settings and print again. The solid outlines are the cutting lines; no extra seam allowance is needed.
Materials and Tools
- Red craft or wool felt, about one A4 sheet for the front, back, bow, bow tails, and berries
- Ivory felt, about 12 × 15 cm for two cuff pieces, two toe patches, and two heel patches
- Dark green felt scraps for two holly leaves
- Matching red and ivory thread or embroidery floss, plus pale thread for the leaf veins
- 22 cm of thin natural cotton twine for the hanging loop
- A hand-sewing needle, sharp scissors for fabric, paper scissors, and pins or clips
- A removable fabric marker and a ruler
- A small pinch of polyester filling if you would like a lightly padded ornament
Felt around 1–1.5 mm thick is easy to handle for this small project. If you use thicker felt, test the needle and thread on a scrap first. I like to set the red and ivory pieces beside each other before I begin, because the little patches are easier to place when I can see the whole stocking.
How to Make a Christmas Stocking Felt Ornament
1. Print the pattern and cut the felt
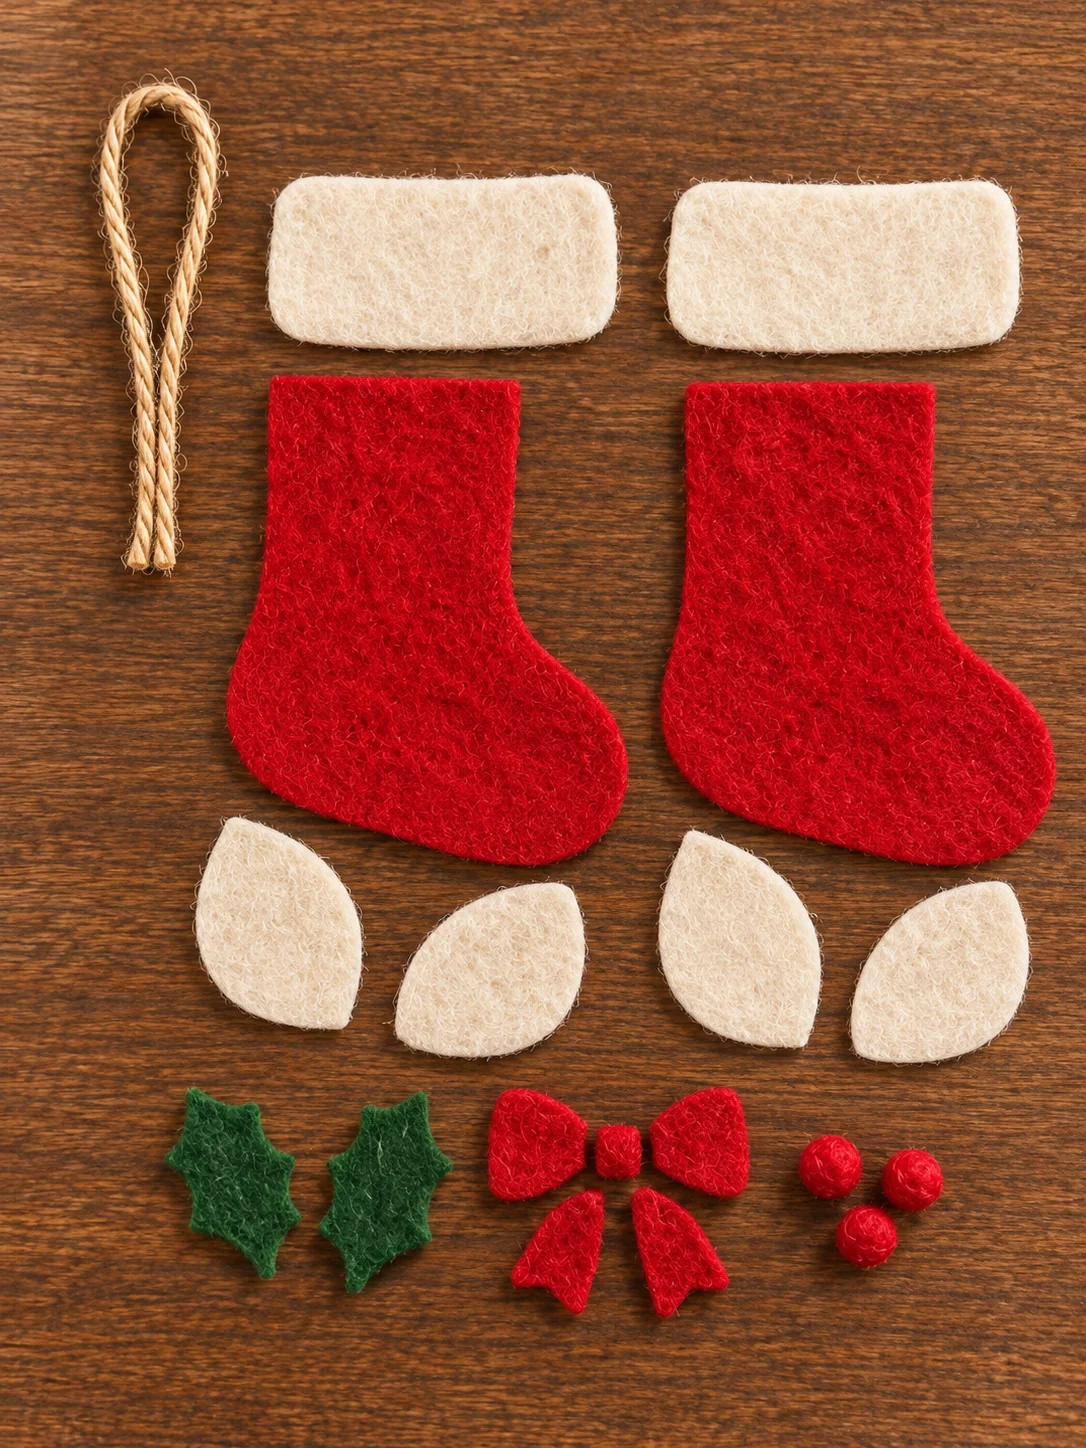
Cut one stocking front A and one stocking back B from red felt. If your felt has a clear right side, flip the back paper template over so both good sides face out after sewing. Cut two ivory cuff pieces C, two ivory toe patches D, and two ivory heel patches E. The extra patches let you finish both sides of the ornament neatly.
Cut two dark green holly leaves F, two red bow pieces G, and three small red berry circles H. Cut two short red strips about 6 × 18 mm for the bow tails. Finally, cut 22 cm of twine and fold it in half. Lay everything on the wood table or a plain piece of fabric and check that you have each pair before threading your needle.
2. Stitch on the heel and toe patches
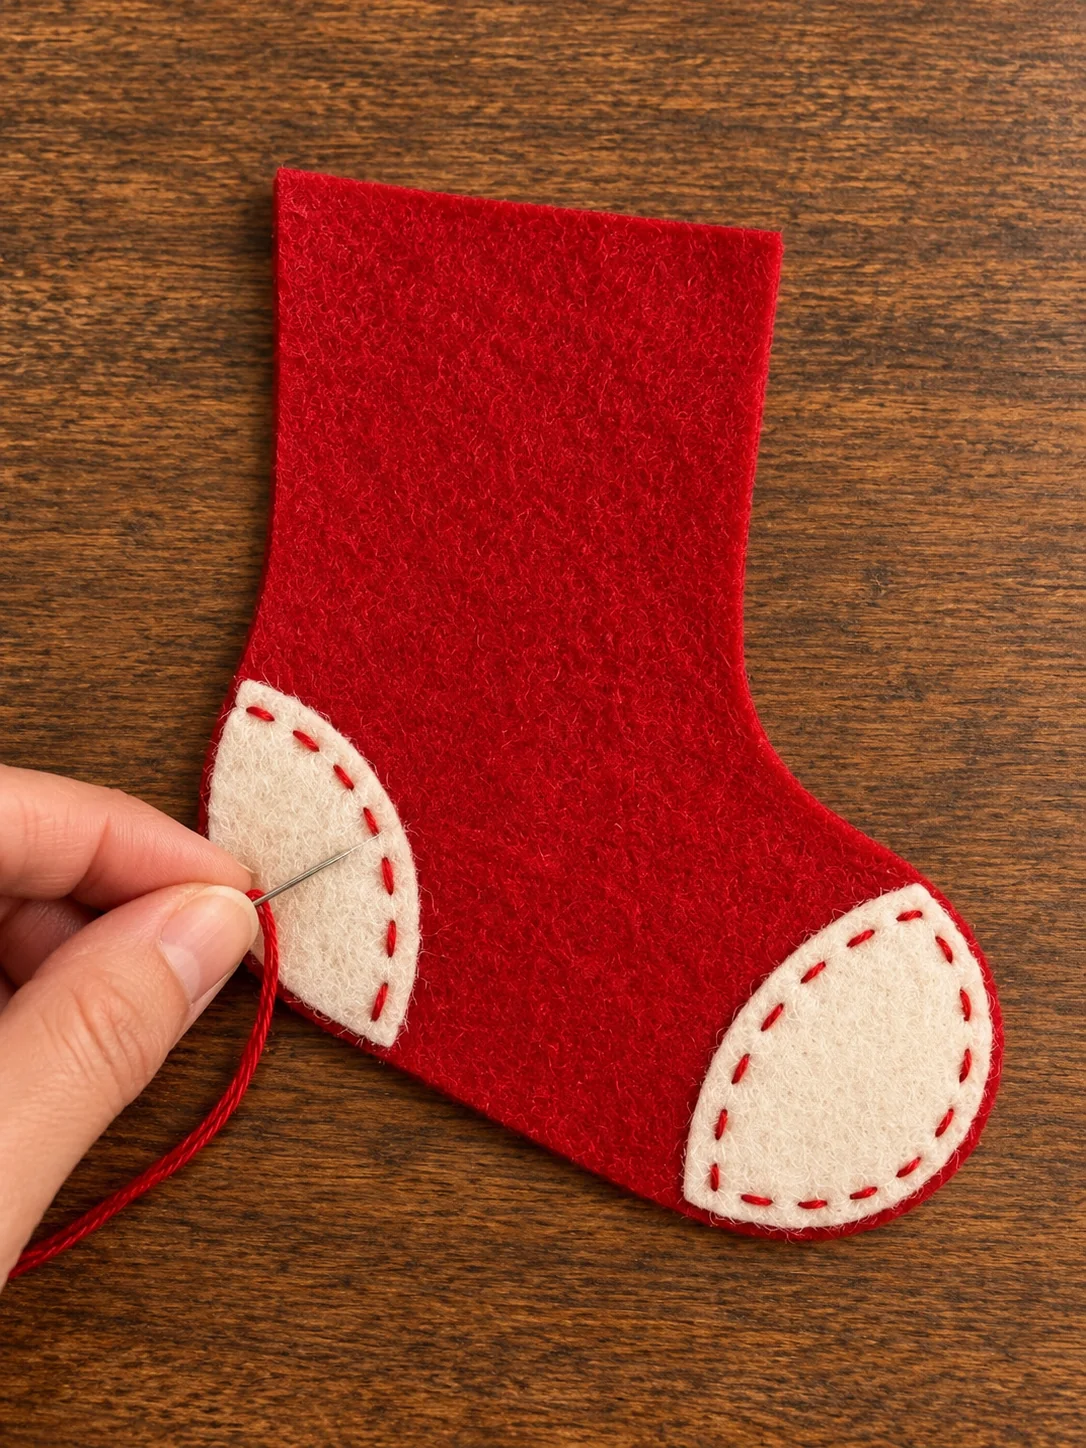
Choose which red stocking will be the front. Place an ivory heel patch on the lower side of the leg and an ivory toe patch at the rounded end of the foot. Check the reference photo for their positions before you sew. Pin each piece gently, then use small red running stitches a little inside the ivory edge.
Repeat on the back piece with the remaining two patches. The two sides do not need to be perfectly identical, but keep the patches in the same general places. Take care not to pull the thread tightly enough to wrinkle the felt. Short, even stitches are lovely here, and the red thread makes them part of the decoration.
3. Prepare the holly and little bow
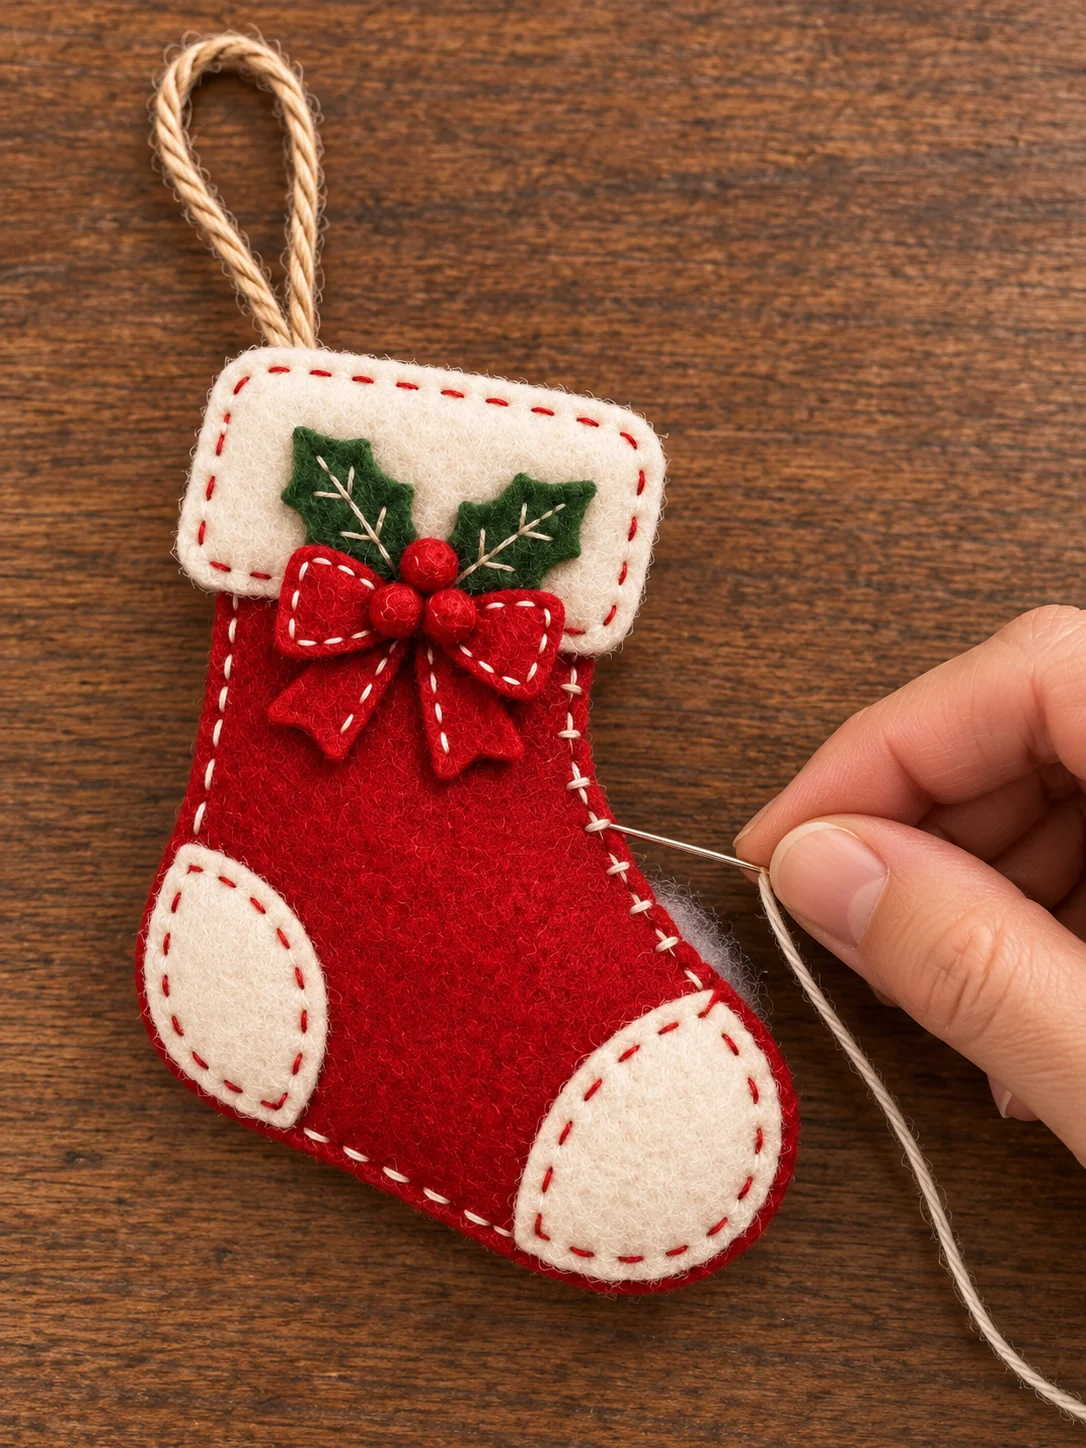
Use pale embroidery thread to sew a simple center vein and a few short side veins on each green holly leaf. The stitches do not have to match from leaf to leaf. Angle the two leaves slightly outward so their tips peek above the bow, and tack them to the front ivory cuff piece.
Stack the two red bow pieces and sew around their edges with small ivory running stitches. Add the two short red tails behind the center. Pinch the middle and wrap it securely with a few red thread stitches. Gather the three tiny red felt circles at their edges if you want rounded berries, or keep them flat for easier sewing. Sew the berries over the bow center.
Try the bow and berries on the cuff before attaching them. Keep the three berries close together and let both holly leaves remain visible behind them. That small layer of green makes the red bow stand out against the soft ivory felt.
4. Sew the ivory cuffs in place
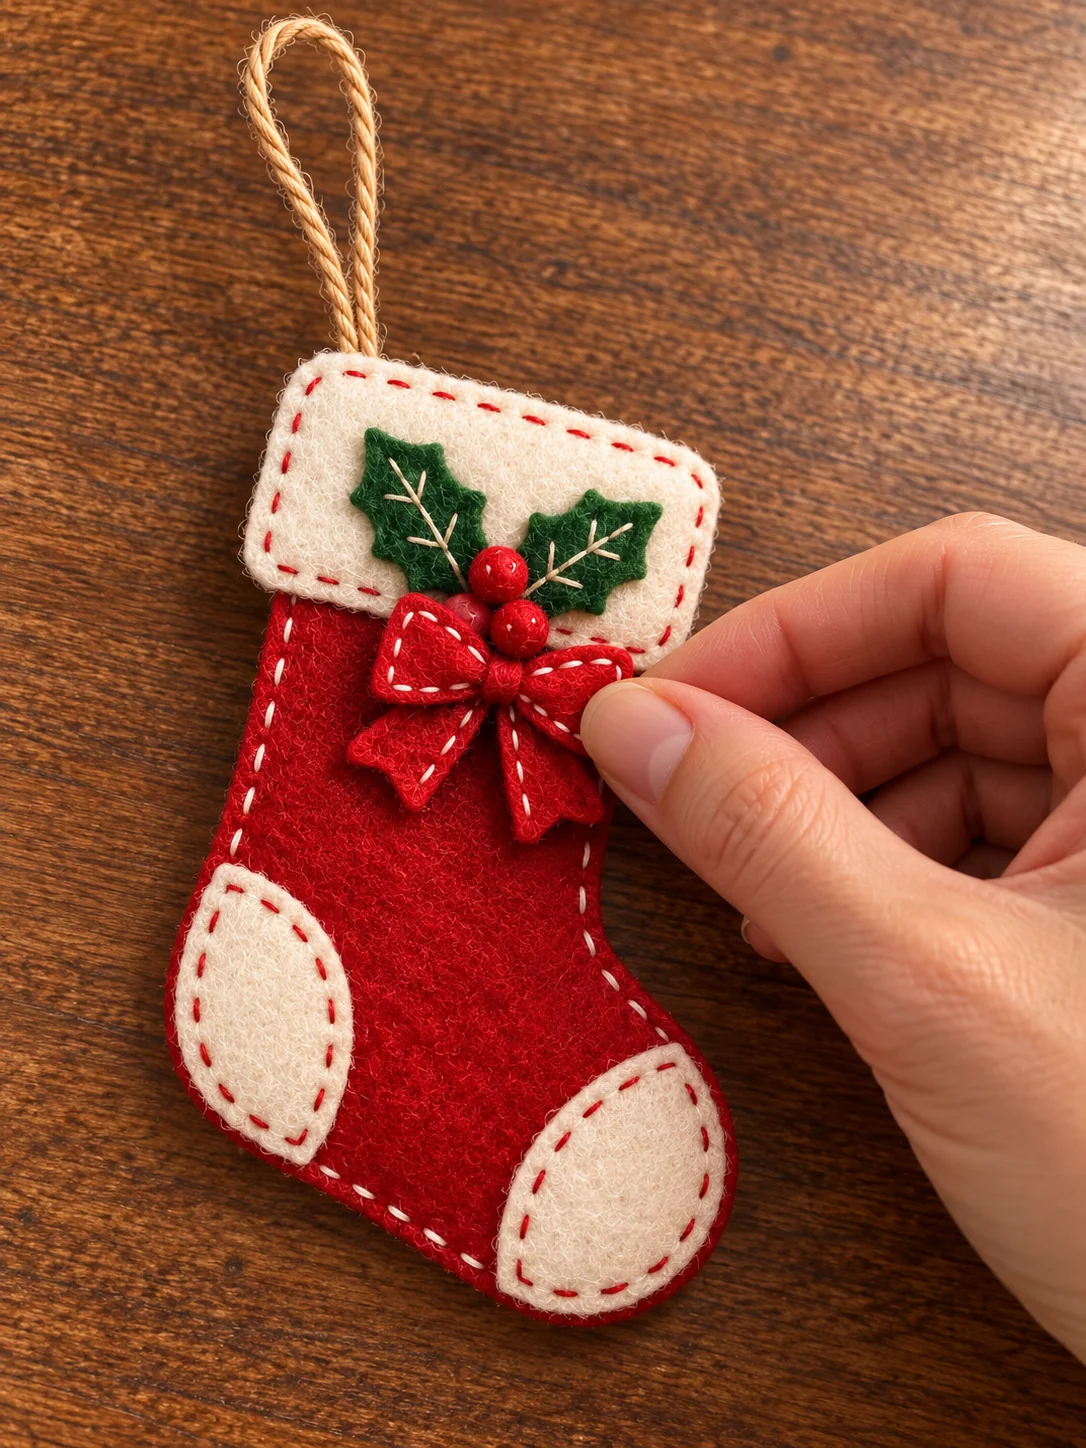
Place the decorated ivory cuff across the top of the stocking front. Let it overlap the red felt slightly, then stitch around the cuff with red running stitches. Follow the gently curved corners rather than trying to force them into a straight line. Attach the second plain ivory cuff to the red back in the same way.
Fold the 22 cm twine in half. Place both ends behind the upper back of the stocking, between the red felt and the cuff, with around 15 mm of twine tucked inside. Stitch the ends down firmly before closing the stocking. Give the loop a gentle pull now; it is much easier to add another securing stitch while the back is still open.
5. Join the front and back
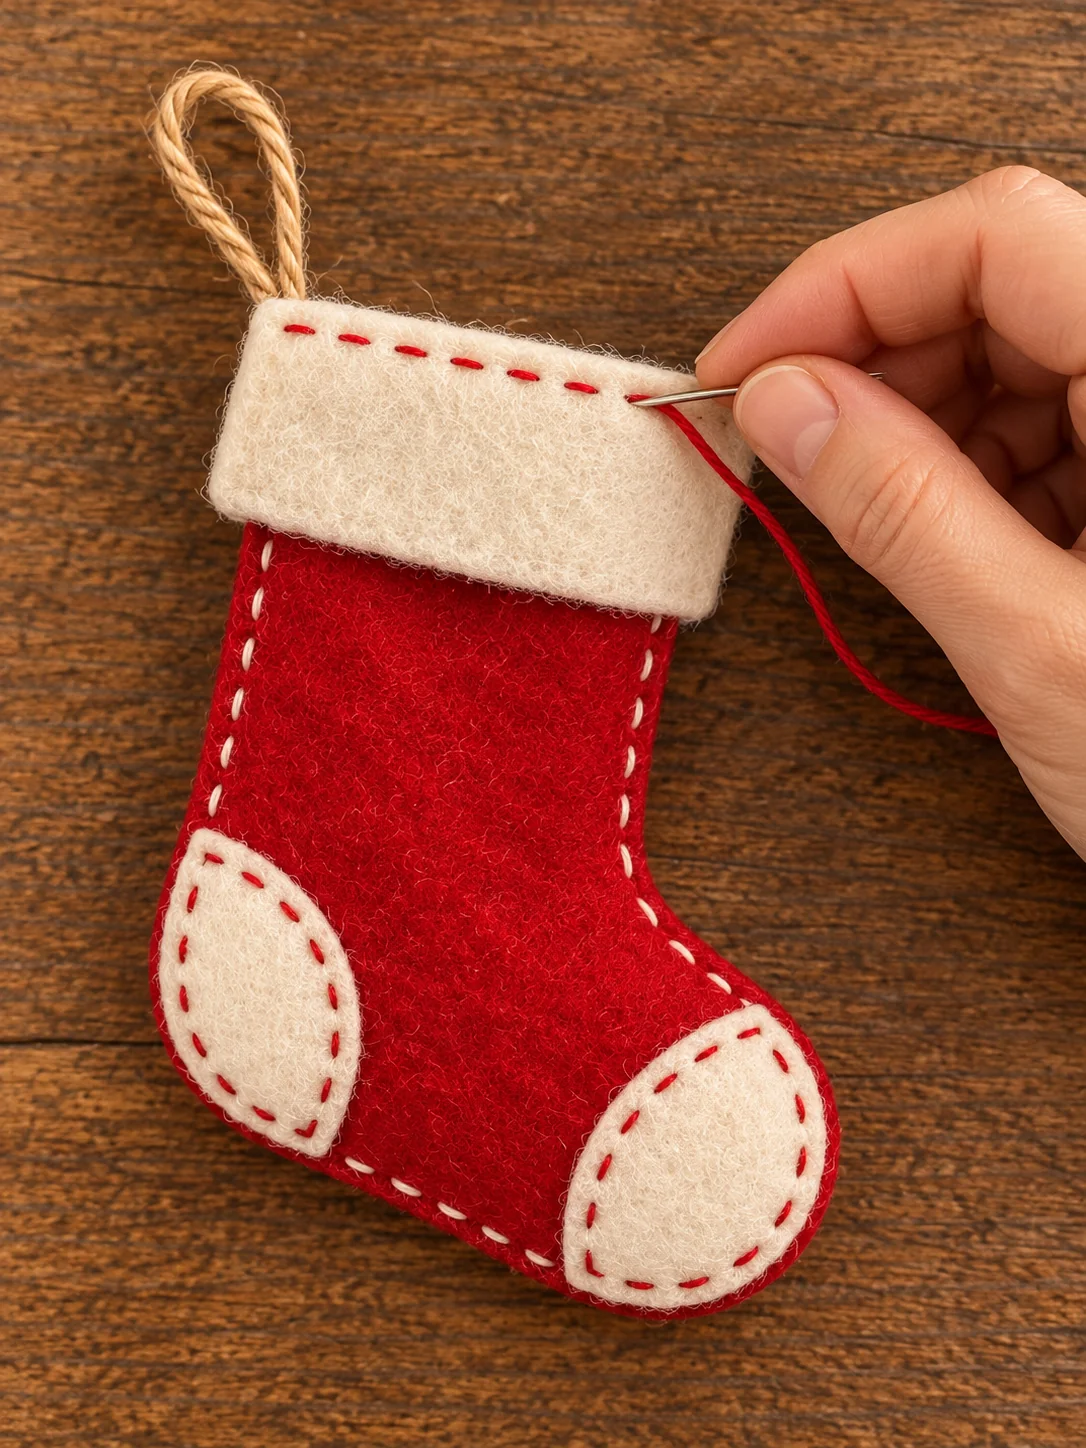
Lay the two stocking pieces together with their wrong sides facing inward. Match the top corners, heel, and toe. Use ivory thread to blanket stitch around the outside about 3 mm from the cut edge. Work slowly around the rounded toe and heel so the stitches stay close together and the two layers do not slide.
Leave an opening about 2–3 cm long along a straight side if you want to add filling. Use only a few tiny wisps, spreading them into the leg and foot with your fingers. A softly padded ornament should still look flat enough to hang comfortably. You can skip filling and sew the whole seam closed for a flatter finish.
Close the remaining gap with the same blanket stitch. Hide the final knot between the two felt layers and bury the loose thread end before trimming it. Check the twine loop again and make sure the red bow and berries feel secure.
6. Hang your stocking on the Christmas tree
Smooth the stocking gently between your fingers and trim any stray felt fibers or thread ends. Hang it from a branch strong enough to support the little ornament without bending. Warm white tree lights look especially pretty behind the red felt, and the ivory patches make the stocking easy to spot among the green needles.
You can also tie it to a wrapped gift or string several stockings along a garland. If you are making a set, cut all the felt pieces first and decorate one cuff at a time. I would make a red and ivory version first, then play with the bow color once the original design feels familiar.
Tips for a Neat Handmade Finish
Use fabric scissors only for felt so the blades stay sharp. When cutting the tiny berries or holly points, turn the felt in your hand instead of making lots of small snips with the scissors. That helps the edges stay smooth. Keep the cut pieces together in a small dish so nothing disappears under your work.
Test one blanket stitch on a scrap if you have not used it recently. Come up through both layers, pass the needle through the thread loop, and pull gently so the loop rests along the edge. Even spacing looks tidy, but a little variation gives the ornament its handmade character.
If you want the twine loop to sit straight, place its two ends close together at the top before securing them. Keep the bow and berries light rather than adding heavy beads. The ornament will hang better, and felt berries match the soft texture of the cuff.
Care and Storage
Spot clean with a barely damp cloth and let the felt dry flat. Do not soak it or machine wash it. When Christmas is over, store the stocking in a box where the bow and holly leaves will not be pressed under heavier decorations. This is a decorative ornament; keep it away from babies and pets.
The step photos are AI-made visual guides based on the supplied design. Use the measured PDF outlines for cutting, and compare the front details with the finished photo above while you sew.
Frequently Asked Questions
Can I make this felt stocking without a sewing machine?
Yes. You can sew every part by hand. Small running stitches hold the ivory patches and decorations, and a blanket stitch joins the stocking front and back.
Does the PDF include the sewing instructions?
The two-page PDF has only the full-size cutting templates. Follow the steps in this article for the order of sewing. Print the PDF on A4 at 100% and check its 20 × 20 mm square before cutting.
Should I add stuffing to the stocking?
That is up to you. A few wisps of filling give it a soft look. For a slim ornament that packs flat, skip the filling and close the seam without leaving a gap.
Can I use a ribbon instead of twine for the loop?
Yes. Choose a narrow ribbon that can be folded and stitched securely between the back stocking and cuff. Test the loop with a gentle tug before hanging the ornament.

Leave a Comment