


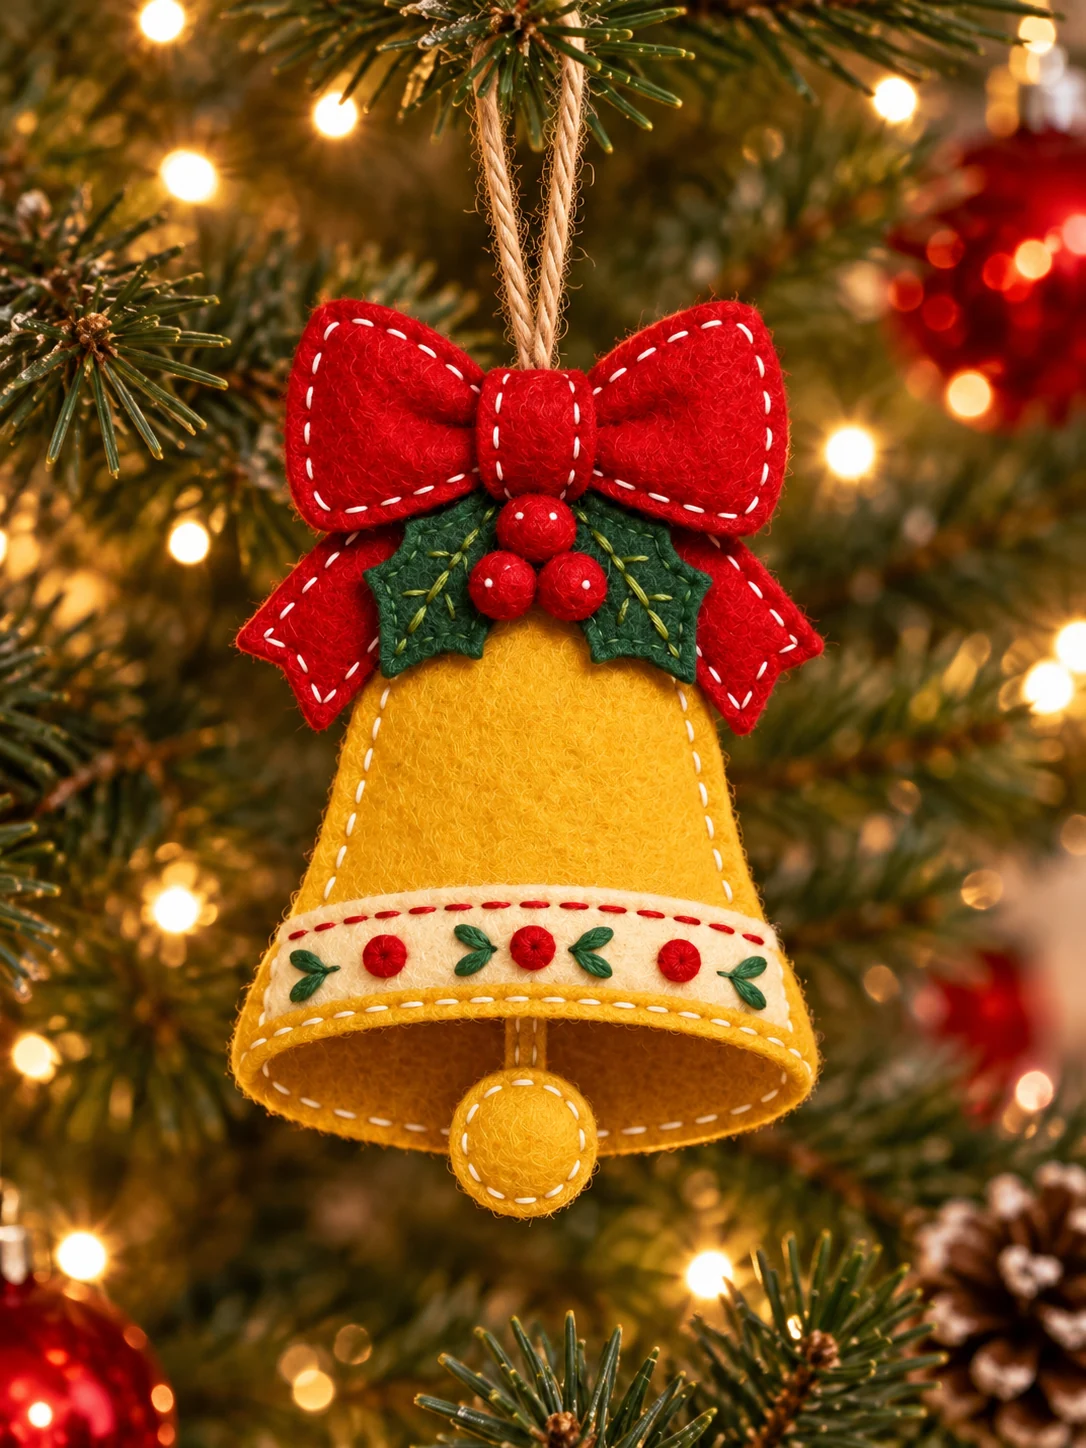
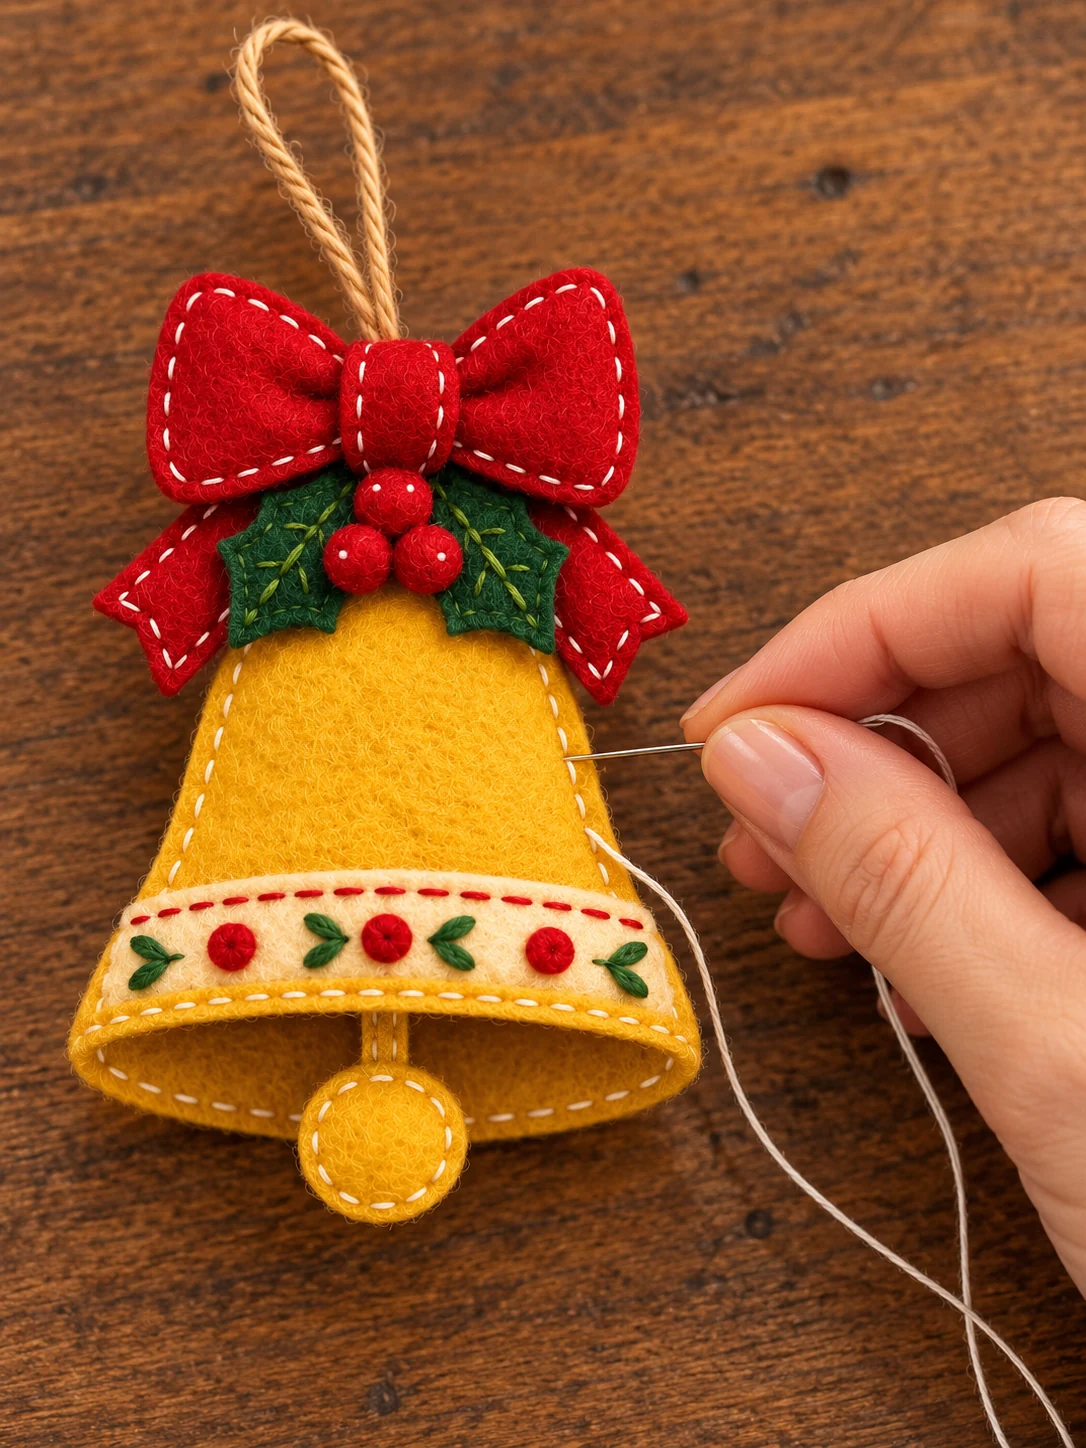
A little golden felt bell feels right at home among the lights on a Christmas tree. I love the red bow, the small holly leaves, and the soft ivory band that gives this ornament its cheerful holiday look.
This is a hand-sewing project you can take slowly at the table with a cup of tea. The stitches are meant to show, so you do not need to hide every tiny line of thread.
I have put the full-size cutting outlines in a free two-page PDF below. The photos show the finished look and the main stages, while the printable sheets contain the pieces you can actually cut from felt.
What Is This Christmas Bell Felt Ornament?
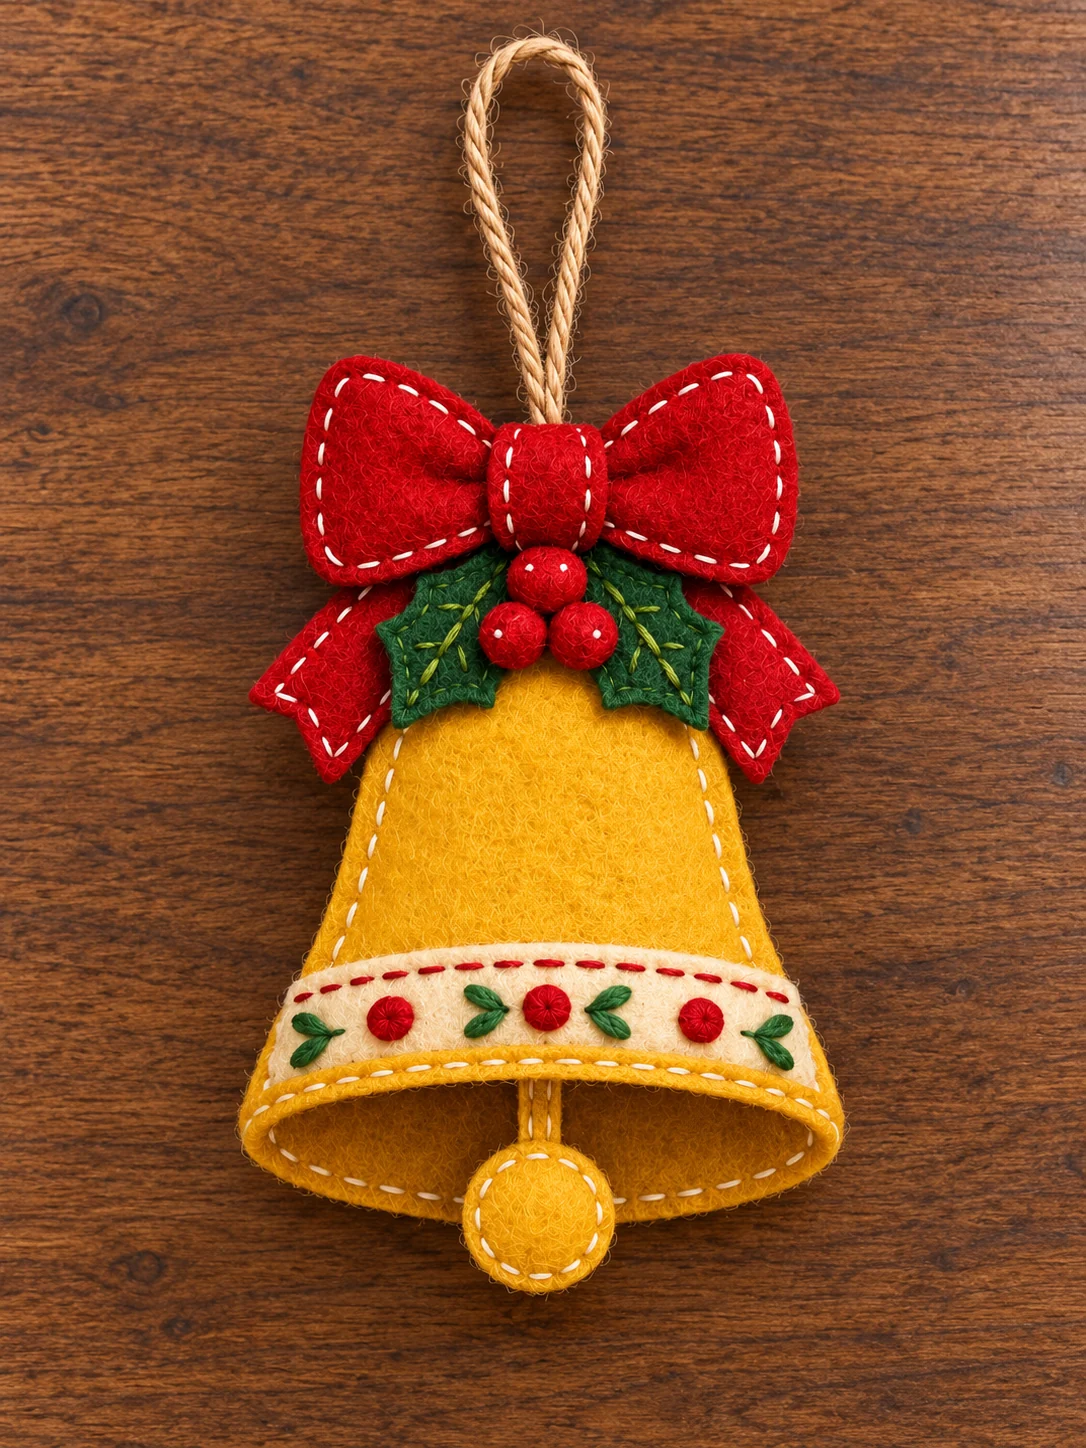
The ornament has a gold felt bell body, an ivory strip at the lower edge, a red felt bow, two dark green holly leaves, and three small red berries. A folded piece of natural twine forms the hanging loop. A small gold clapper hangs below the bottom edge. The reference has a softly open bell mouth; the cut pattern makes a lightweight sewn felt version with a rounded lip.
The bell itself is about 10 cm wide and 10 cm tall when printed at its intended size. The bow adds a little width at the top, and the twine adds height. It is suitable for a tree, a festive gift, or a simple handmade garland. These generated photos are visual guides to the colors and placement; use the printable lines and the measurements below when cutting.
Free Printable Bell Ornament Cutting Templates
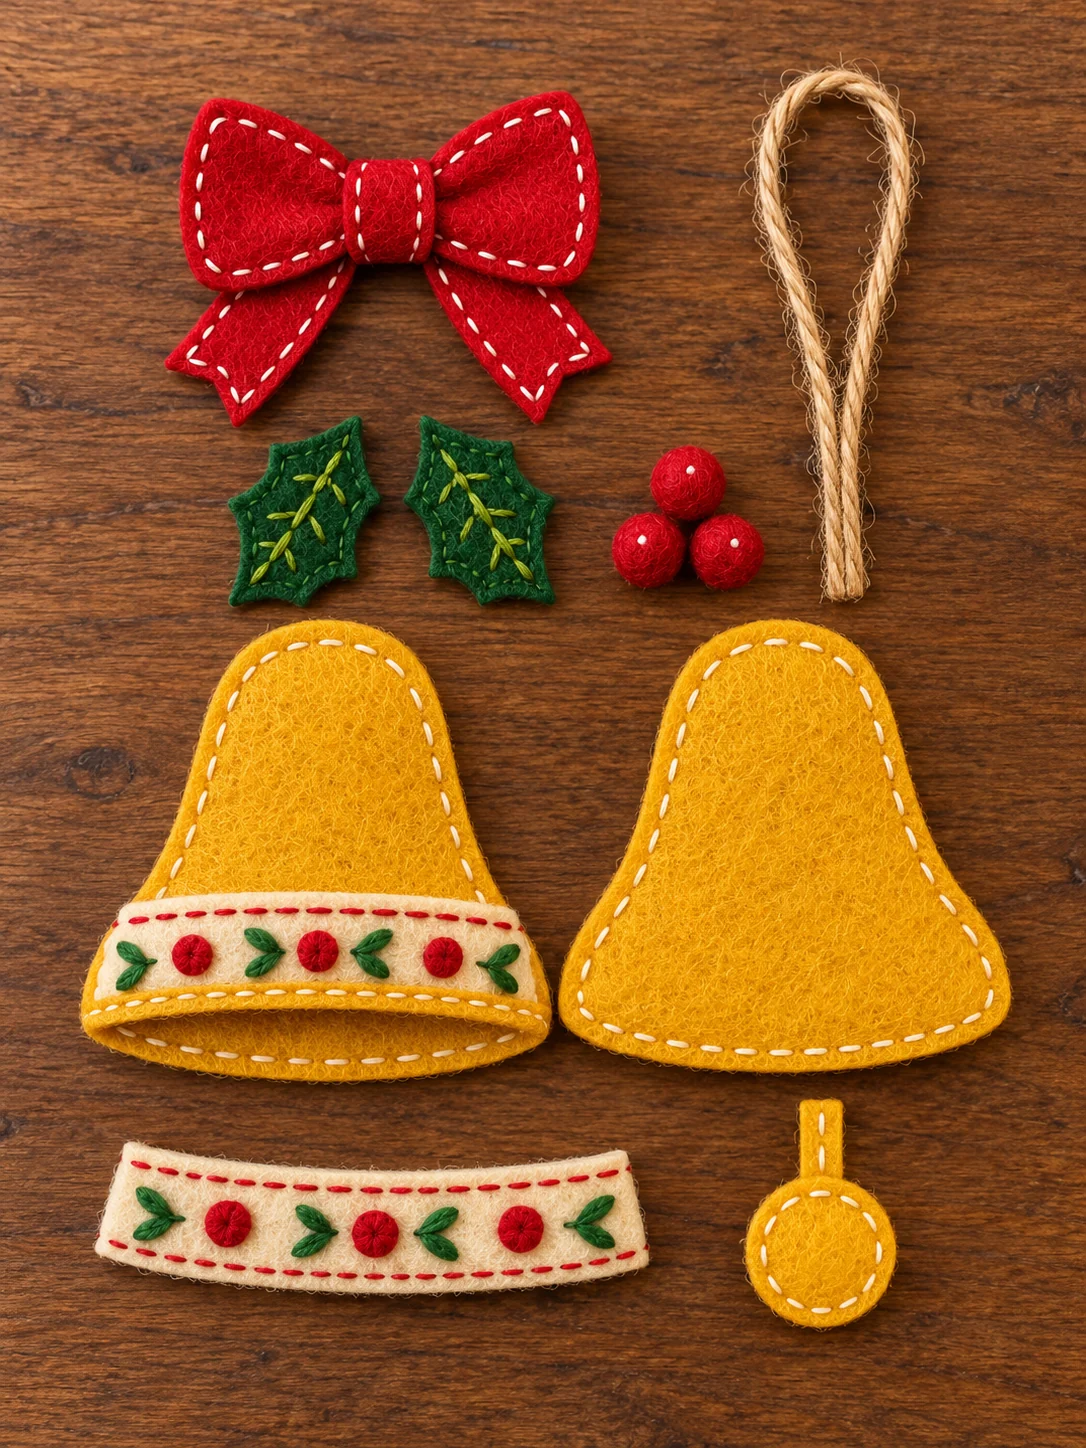
Download the Christmas Bell Felt Ornament Cutting Templates PDF. Page one has the matching gold bell front and back. Page two has two ivory trim bands, one red bow, two green holly leaves, three berries, two gold clapper discs, and one narrow clapper connector. The twine loop is measured rather than drawn, so you can cut it straight from your spool.
Print the A4 PDF at 100% or Actual Size. Turn off “Fit to Page.” Measure the outlined 20 × 20 mm square on each sheet with a ruler. Only cut after both squares measure 20 mm. The solid outer outlines are cutting lines. Keep the bell front and back aligned as you sew, and do not add seam allowance to the printed shapes.
What You Will Need
- Gold or mustard yellow felt for two bell bodies, two clapper discs, and a narrow connector
- Ivory felt for two narrow bands at the bottom of the bell
- Red felt for the bow and three berry circles
- Dark green felt for two holly leaves
- Natural twine, 22 cm long, for the hanging loop
- Ivory, red, green, and gold thread or embroidery floss
- Hand-sewing needle, fabric scissors, paper scissors, pins or small sewing clips
- Removable fabric marker, ruler, and a very small amount of stuffing if you prefer a soft bell
Felt around 1 to 1.5 mm thick is pleasant to sew by hand. Choose a little stiffer felt for the bow if you want the wings to hold their shape. A fine needle helps with the small berry circles. Keep your paper pattern and fabric scissors separate so the fabric scissors stay sharp.
How to Sew a Christmas Bell Felt Ornament
1. Print and cut all the pieces
Cut one bell front and one bell back from gold felt. The shapes are the same size, so put them together with their edges touching before you sew anything. Cut two ivory bands from the second page. Cut one red bow, two green holly leaves, and three red berry circles. Cut two gold clapper discs and one narrow gold connector strip. Finally, cut 22 cm of twine and fold it in half to make the hanging loop.
Arrange every piece on your table and check the count against the PDF. It is much easier to notice a missing clapper disc now than after the bow is stitched on. If your felt has a different texture on each side, choose which face will show on the front and back. Trace the pattern with a removable marker and cut just outside the drawn mark so the marker does not show.
2. Add the ivory band to the bell front
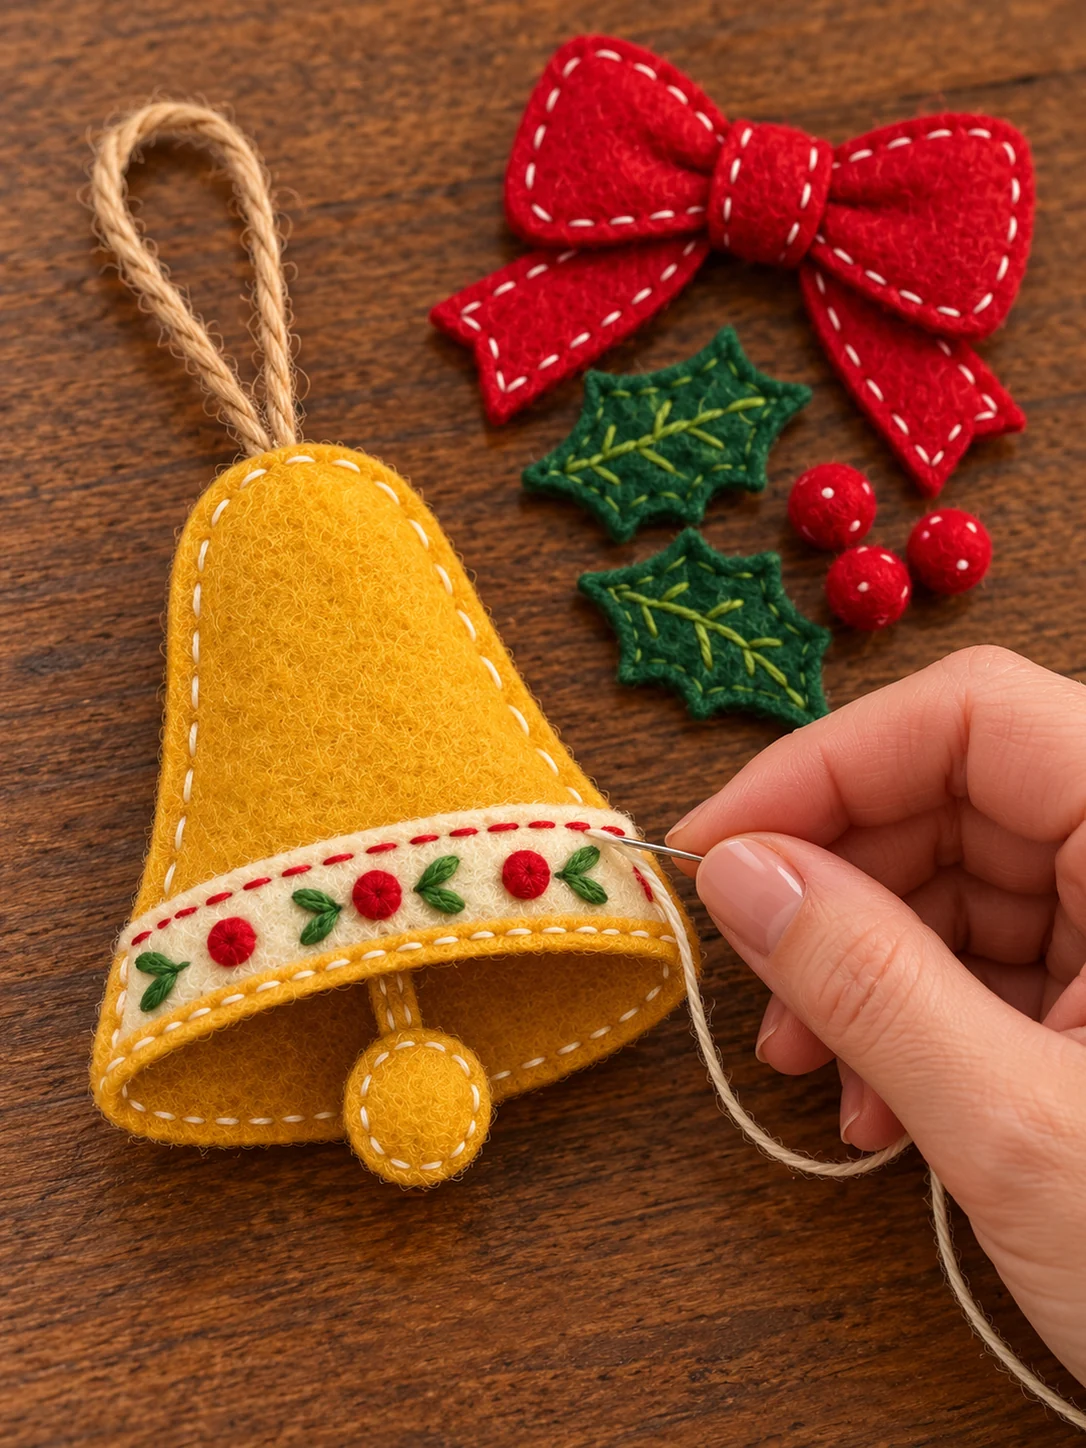
Lay one ivory band across the lower part of the front bell. It should follow the wide edge without sticking far beyond either side. Pin it in place and work small red running stitches near the upper edge, then ivory or gold stitches near the lower edge. Keep the band smooth while you sew. The second ivory band belongs on the back bell, so the ornament looks tidy from both sides.
You can embroider a simple row of red dots and small green leaf shapes along the front band, as seen in the photo. Mark the dots lightly first so they are spaced evenly. If embroidery is new to you, small straight stitches form the green leaves and a few short satin stitches make the red dots. This decoration is optional; it is not another cut piece on the PDF.
3. Sew the holly leaves and berries
Use a few green stitches to add a center vein and small side veins to each holly leaf. Set the leaves just below the bow area, one leaning left and one leaning right. Sew them to the bell front with a few small stitches at their bases. The pointed leaf tips should remain visible when the bow is added.
Place the three red berry circles close together between the leaves. You can keep them flat and sew around their edges, or put a tiny pinch of filling underneath each circle for a raised look. Work slowly because the circles are small. If you find them fiddly, use embroidered red circles instead; the printable berries still show you where the three accents belong.
4. Shape the red bow
The PDF provides one red bow silhouette with two wings and two tails. Fold the middle inward gently, pinch the center, and secure it with several stitches. Small ivory running stitches near the wing edges create the handmade finish shown in the photo. Do not pull them so tight that the felt gathers into a ball. Sew the center securely over the holly stems and berries, leaving the leaves visible beneath.
Check the arrangement before making the final knot. The bow should be centered above the golden bell, with the tails falling toward each side. If the felt bow is too floppy, add a second small felt scrap behind the center or use slightly firmer felt next time. You do not need glue; a few neat stitches will hold this lightweight decoration.
5. Make the clapper and hanging loop
Place the bottom of the narrow gold connector between the two gold clapper discs and stitch around the disc edges, leaving the upper part of the strip free. The finished clapper should swing below the bottom center of the bell. Tack the upper end of the connector to the inside lower edge of the bell back. Check its length before attaching the front so that the round disc is fully visible.
Fold the 22 cm twine in half and make a loop above the crown of the bell. Put the two loose ends between the front and back felt pieces at the top. Tack the ends firmly to the inside of the back with several stitches. Give the loop a gentle pull. It should stay put without stretching the felt at the crown.
6. Join the front and back
Stack the two gold bell bodies with their finished sides facing outward. Match the crown and side curves first, then pin the lower corners. Sew around the outer sides with small ivory running or blanket stitches, leaving the bottom slightly open for the decorative lip and the clapper. If you want a softly rounded ornament, tuck a very small amount of filling into the upper bell before finishing the second side. Too much filling will hide the graceful bell shape.
Sew the second ivory band onto the back if you have not already done so. At the lower edge, secure the two felt layers at the side corners while leaving a narrow opening between them. This gives a simple open-mouth effect like the reference photo. The paper pattern is for a sewn felt decoration and does not create a working metal bell or a rigid three-dimensional shell.
7. Check the finished ornament
Hold the loop and let the bell hang freely. Straighten the bow, check that the clapper sits in the middle, and trim any loose thread ends. If one corner of the ivory band lifts, secure it with one more tiny stitch. I like to hang the bell on a strong branch where the gold felt can catch the lights and the red bow is easy to see.
For a gift, slip it inside a paper bag with a small note saying it is handmade. It also looks sweet tied to the outside of a wrapped present. Keep it dry and store it flat after Christmas, with a little tissue around the bow so the loops do not fold sharply.
Tips for a Neat Felt Bell
Use short, even stitches and let the visible thread become part of the design. Place the ivory band before sewing the body together, because stitching it on a flat piece is much easier. Trim the twine ends only after you have tested the loop. If you sew with a child, let the adult handle the sharp needle and tiny berry pieces.
Try holding the front and back pieces together against a window before sewing. You can see whether their lower corners line up. If a felt edge looks uneven, trim only a small amount at a time. Felt does not fray, so there is no need to turn under the outer edges. Gold, red, green, and ivory make a classic Christmas mix, but you can use the same cutting sheets for a silver bell and blue bow.
Frequently Asked Questions
Is the PDF a full-size cutting pattern?
Yes. The two A4 sheets have solid outer lines for the cut pieces. Print at 100% and measure each 20 × 20 mm calibration square before cutting. The instructions stay here in the post so the PDF is easy to print and use at the craft table.
Do I need a sewing machine?
No. This small ornament is made with hand stitches. A running stitch and a few securing stitches are enough. The visible stitches give the bell its cozy handmade look.
Can I make the bell without stuffing?
Yes. Leave it flat if you prefer a light ornament for a small branch. If you add filling, use only a little near the upper part and keep the lower edge clear for the clapper.
Can I use ribbon for the hanging loop?
Yes. Cut a narrow ribbon to the same 22 cm length, fold it in half, and stitch both loose ends between the felt layers at the top. Check it with a gentle pull before hanging the bell.

Leave a Comment