


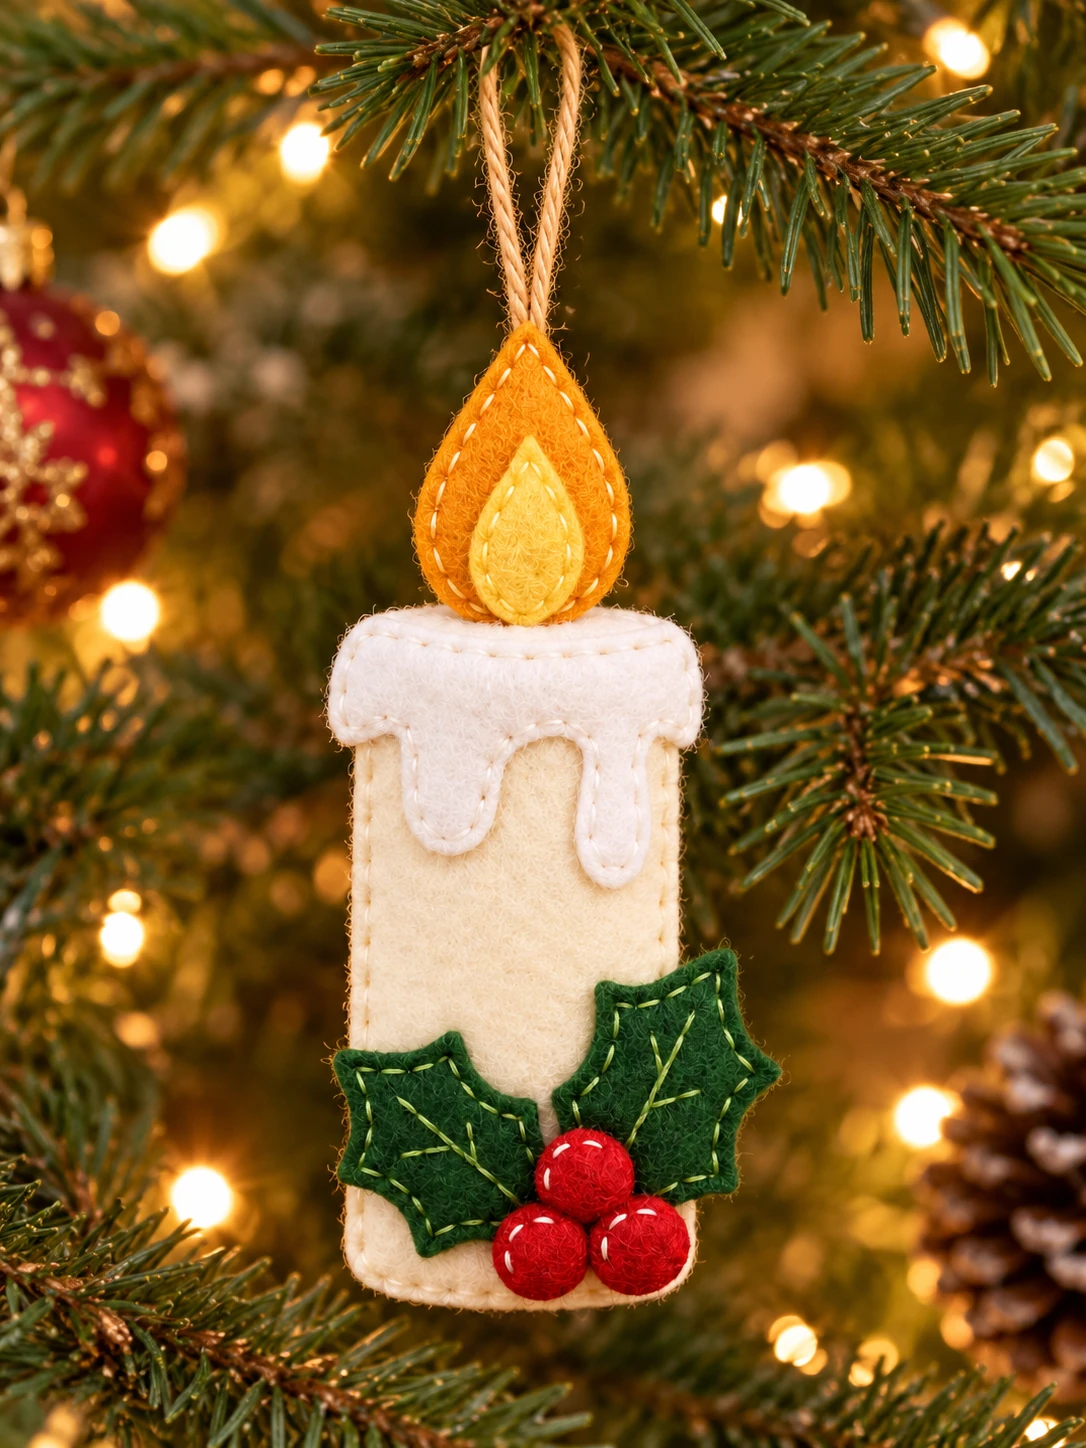
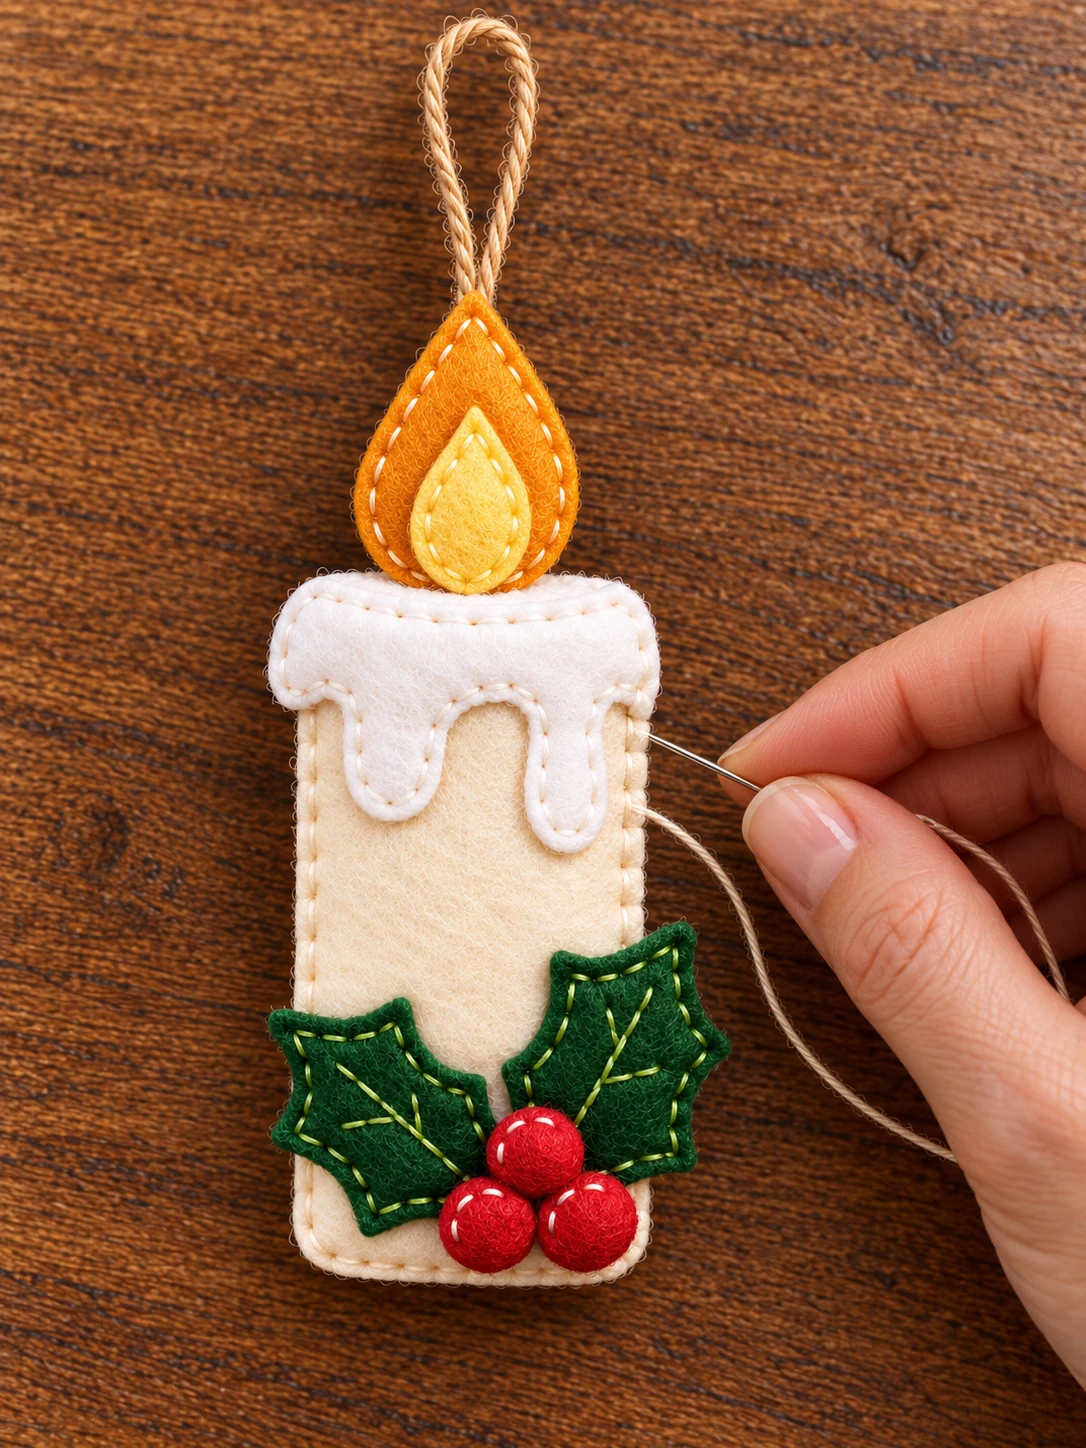
Every Christmas, I love pulling out the little handmade ornaments that make our tree feel personal. This felt candle is one of my favorites, with its soft cream body, white wax, and bright holly at the bottom.
I especially love the tiny stitches around the flame and leaves. They do not need to be perfect. Those small handmade details are what make it so sweet on a branch or tied to a wrapped gift.
Below, I will show you the pieces and the simple hand-sewing steps. Print the free cutting pattern, gather a few felt scraps, and enjoy a quiet afternoon making your own.
What Is This Felt Candle Ornament?
It is a small, flat felt candle ornament with a softly shaped front and back. An ivory wax top sits over the upper edge, with a two-color flame rising above it. Two green holly leaves and three red berries decorate the lower front. A jute twine loop at the back makes it easy to hang.
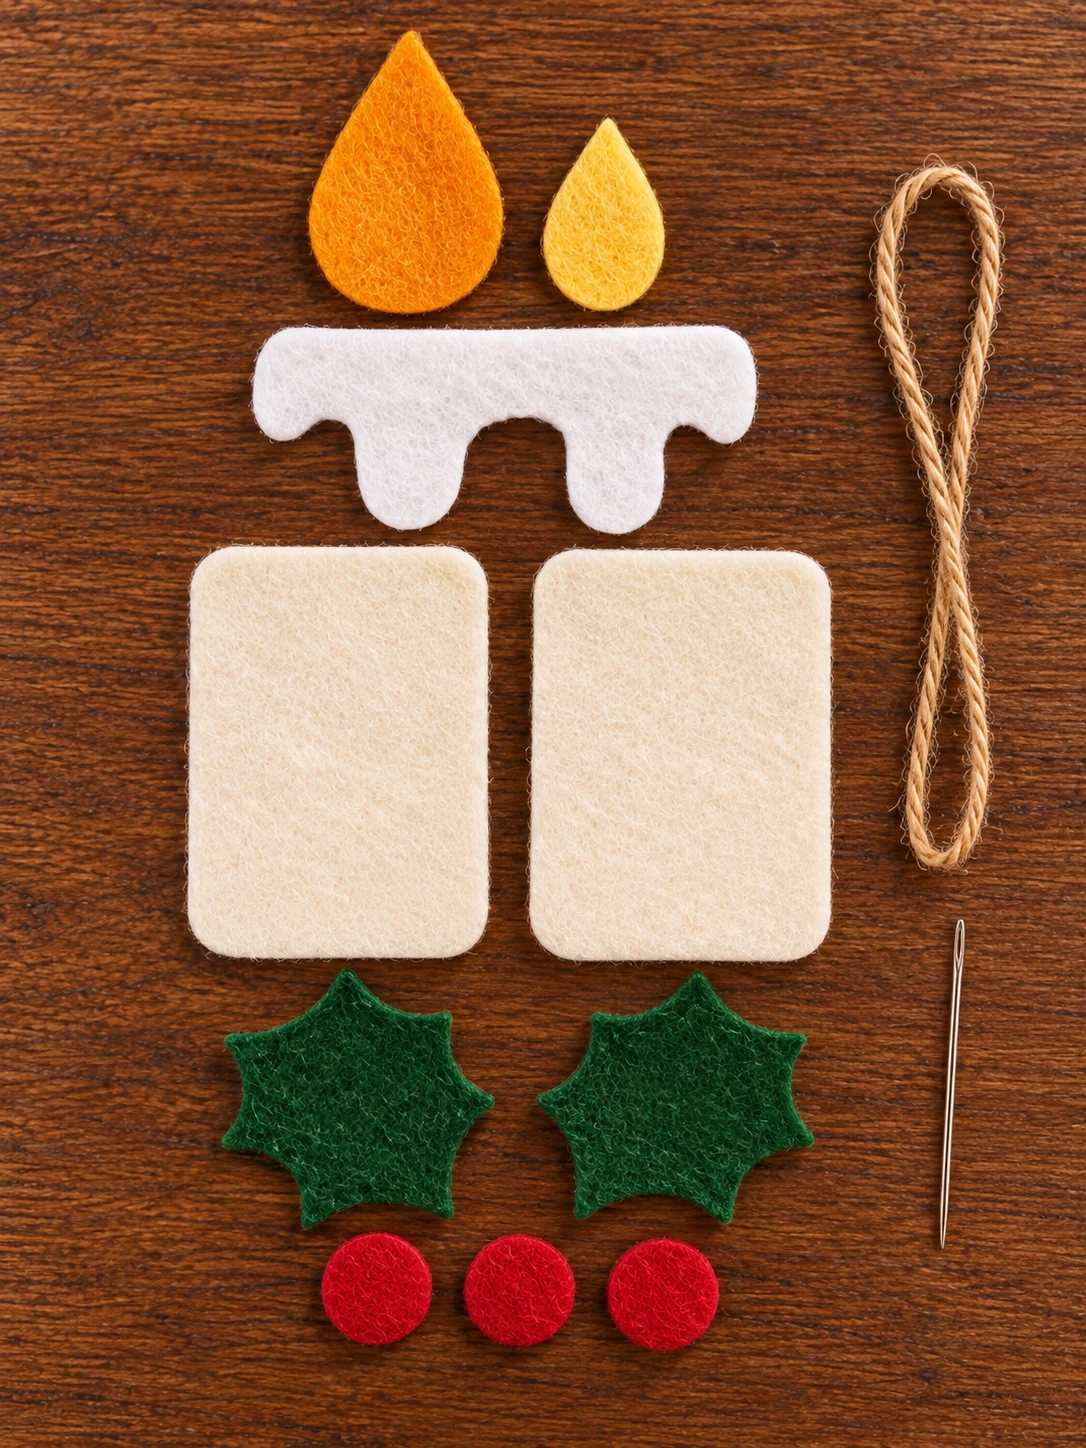
For one candle, cut ten felt pieces in all: a front and back, one white wax top, an outer orange flame, a smaller yellow flame, two green holly leaves, and three red berries. The hanging loop is one separate length of twine. The two flame shapes are different sizes so the yellow center sits neatly inside the orange layer.
With the included template, the candle body is about 10 cm (4 inches) high and 5 cm (2 inches) wide. The flame adds about 3 cm above it, so the finished decoration is roughly 13 cm (5 inches) tall, excluding the hanging loop. The exact height depends on how far you tuck the flame between the candle layers.
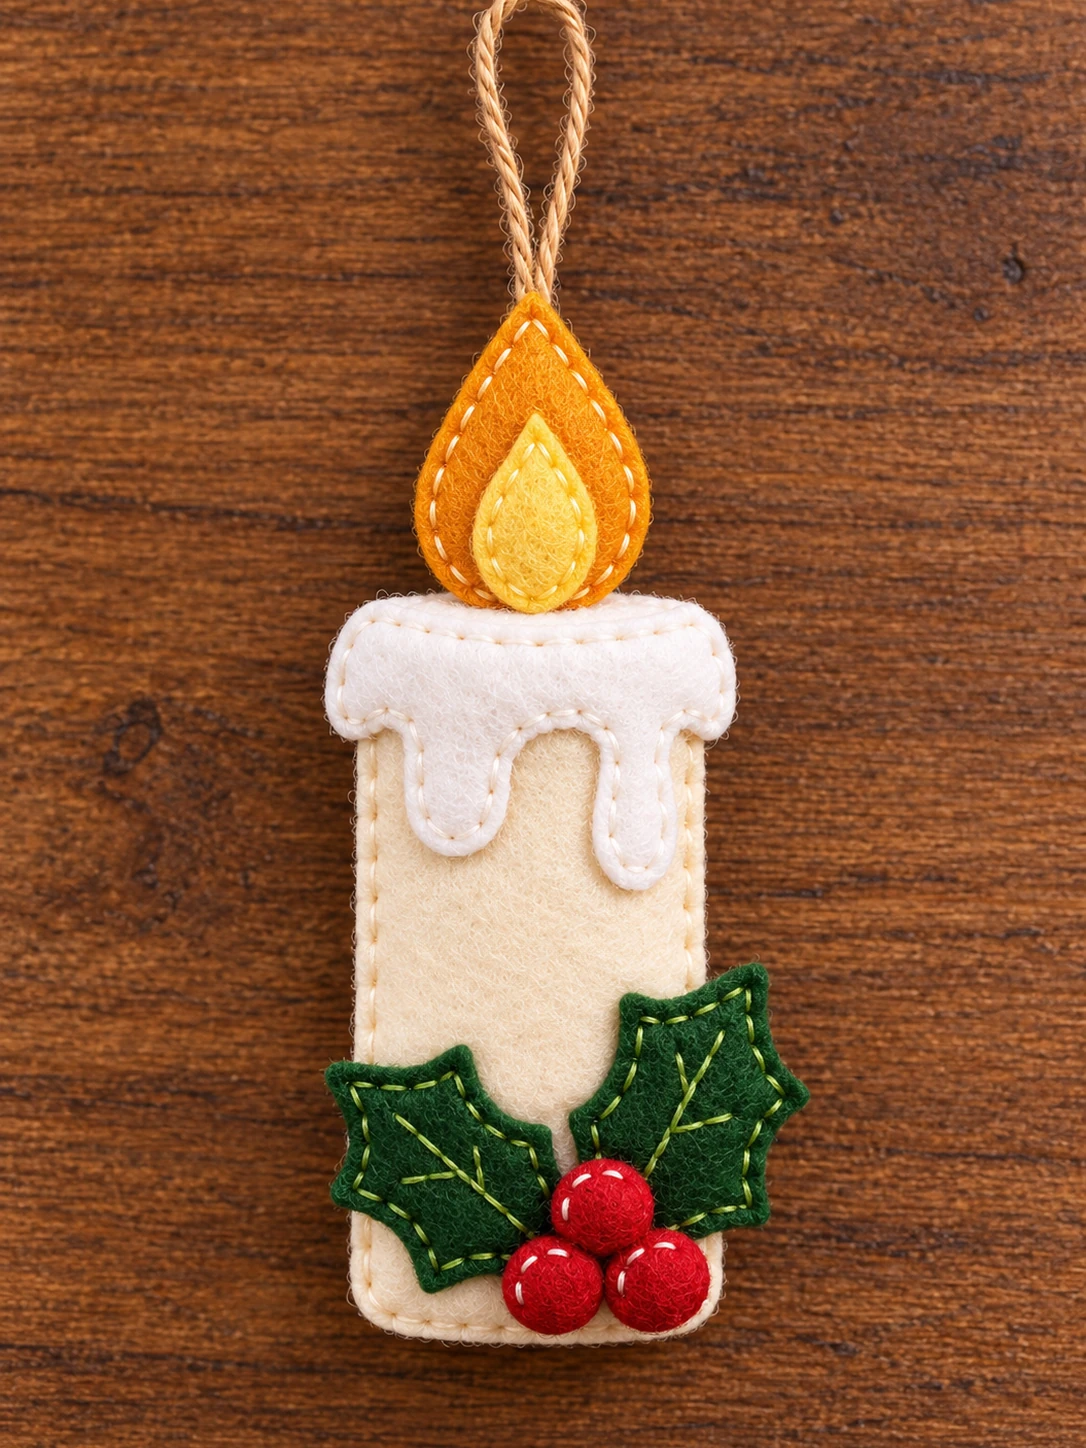
Free Printable Felt Candle Pattern
The single A4 page has full-size outlines for the candle front and back, wax top, both flame layers, two holly leaves, and three berries. Measure and cut an 18 cm (7 inch) piece of twine for the loop. The solid black outlines are cutting lines; the pale dashed lines on the candle pieces are only a guide for stitching.
Print at 100% or Actual Size. Turn off “Fit to Page” or other scaling options. Check the 20 × 20 mm test square with a ruler before cutting your felt. No extra seam allowance is needed.
Materials and Tools
- Cream or pale ivory felt for the candle front and back
- White felt for the wax top
- Orange felt for the outer flame and yellow felt for the inner flame
- Dark green felt for two holly leaves and red felt for three berries
- Matching sewing thread or embroidery floss: cream, white, orange, yellow, green, and red
- One 18 cm (7 inch) piece of natural jute twine or narrow ribbon
- A hand-sewing needle, sharp fabric scissors, paper scissors, and pins or clips
- A ruler and removable fabric marker
- A small pinch of polyester filling, if you want a lightly padded candle
Felt about 1 to 1.5 mm thick works well. Thicker felt can make the tiny berries and leaf points harder to cut neatly. Keep a scrap of cream felt beside you for testing your stitches before sewing the actual candle.
How to Make a Felt Christmas Candle Ornament
1. Print and cut out the pieces
Print the PDF at actual size and check the test square. Cut one candle front and one candle back from cream felt. Cut one wax top from white felt, one large outer flame from orange felt, and one small inner flame from yellow felt. Cut two holly leaves from green felt and three berry circles from red felt.
Lay the pieces out in the same order as the finished candle in the photo. The wax goes across the top of the candle body. The two leaves sit near the bottom and point out to either side, while the berries gather between them. This quick check helps you spot a missing piece before you begin sewing.
2. Sew the layered flame
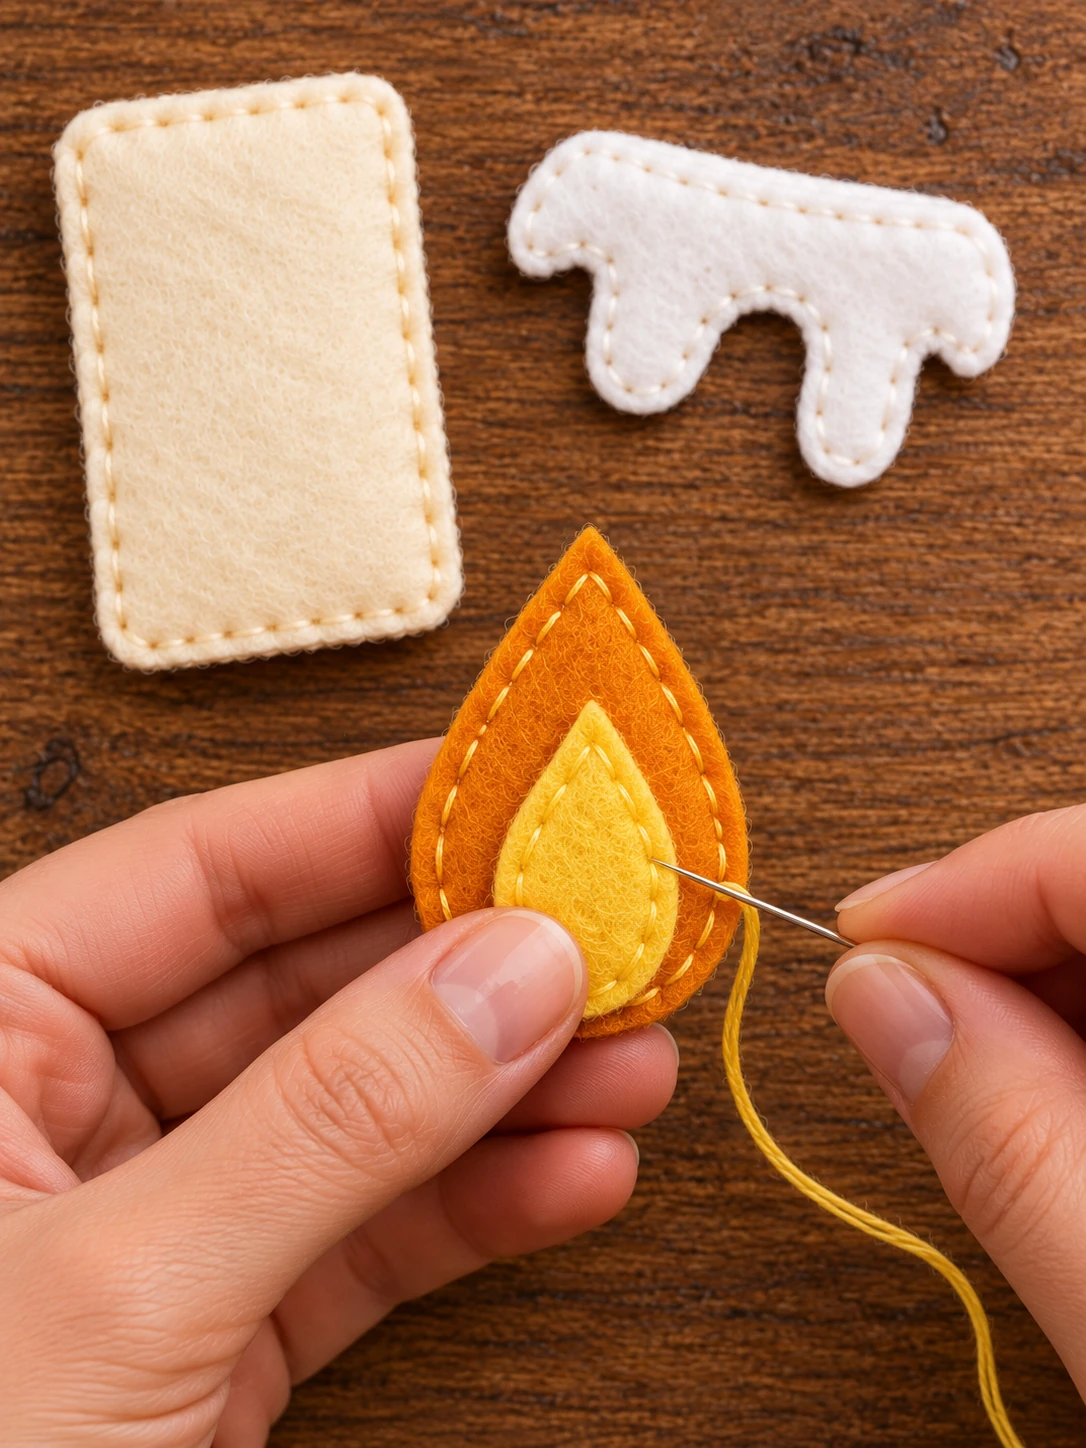
Place the small yellow flame in the center of the larger orange flame, leaving an orange border visible all around it. Sew a line of short yellow running stitches close to the edge of the smaller piece. If you like the visible handmade stitches in the photo, use a few cream stitches around the outer orange edge too.
Position the flame behind the candle front so about 1 cm of its base is hidden inside the candle. The point should rise above the wax top. Secure the base to the wrong side of the candle front with several firm stitches. The back candle piece will cover those stitches later.
3. Add the dripping wax top
Place the white wax piece across the upper front of the candle. Center it so the rounded ends overhang the body a little and the rounded drips face down. The flame should appear to grow from behind the wax, not from its front surface.
Sew around the wax with small white running stitches. Follow the rounded drips slowly and keep the thread loose enough that the felt stays flat. If a little orange flame base is visible below the wax, move the wax slightly higher or add a few stitches to hold the flame behind it.
4. Prepare the holly leaves and berries
Stitch a center vein on each green leaf with lighter green thread. Add two or three short side veins if you want more detail. Turn one leaf toward the left and the other toward the right, with their broad ends meeting near the middle of the candle.
Sew the leaves to the lower front of the candle. Keep them high enough that their lower edges do not get caught in the candle’s outer seam. Add the three red berries over the place where the leaves meet. You can leave the circles flat, or gather each around the edge with red thread for a slightly rounded look. Sew through the center of each berry a few times so it stays secure.
5. Attach the hanging loop
Fold the twine in half and place both cut ends at the upper back of the candle, just behind the flame. Tuck about 1 cm of each end between the candle front and back, then stitch firmly through the twine and the back felt. Gently pull the loop to check that it is secure before closing the ornament.
If you prefer ribbon, cut a similar length and use the same method. A narrow ribbon will lie flatter inside the seam. Keep the visible loop tall enough to fit over a Christmas tree branch.
6. Sew the candle front and back together
Put the candle back behind the decorated front, with both good sides facing outward. Match the top, sides, and rounded lower corners. Use cream thread to blanket stitch around the outside, about 3 mm from the cut edge.
For a flat ornament, sew all the way around. For a little softness, stop along one straight side, add a very small amount of filling, and close the gap. Avoid packing the candle tightly; too much filling can pull the wax and holly out of shape. Hide the final knot between the layers and trim any loose threads.
Tips for a Neat Handmade Finish
Cut the small shapes slowly. Turn the felt as you cut around the leaf points and wax drips. One smooth cut usually looks better than many tiny snips.
Keep the flame centered. Pin it in place, lay the wax over it, and check the front before sewing either piece down. The yellow center should remain clearly visible.
Use the printed pieces as cutting guides. The reference image is a lovely visual guide, but it is a collage and does not give a dependable print scale. The PDF includes a measurement square so you can check the size.
Secure the loop twice. The hanging twine carries the ornament’s weight. A few extra stitches at its base help it stay put when you take the decoration on and off the tree.
Care and Storage
Gently spot clean the felt with a barely damp cloth and let it dry flat. Do not soak or machine wash the ornament. When Christmas is over, place it in a small box where the flame and holly leaves will not be crushed by heavier decorations.
This is a decorative item with small stitched berries and a hanging cord. Keep it out of reach of babies and pets.
Frequently Asked Questions
Can I make this ornament without a sewing machine?
Yes. The whole candle can be sewn by hand with simple running stitches and a blanket stitch around the outer edge.
Are the two flame pieces identical?
No. Cut one large orange outer flame and one smaller yellow inner flame. Sew the yellow piece on top of the orange piece before attaching the flame to the candle.
Do I need two wax tops?
The pictured blueprint shows one wax top on the front. The candle back is a plain cream shape. You can add a second wax piece to the back if you want a decorated reverse side, but that is an optional extra and is not in the cutting list.
How many holly leaves and berries do I cut?
Cut two green holly leaves and three red berry circles. Arrange the leaves so they point outward from the center, then place the berries where they meet.
Should I stuff the candle?
You can leave it flat, just like a simple felt ornament. A tiny pinch of filling adds a softer shape, but it should still hang easily from a branch.
Can I use glue instead of stitches?
You can tack the small decoration pieces in place with a tiny amount of fabric glue, but stitching makes the flame, berries, and hanging loop more secure. Let any glue dry fully before joining the front and back.
What paper size should I use for the free pattern?
The PDF is designed for A4 paper. Print at 100% or Actual Size, then measure the 20 mm test square. If you use US Letter paper, select 100% with no scaling and check that every outline appears on the page before cutting.

Leave a Comment