


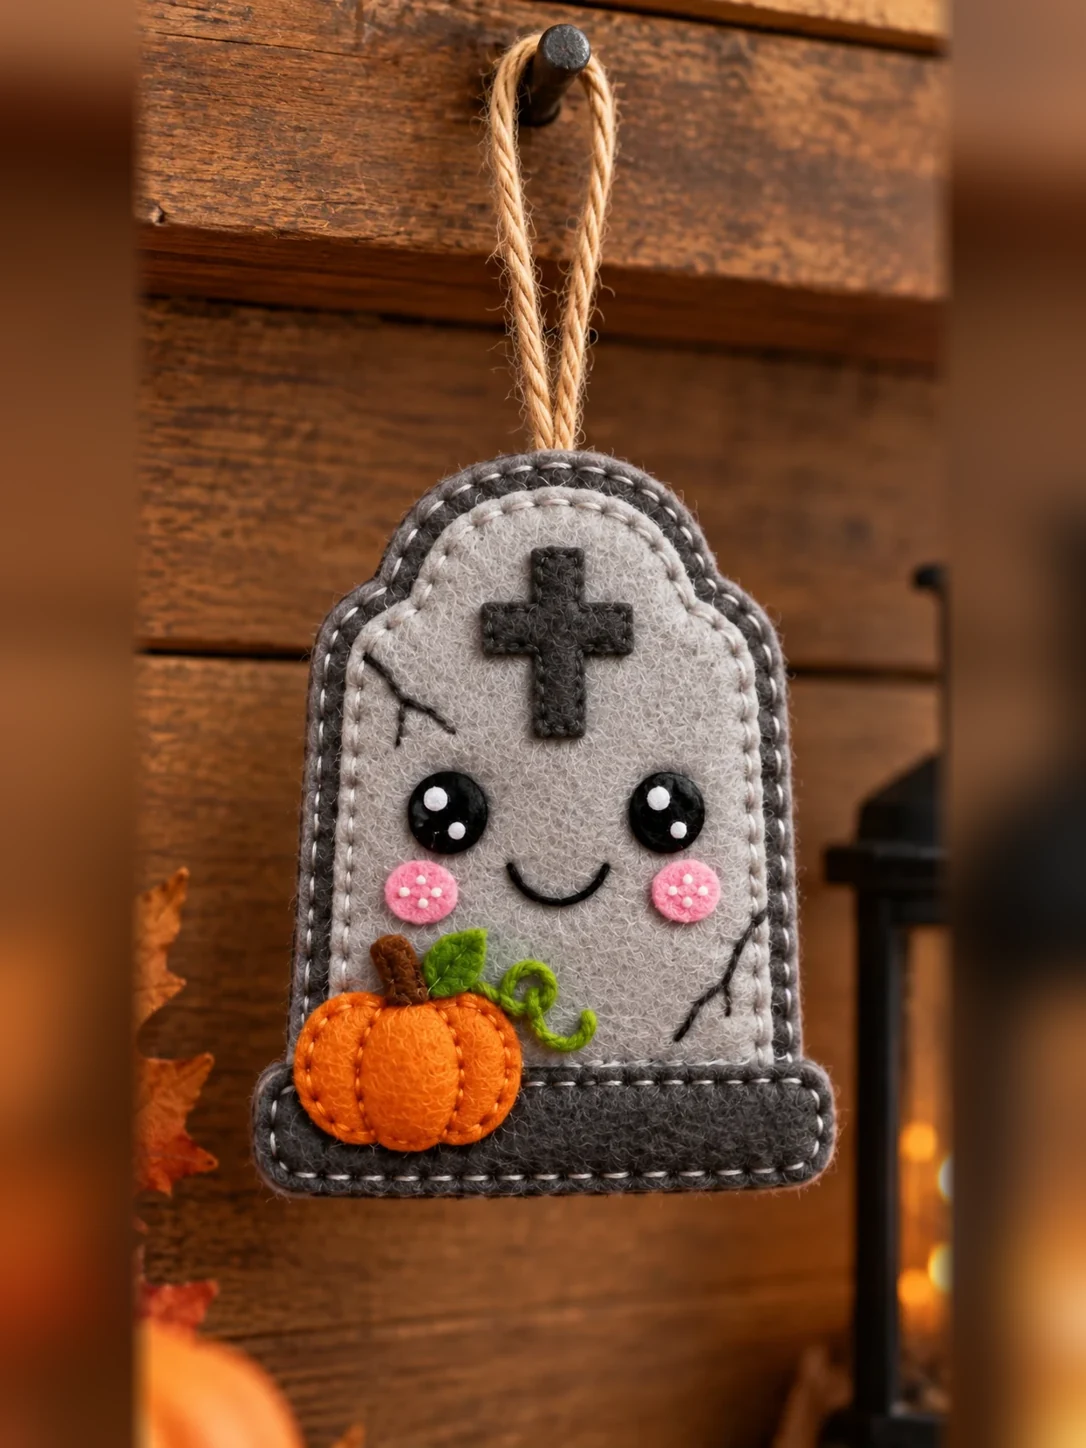
I love Halloween crafts with a friendly face. This little felt gravestone has round eyes, rosy cheeks, and a small orange pumpkin at the bottom. Its soft gray layers and hand stitches make it a sweet decoration for a Halloween tree, door handle, garland, or gift bag.
Everything can be sewn by hand, so it is a lovely project for an evening at the craft table. I made a free printable pattern with the main felt shapes, plus step photos to help you put them together.
What Is This Felt Gravestone Ornament?
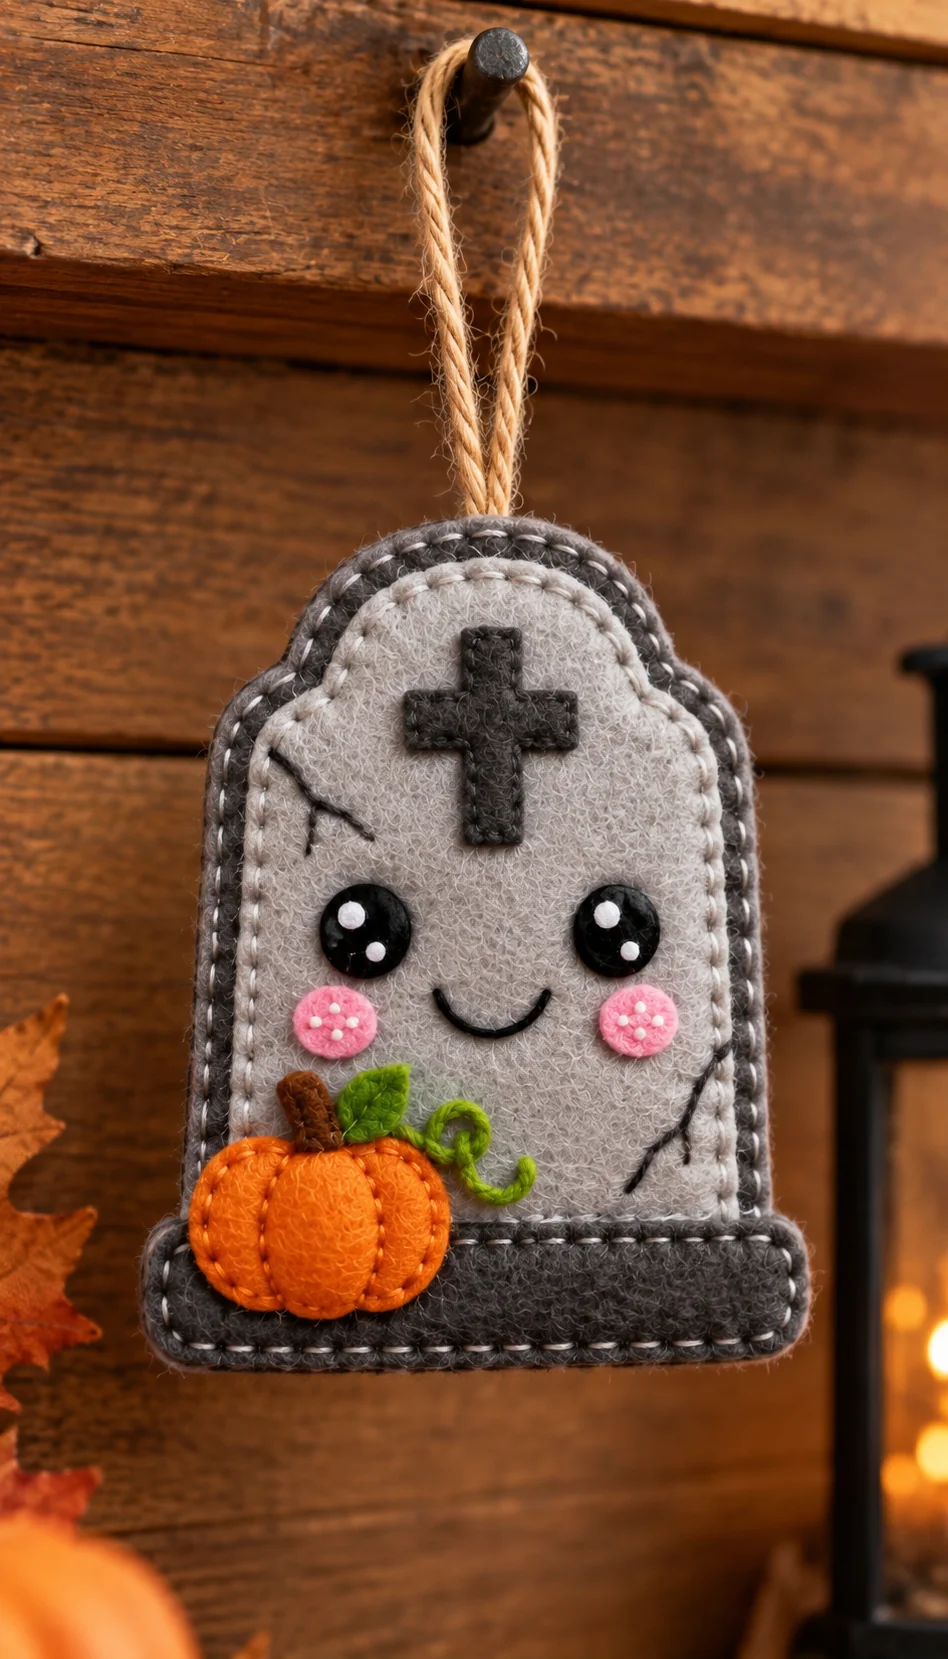
It is a lightly padded hanging ornament made from a dark gray front and back, a smaller light gray front panel, and a dark felt base. A little cross, embroidered cracks, and a smiling face decorate the gravestone. An orange felt pumpkin with a green leaf and curled vine sits in one corner. A jute loop at the top lets you hang it anywhere you like.
The finished felt shape is about 10.7 cm (4¼ inches) tall, plus the hanging loop. Your final size may vary slightly with your stitches and the thickness of your felt.
Free Printable Felt Gravestone Pattern
Download the Felt Gravestone and Pumpkin Ornament Free Pattern (PDF)
The printable pattern is one A4 page. Set your printer to 100% or Actual Size and turn off “Fit to Page.” Check the 20 mm square with a ruler before you cut your felt. Solid outlines are cutting lines, and dashed lines show suggested stitching paths. You do not need to add a seam allowance.
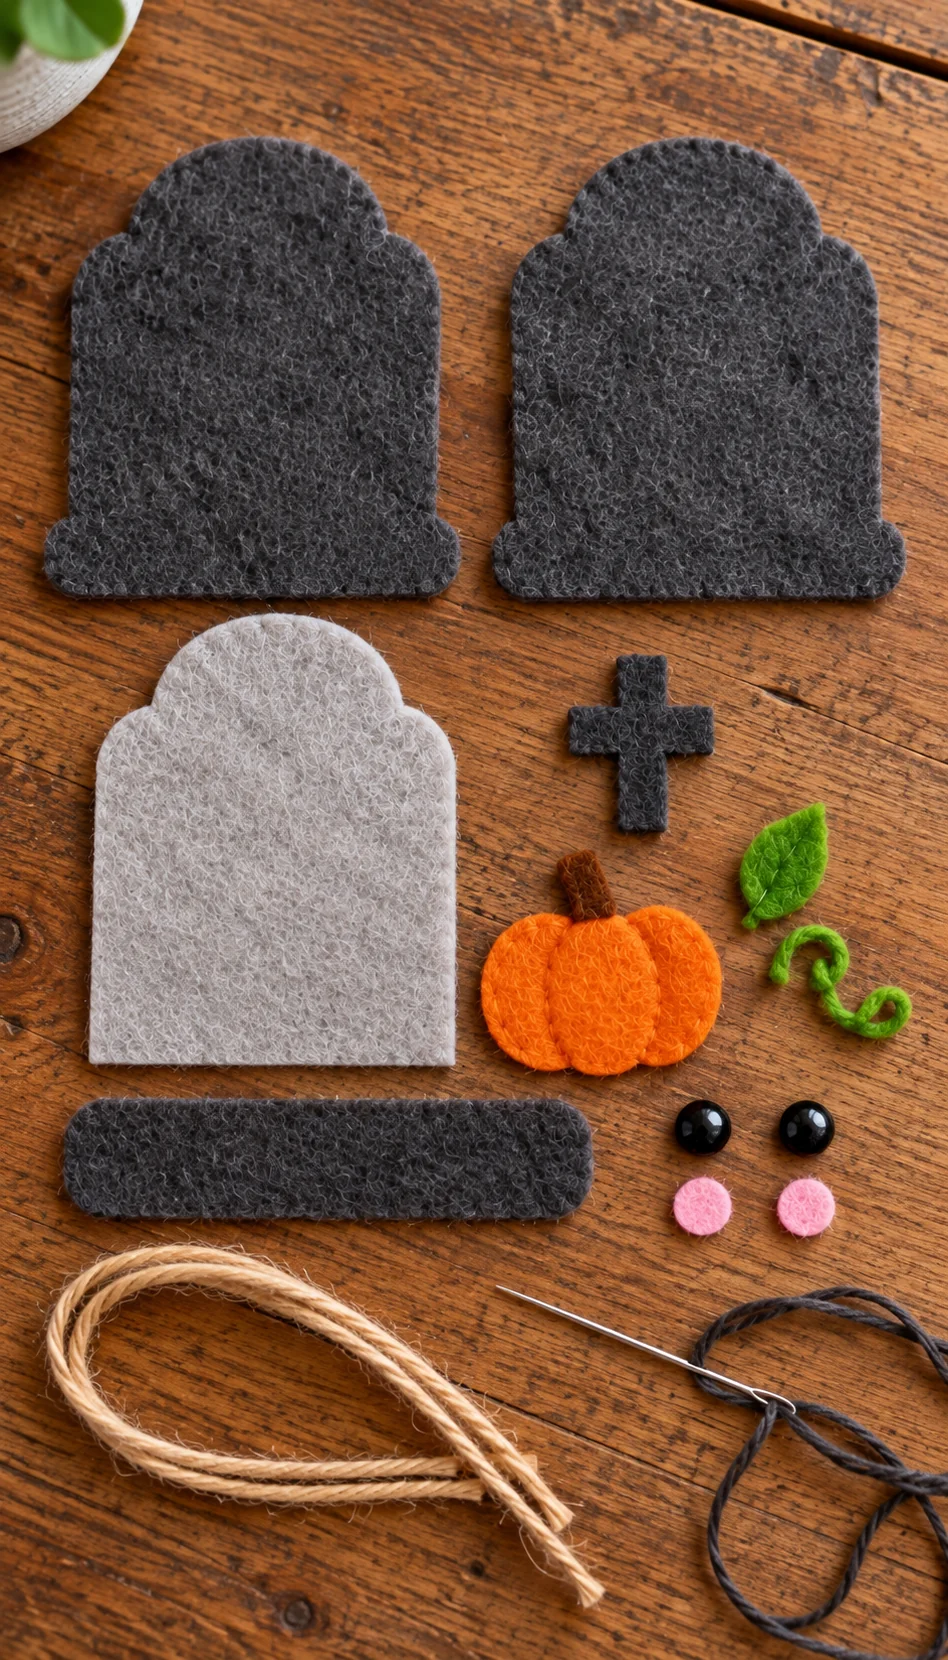
Cut one dark gray outer front, one dark gray outer back, one light gray inner front, and one dark gray base. The pattern also includes a pumpkin, cross, leaf, two eyes, and two cheeks. Stitch the smile, cracks, and curly pumpkin vine with embroidery floss.
Materials and Tools
- Dark charcoal gray felt for the outer gravestone, base, and cross
- Light gray felt for the smaller front panel
- Orange felt for the pumpkin and a small piece of brown felt for its stem
- Green felt for the leaf
- Black felt for two eyes and pink felt for two cheeks
- Light gray or cream embroidery floss for visible edge stitches
- Black floss for the smile and cracks; green and orange floss for the pumpkin details
- 16–18 cm (6–7 inches) of jute twine or narrow ribbon
- A small amount of polyester filling, a needle, scissors, pins, and a ruler
Felt about 1–1.5 mm thick is easy to cut and sew. If your felt is very thick, use less filling so the edge remains smooth.
How to Make the Felt Gravestone Ornament
1. Print the pattern and cut all the pieces
Print the PDF at actual size and measure its test square. Cut out each paper shape and trace it onto your chosen felt colors. Cut the two dark outer gravestones, one smaller light gray panel, one dark base strip, a dark cross, an orange pumpkin, a green leaf, two black eyes, and two pink cheeks. Cut a tiny brown rectangle for the pumpkin stem.
Arrange the shapes on the table before you sew. Place the light gray panel in the center of one outer gravestone, leaving a visible dark border. Lay the face, pumpkin, and base on top to make sure the small pieces have enough room.
2. Sew on the light gray front panel
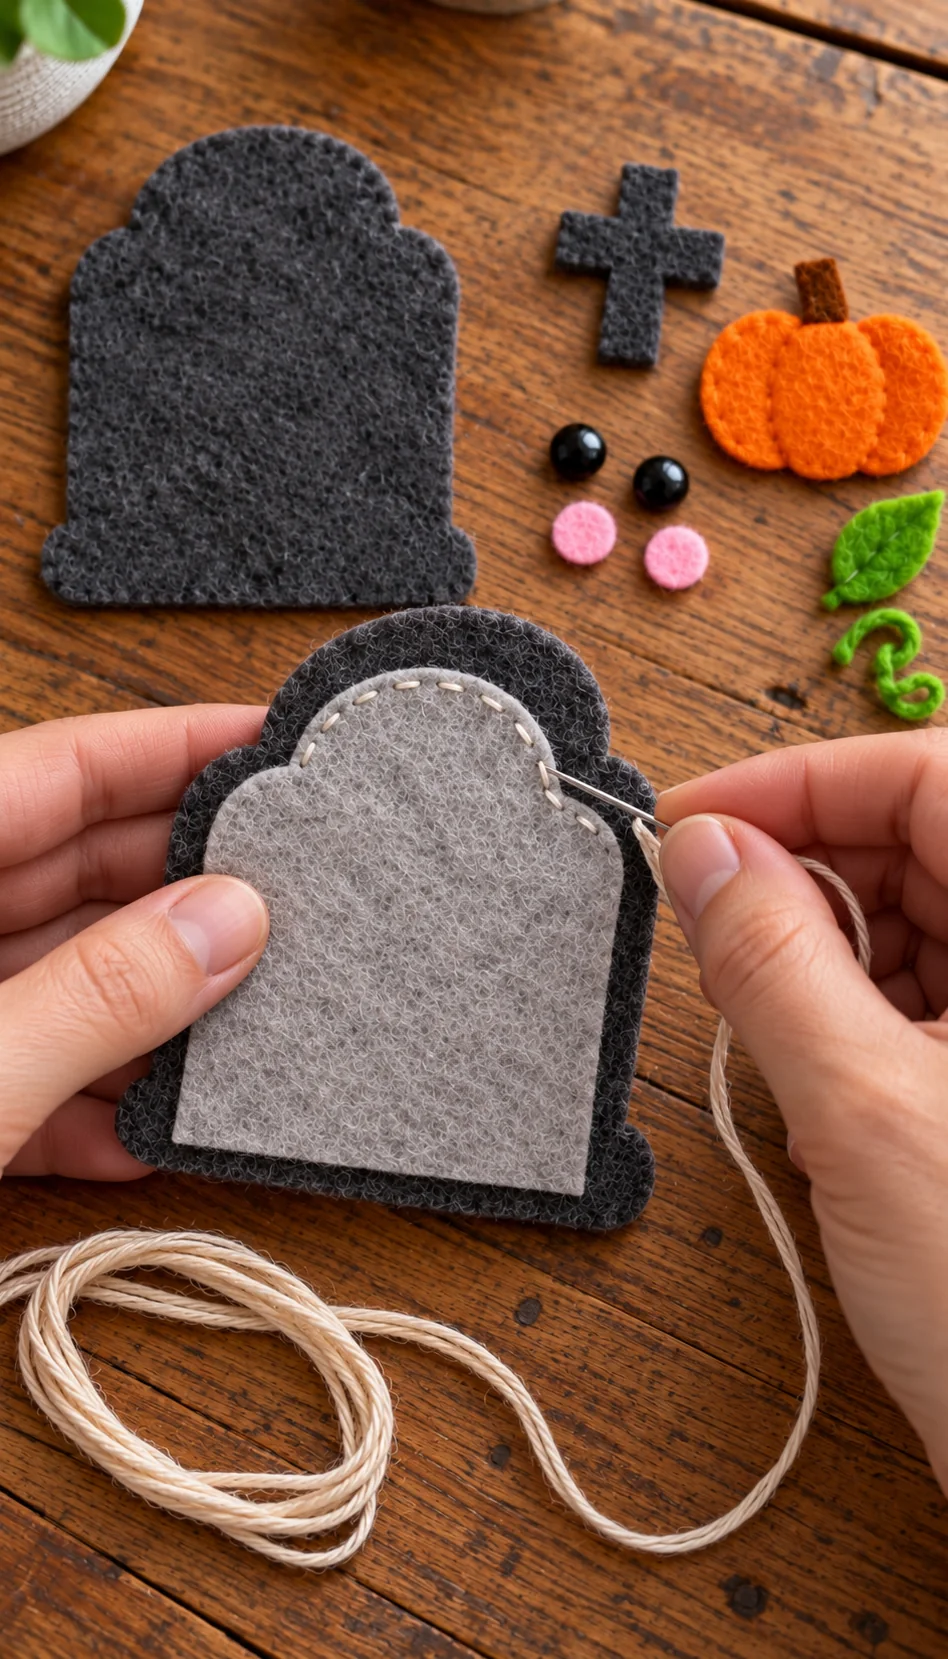
Pin the light gray panel onto the dark outer front. Check that the curved top is centered and that the dark border is about the same width on both sides. Thread your needle with light gray or cream floss.
Use short running stitches around the light gray panel, about 3 mm inside its edge. Take your time along the arch and the small curves at the shoulders. Keep the felt flat and hide the knots between the two layers.
3. Add the cross, eyes, cheeks, smile, and cracks
Place the dark felt cross near the top center of the light gray panel. Sew around its edge with tiny stitches. Set the two round eyes below it, with enough space between them for a little smile. Stitch them in place with black thread. A couple of small white stitches on each eye make bright highlights.
Add one pink cheek below each eye. Use black embroidery floss to make a soft U-shaped smile between the cheeks. For the cracked-stone detail, make two or three short angled stitches near one upper side and the opposite lower side. Keep the cracks small so the face stays the focus.
4. Sew the pumpkin and green details
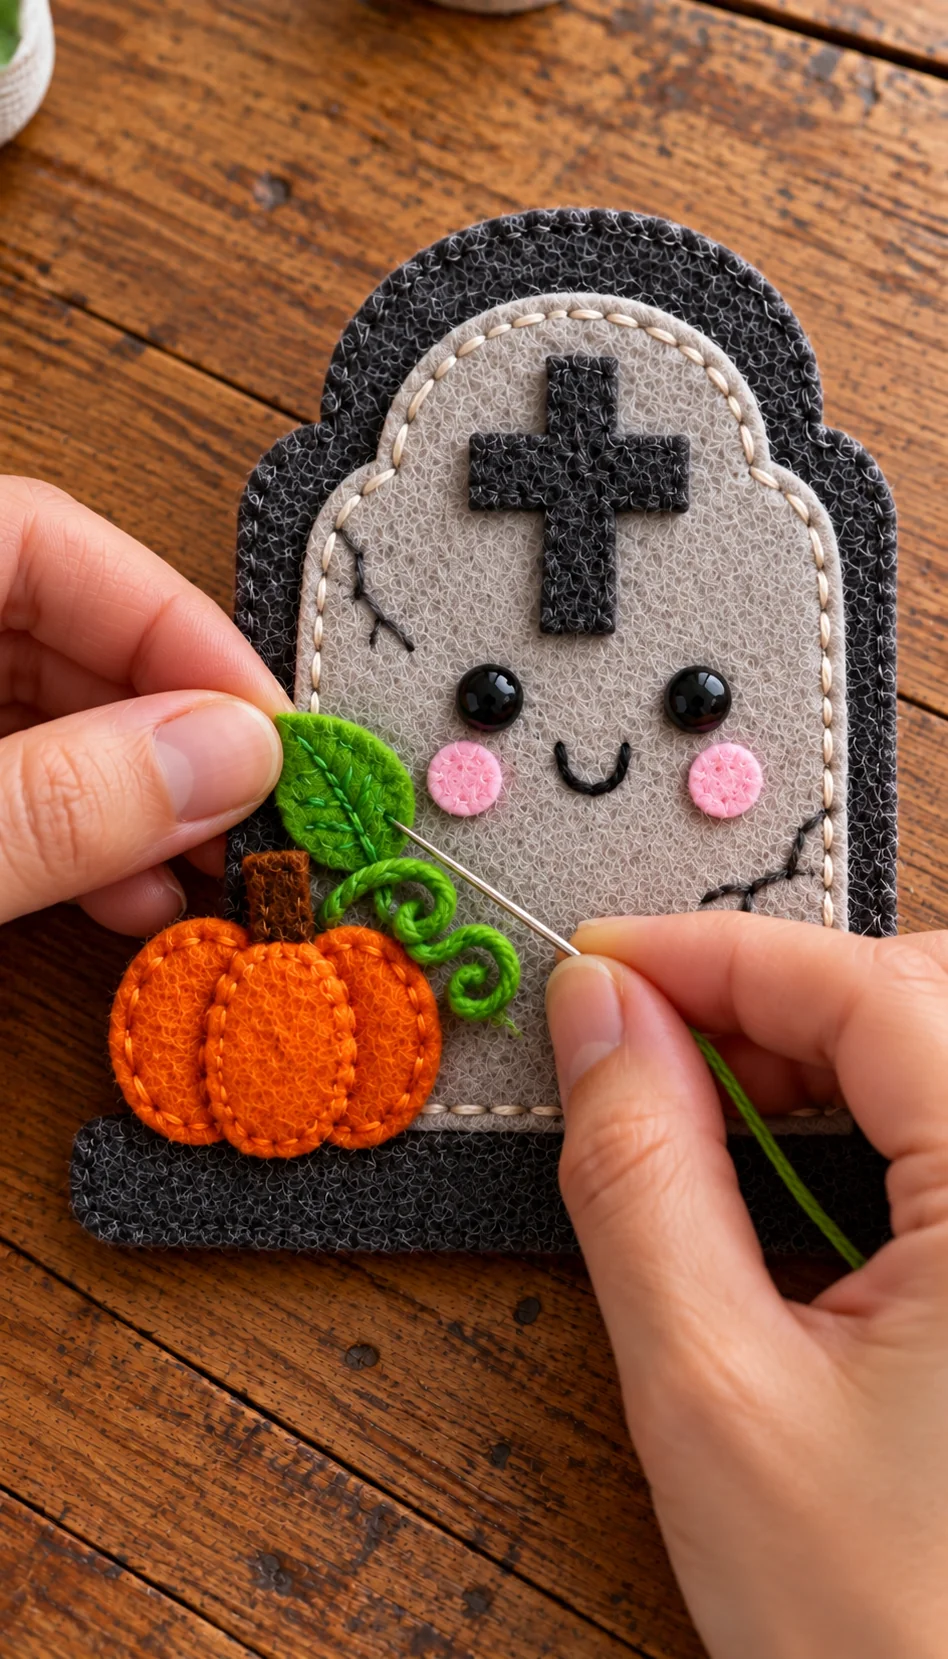
Place the orange pumpkin at the lower-left corner, overlapping the light panel and the dark base slightly. Sew its edge with orange thread, then add a few curved lines across its front to suggest pumpkin sections. Tuck the little brown stem behind the top and stitch it down.
Stitch the green leaf beside the stem. Make a curled vine using green embroidery floss: start beside the leaf, loop the thread into a loose spiral, and catch it with a few small stitches. Keep the pumpkin clear of the gravestone’s smile.
5. Add the base and hanging loop
Lay the dark gray base strip across the bottom of the decorated front. Its ends should reach just beyond the gravestone sides. Sew along the top and lower edges with light gray stitches. If the pumpkin already overlaps the strip, take care not to catch its orange front in the base stitches.
Fold the jute twine in half. Place both cut ends at the top center between the front and back gravestone pieces, leaving the loop above the arch. Sew through the twine ends several times to secure them before you join the two felt layers.
6. Join, fill, and close the ornament
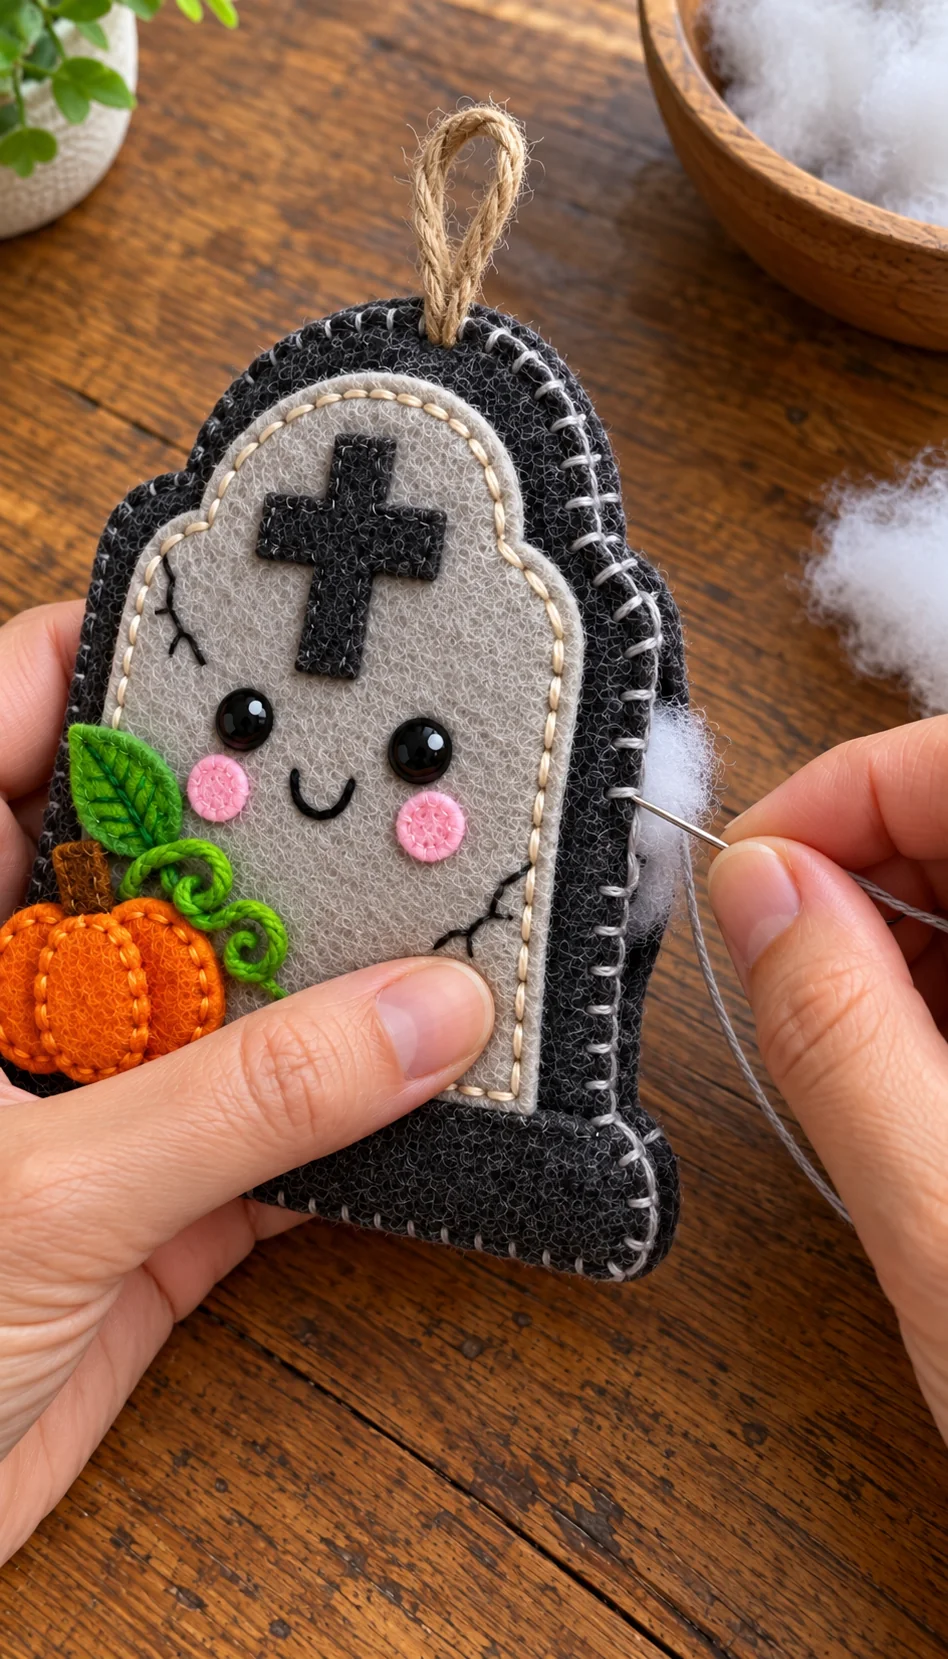
Put the plain dark back behind the decorated front with the good sides facing outward. Match the rounded tops, straight sides, and bottom corners. Use a light gray blanket stitch around the outer edge, leaving a small opening on one side.
Add a small amount of filling. Push a little into the top curve and both bottom corners, but do not pack it tightly. Finish the blanket stitches and hide the knot between the felt layers. Hold the ornament by its loop to check that it hangs straight.
Tips for a Neat Handmade Finish
Center the light panel first. Step back and look at both sides of the dark border before making your first stitch. It is easier to move a pin than to remove a seam.
Keep the face simple. Small, even eyes and a gently curved smile make the gravestone look friendly. Pin the eyes and cheeks temporarily to check their spacing.
Use short stitches around curves. Smaller stitches follow the rounded top without puckering the felt.
Do not overstuff. A thin layer of filling gives the ornament shape while keeping its bottom flat.
Strengthen the loop. Several stitches through both twine ends help the ornament hang securely.
Display and Storage
Hang your gravestone on a Halloween tree or garland, tuck it onto a gift bag, or display it beside other small felt ornaments. You could make a set with different pumpkin colors and faces.
Spot clean the felt with a barely damp cloth and let it dry flat. Store it where heavier decorations will not press on the pumpkin or bend the loop. Small pieces and the cord make this a decoration rather than a toy for babies or pets.
Frequently Asked Questions
Can a beginner make this ornament?
Yes. The project uses simple cutting, running stitches, blanket stitches, and a few embroidered details. Take your time with the little eyes and cheeks.
Do I need a sewing machine?
No. All the pieces can be sewn by hand.
Can I make it flat?
Yes. Leave out the filling for a flat ornament or gift tag.
Can I use ribbon for the loop?
Yes. A narrow gray, black, or orange ribbon works well instead of jute twine.
What if my pumpkin is too large?
Trim it a little before stitching. The pumpkin should sit in the bottom corner without covering the smile.
Can I use beads for the eyes?
You can, but felt eyes are easy to sew and lie flat. Keep decorations with small parts away from young children.
Can I print the pattern on US Letter paper?
Check the printer preview to be sure no shapes are clipped. Print at 100% and measure the 20 mm test square before cutting.
Enjoy Your Little Halloween Craft
This smiling gravestone is quick to make from felt scraps and is easy to personalize. Print the free pattern, choose your favorite shades of gray and orange, and have fun adding the little pumpkin and face.

Leave a Comment