


A red-and-white candy cane brings an easy bit of Christmas color to a handmade tree. The little bow makes this one feel gift-ready even before it is wrapped.
The curved hook is the trickiest part to cut. Work slowly with small scissors, and the rest is simple hand sewing. The free printable cutting outline and clear step photos below will help you work from start to finish.
What Is This Felt Candy Cane Ornament?
It is a soft, hand-stitched hanging ornament made from red and white felt. The design uses white candy cane fronts and backs, four red diagonal stripes, red bow pieces and a jute loop. A folded jute cord at the top lets you hang it from a branch, hook or seasonal wreath. You can leave the ornament flat or add a small amount of stuffing for a gentle padded shape.

Free Printable Felt Candy Cane Pattern
Download the Felt Candy Cane Free Pattern (PDF)
The PDF is an A4 cutting guide prepared from the supplied outline. Print at Actual Size, compare the outline with the ornament size you want, and adjust printer scale before cutting if needed. Solid lines are cutting lines; dashed lines mark suggested stitch placement. Do not treat the dashed line as another piece to cut.
Materials and Tools
- 1–1.5 mm felt in red and white and any small accent colors shown in the pattern
- Pattern pieces: white candy cane fronts and backs, four red diagonal stripes, red bow pieces and a jute loop
- Matching embroidery floss or sewing thread, plus contrasting thread for visible edge stitches
- Hand-sewing needle, small sharp scissors, pins or clips, and a fabric marker
- About 16–18 cm (6–7 inches) of jute twine or narrow ribbon for the hanging loop
- A small pinch of polyester filling, if you want a padded ornament
Small felt scraps are perfect for the accent pieces. Keep the tiniest cutouts in a bowl so they do not disappear from the work surface.
How to Make a Felt Candy Cane Ornament
1. Print the pattern and cut the pieces
Cut two white cane shapes. Match the two large red stripe pieces along the curved upper part and two smaller ones along the lower stem. Pin paper to the felt or trace each shape with a removable fabric marker. Cut just outside the traced line, then check the front and back against each other. Keep the back piece plain until the front is decorated.
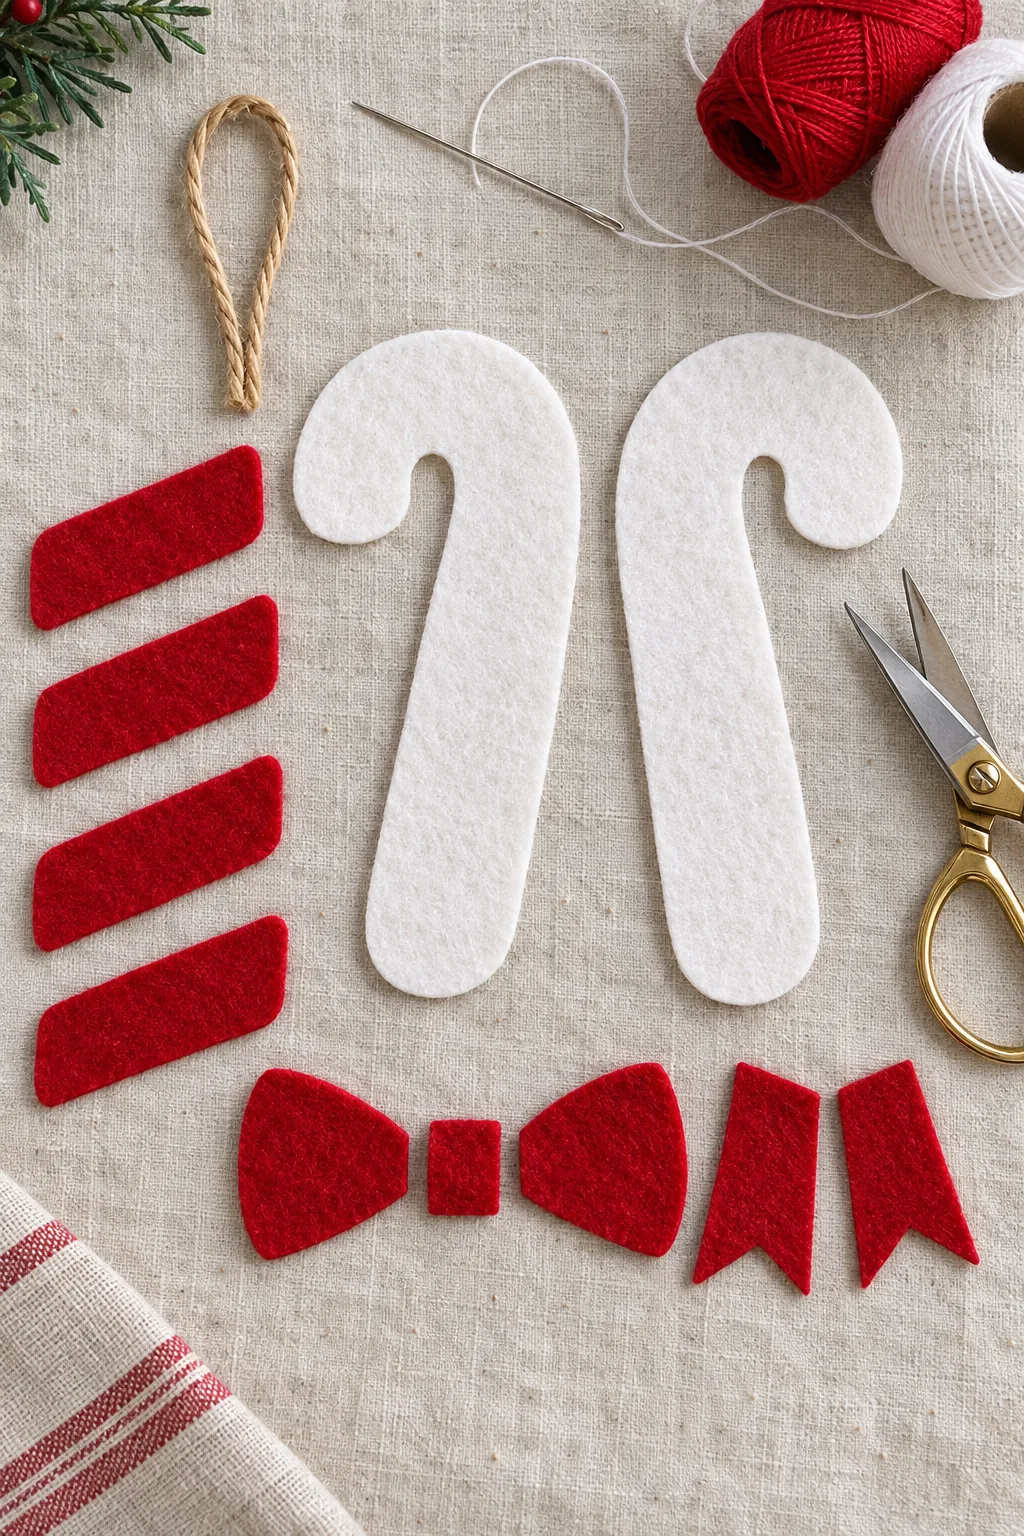
2. Arrange the front details
Lay every accent on the front felt piece before picking up the needle. Move the small shapes until the design resembles the finished reference and has comfortable space around the edge for the closing stitch. A pin or a tiny dot of fabric glue can hold pieces temporarily; use glue sparingly so the needle still passes through easily.
3. Stitch the decorations
Stitch the stripes onto the front with red thread, then make the bow from the center, two loops and two tails. Sew it across the stem without hiding all the stripes. Use two or three strands of embroidery floss for the small details. Take short, even stitches around each applique. For embroidered features, mark the placement lightly first and hide knots on the back of the front piece.
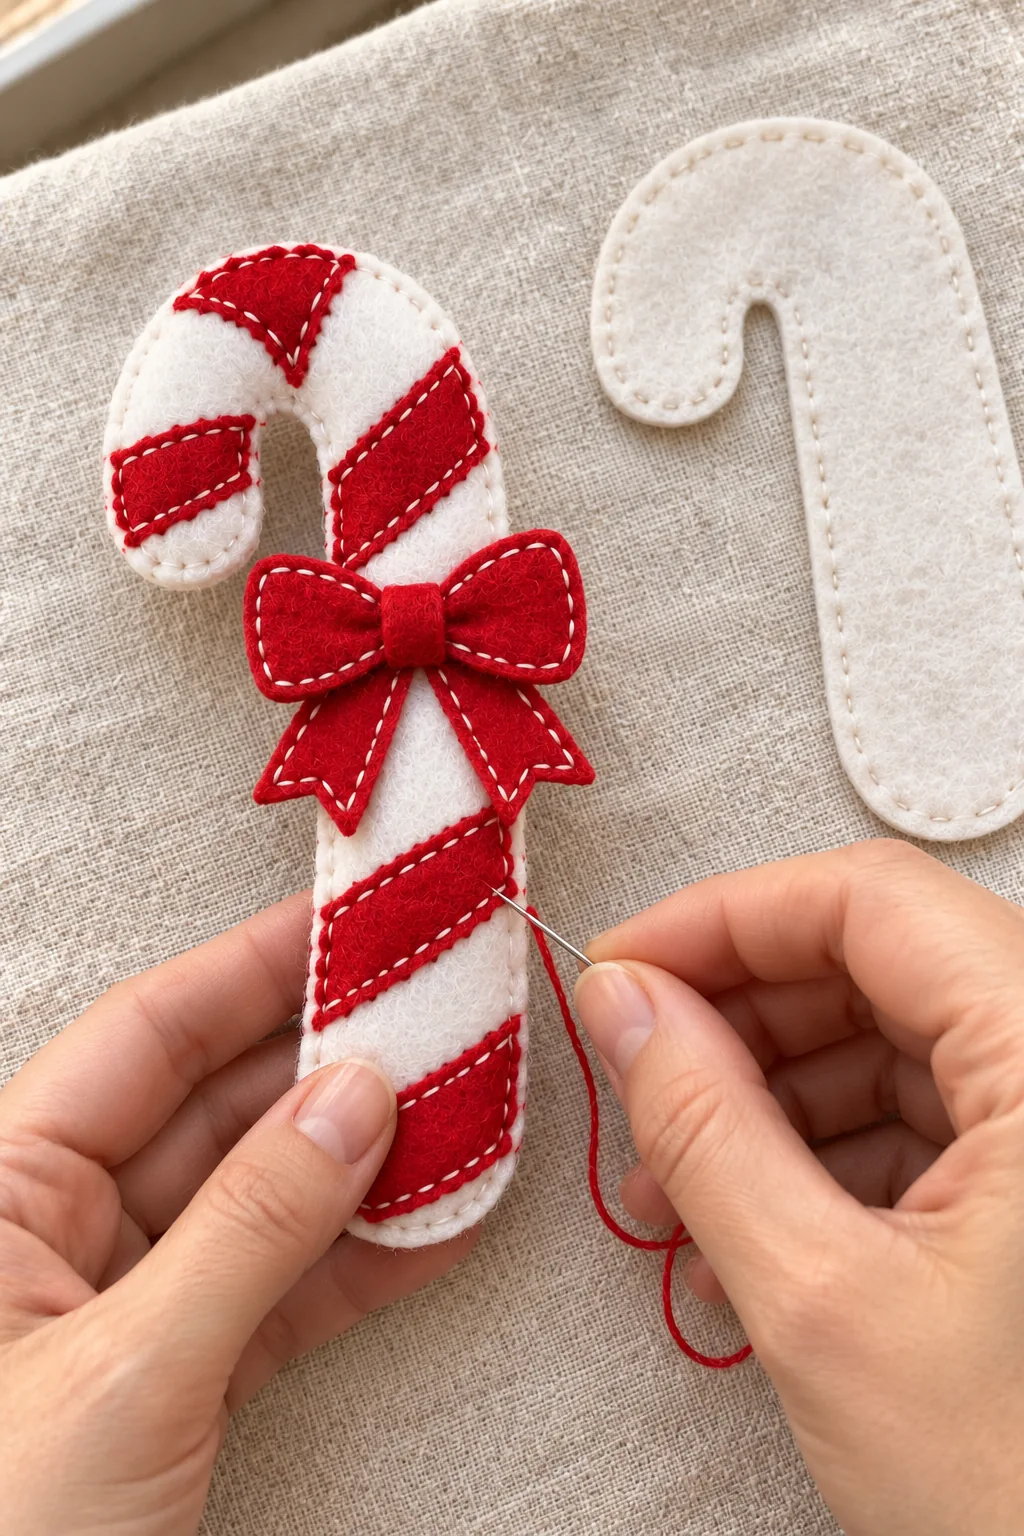
4. Add the hanging loop and join the layers
Fold the twine in half and place its two cut ends between the front and back at the top. Sew through the ends several times so the loop can carry the ornament. Put the felt pieces together with their good sides facing outward. Blanket stitch around the edge, taking smaller stitches around tight curves and corners. Leave a small opening before the final section.
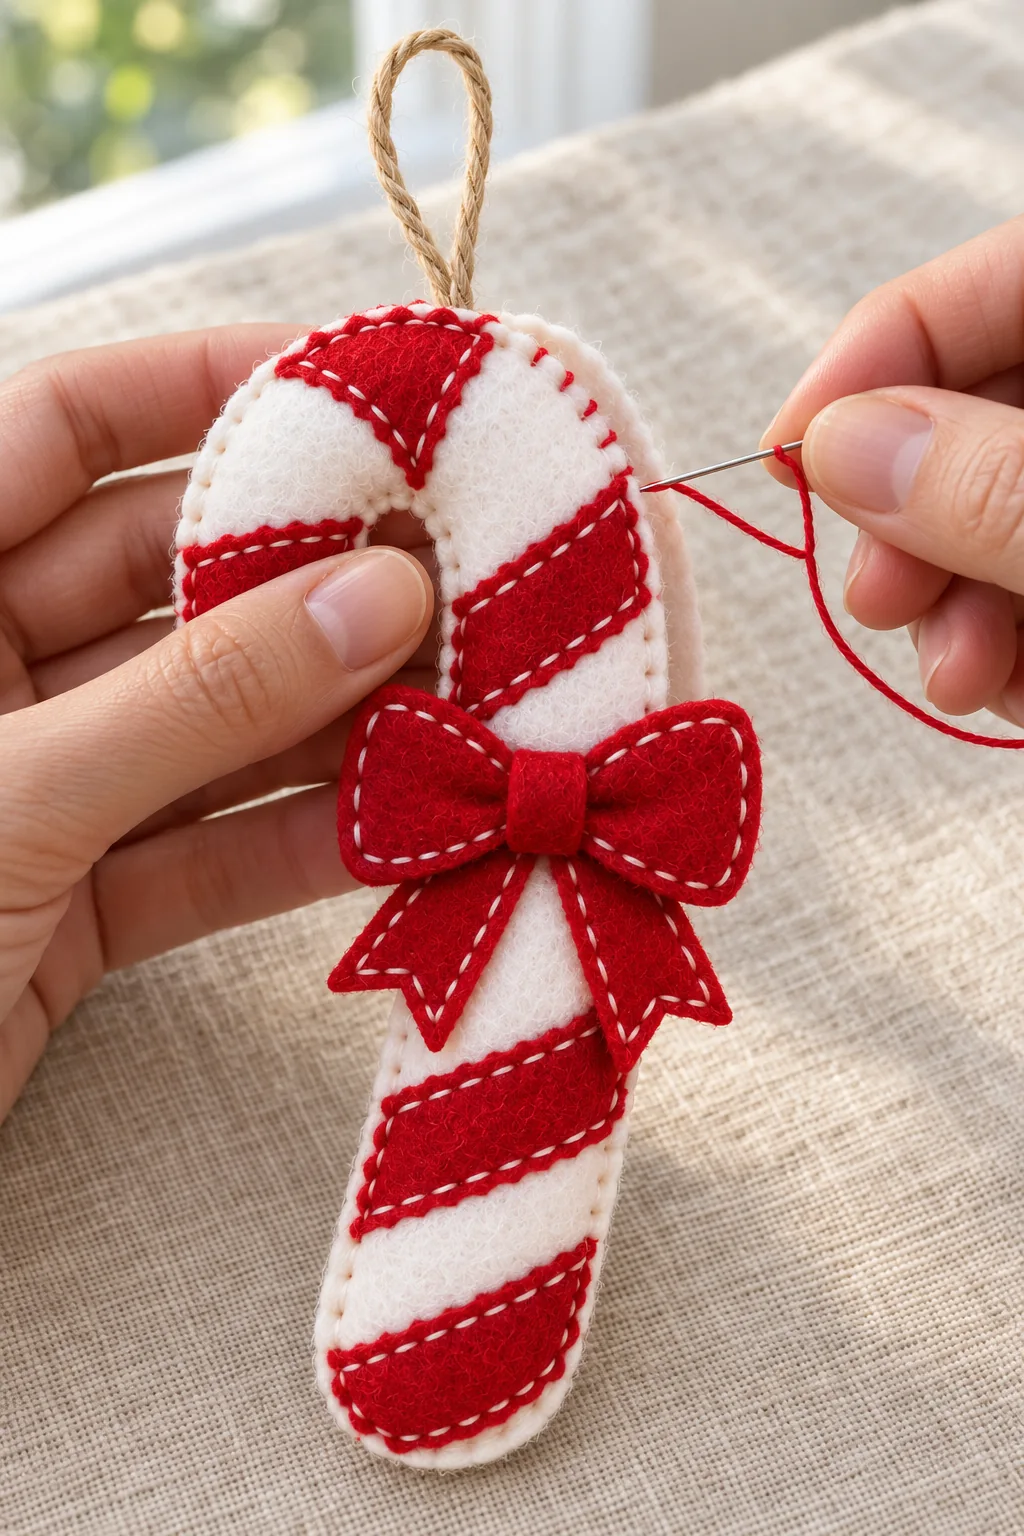
5. Fill lightly and close
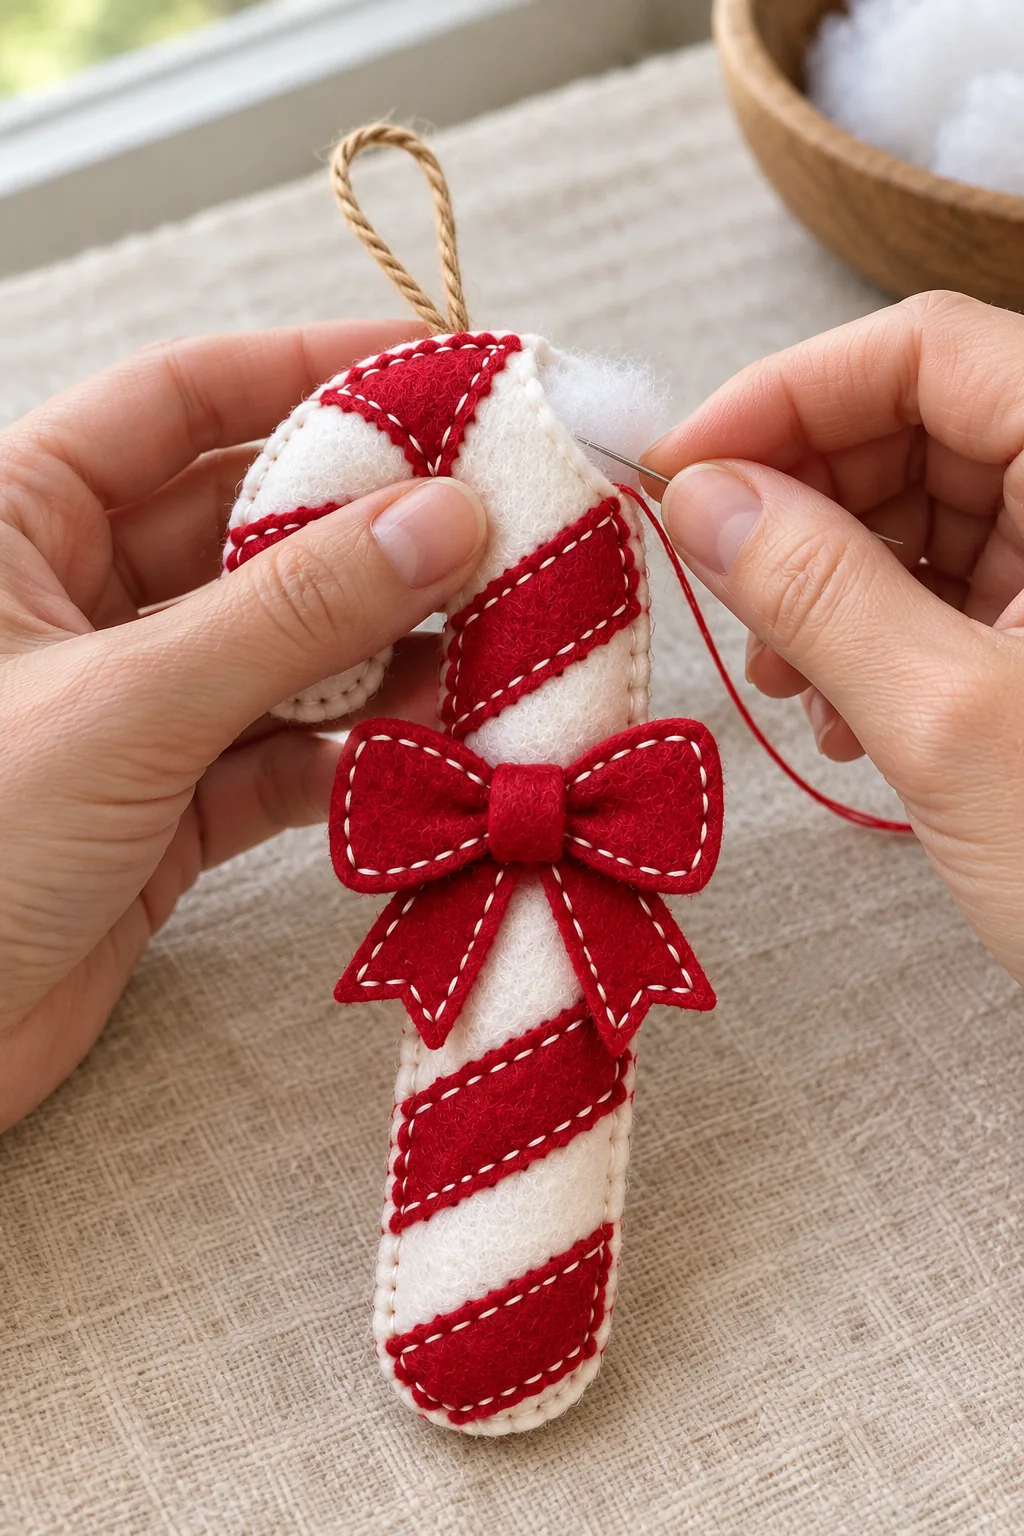
Align the white front and back with the twine ends trapped at the top of the hook. Blanket stitch in white around the edges. Add a little filling before closing. Push small amounts of filling into corners with the blunt end of a pencil rather than pulling hard on the seam. Continue the edge stitch across the gap, hide the final knot between the felt layers, and trim any loose threads.
Tips for a Neat Handmade Finish
Cut matching layers together. This helps the front and back line up when you sew. For a curved edge, turn the felt as you cut instead of making one long scissor stroke.
Keep stitches short. Close spacing is easier around small curves. Matching thread blends into the felt; contrasting thread makes the hand-sewn edge a design detail.
Test the loop. Gently tug the hanging cord before closing the seam. Add a few reinforcing stitches if it moves.
Use very little filling. A softly padded ornament holds its outline better than an overstuffed one.
Care and Storage
Dust the ornament with a soft brush or spot clean with a barely damp cloth. Let it dry flat. Avoid soaking or machine washing, especially when small applique pieces are attached. Store it in a small box between seasons so the felt details keep their shape. This decoration includes small pieces and a hanging cord; keep it away from babies and pets.
Frequently Asked Questions
Can I sew this ornament by hand?
Yes. A running stitch for small details and a blanket stitch for the outside edge are enough. A sewing machine is not needed.
Do I need to stuff the ornament?
No. It also looks lovely flat. If you prefer a padded finish, use only a small pinch of filling.
Can I use fabric glue?
A dot can hold a small piece while you sew, but stitching the decorations and hanging loop makes them more secure.
What paper size is the printable pattern?
The PDF is formatted for A4 paper. Check the printed outline against the size you want before cutting your felt.
Can I change the felt colors?
Yes. You can choose different shades, but keep enough contrast between the main red and white shapes and the tiny features so the design remains easy to see.

Leave a Comment