


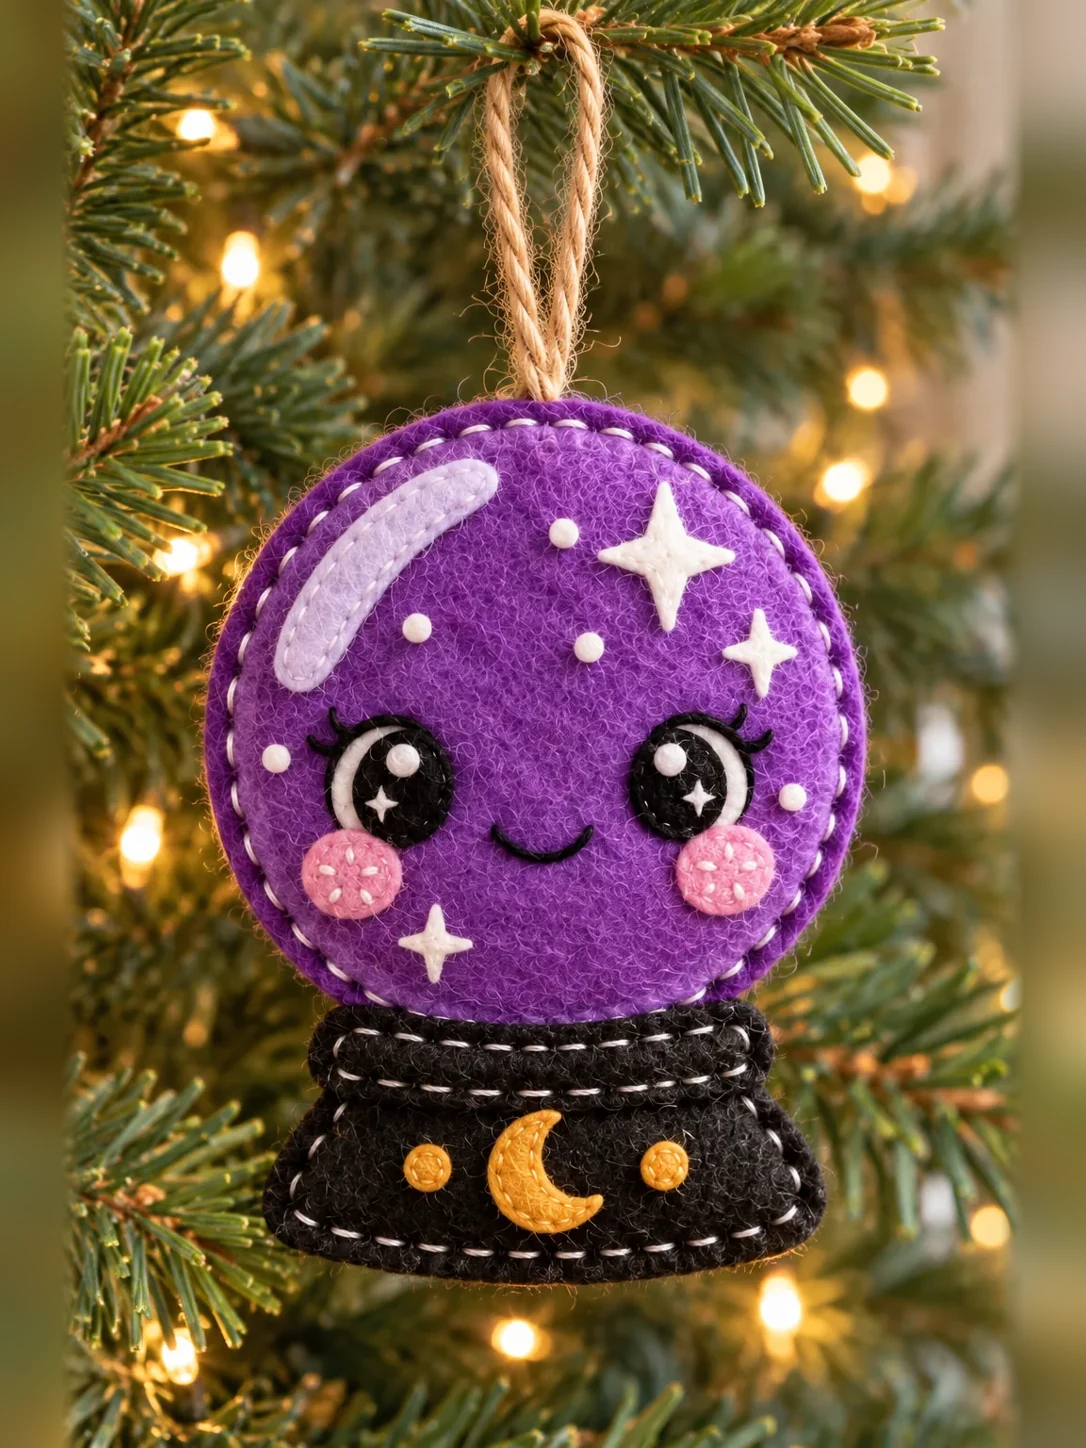
There is something extra sweet about a handmade ornament with a little face. This purple felt crystal ball has bright eyes, rosy cheeks, tiny stars, and a golden moon on its black base. It looks playful on a Christmas tree, but you could also hang it by a craft desk all year.
The project uses simple hand stitches and small felt scraps. I made a printable cutting pattern so you can prepare the pieces before you start. Take your time with the face; the small differences in each stitch are what give your ornament its own personality.
What Is This Felt Crystal Ball Ornament?
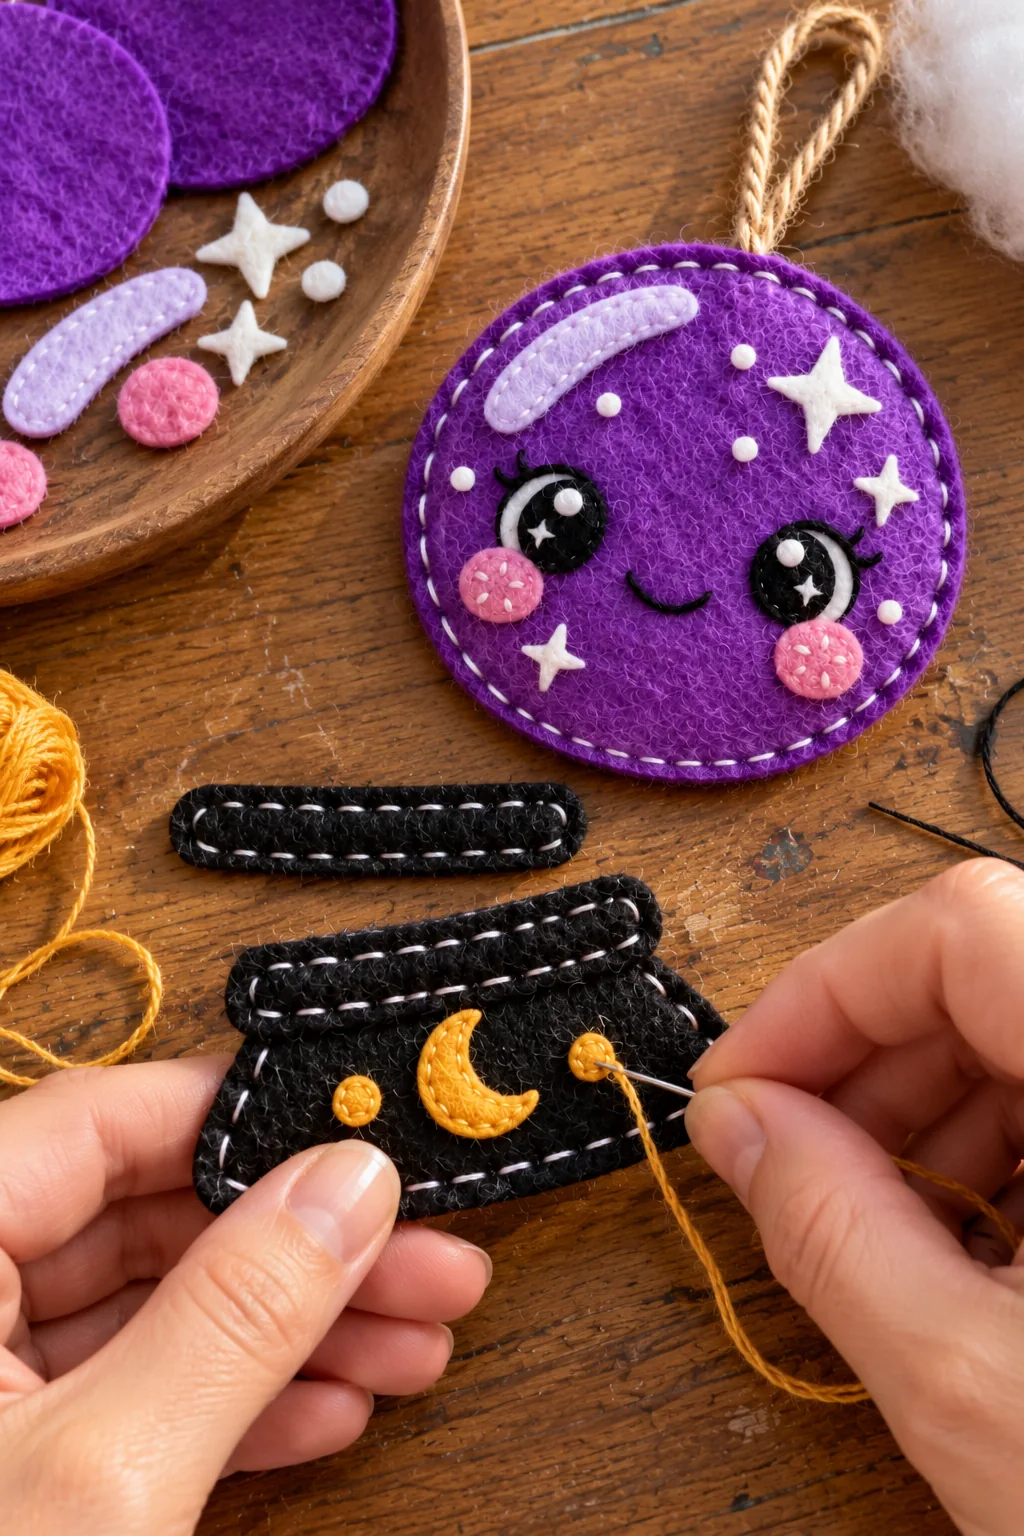
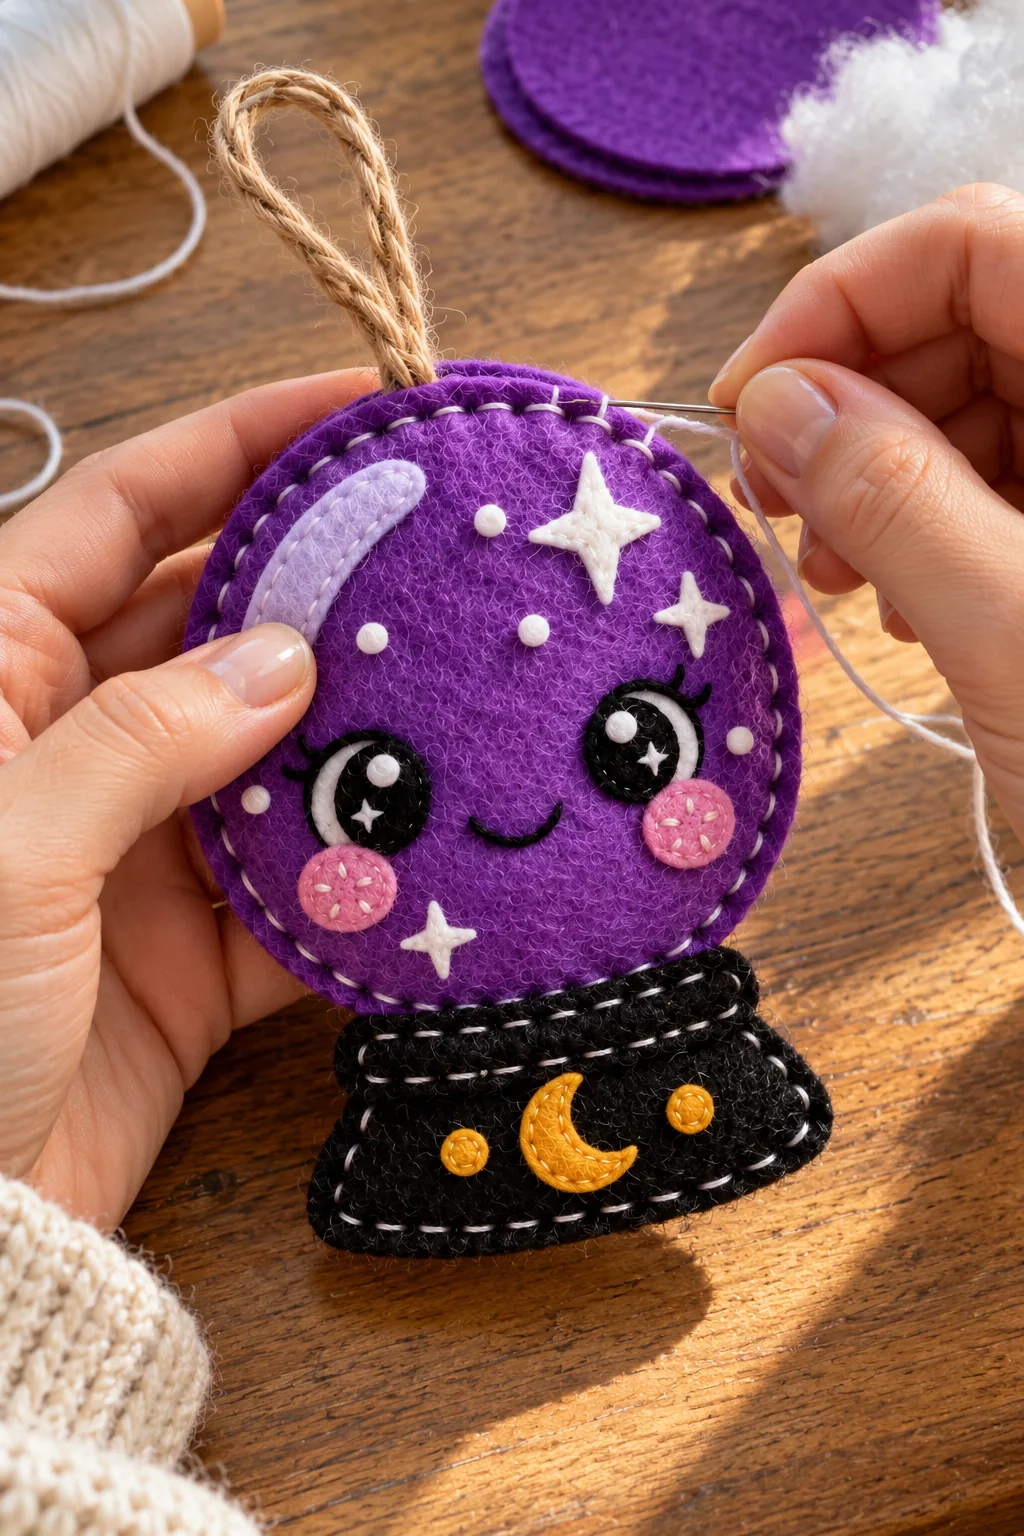
It is a soft, round purple felt ornament with a smiling face and a small black stand underneath. The front has a pale curved shine, white stars and dots, large eyes, and pink cheeks. The stand has a gold moon and two dots. A jute loop lets you hang the finished piece.
The printable pattern has two purple circles, the base pieces, and the larger decoration shapes. The circles are 78 mm (just over 3 inches) across. Once you add the stand, the ornament is about 11 cm (4¼ inches) tall, excluding the hanging loop. The precise size may vary a little with your stitching.
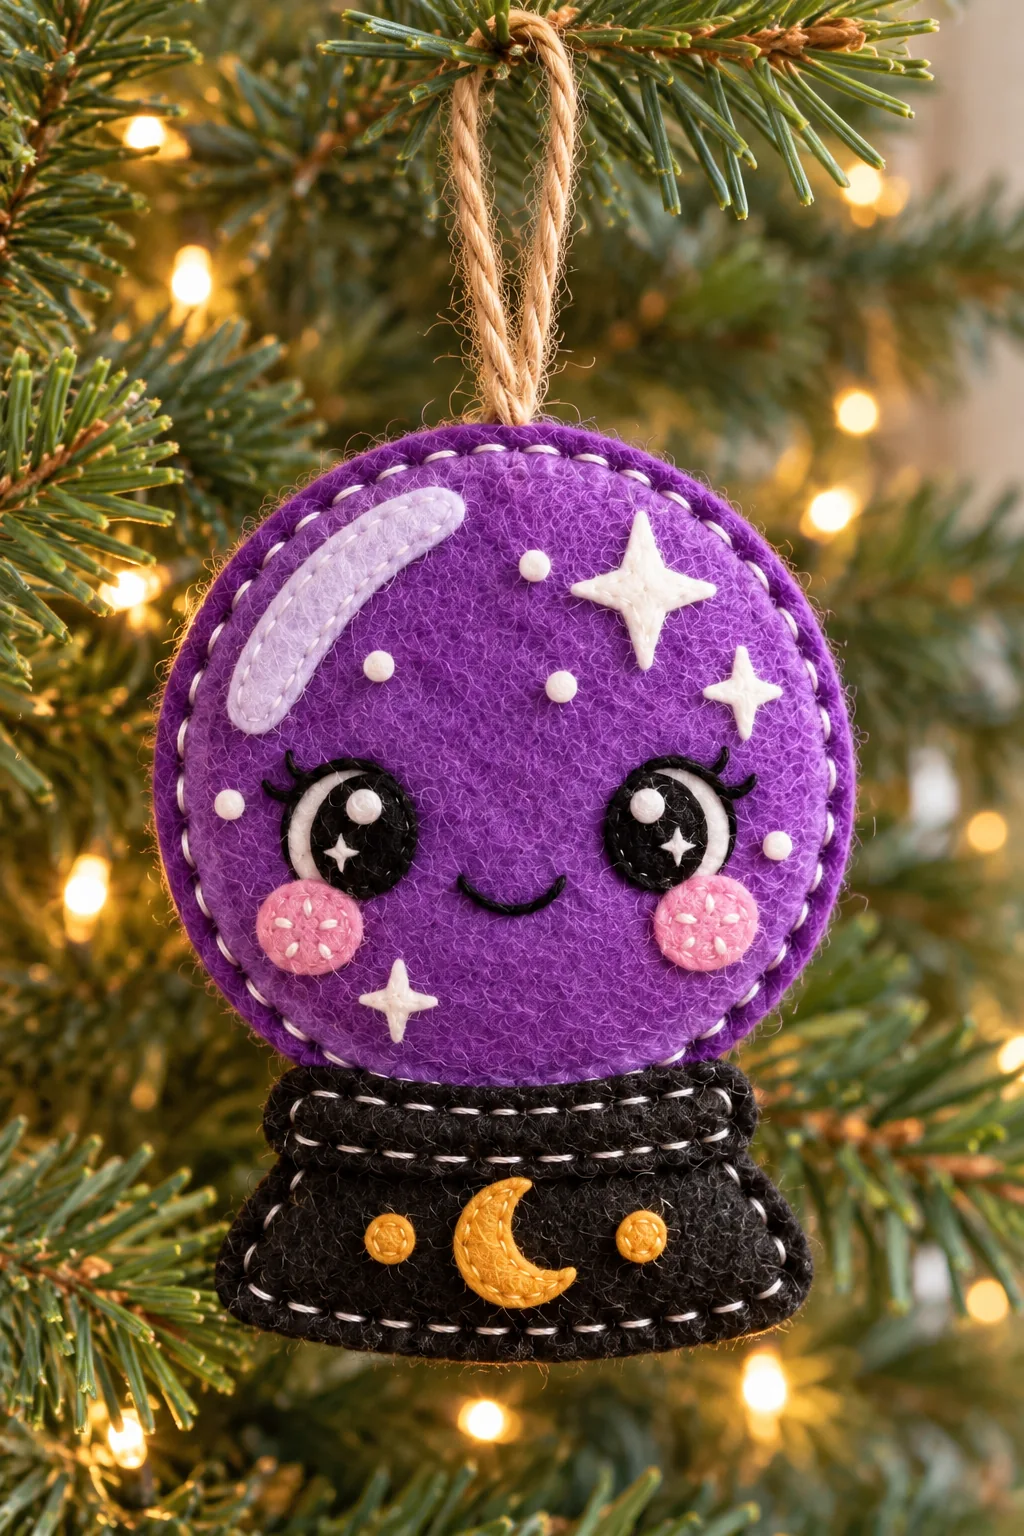
Free Printable Felt Crystal Ball Pattern
Download the Felt Crystal Ball Ornament Free Pattern (PDF)
Print the A4 pattern at 100% or Actual Size. Do not select “Fit to Page.” Measure the 20 mm test square with a ruler before you cut the felt. The solid lines show where to cut; the dashed circles are stitching guides, not extra cutting lines. There is no need to add seam allowance.
Materials and Tools
- Purple felt for the ball front and back
- Black felt for the stand and the eyes
- Pale lilac felt for the curved highlight
- White felt for stars, dots, and eye highlights
- Pink felt for two cheeks; gold or yellow felt for the crescent moon and two base dots
- White, black, purple, pink, and gold embroidery floss or sewing thread
- About 16–18 cm (6–7 inches) of jute twine or narrow ribbon for the hanging loop
- Hand-sewing needle, sharp scissors, pins, fabric marker, and a small amount of polyester filling
Felt around 1–1.5 mm thick is easy to cut and stitch. For the tiniest eye sparkle, you may use a few white stitches rather than trying to cut a very small felt shape.
How to Make a Felt Crystal Ball Ornament
1. Print and cut the felt pieces
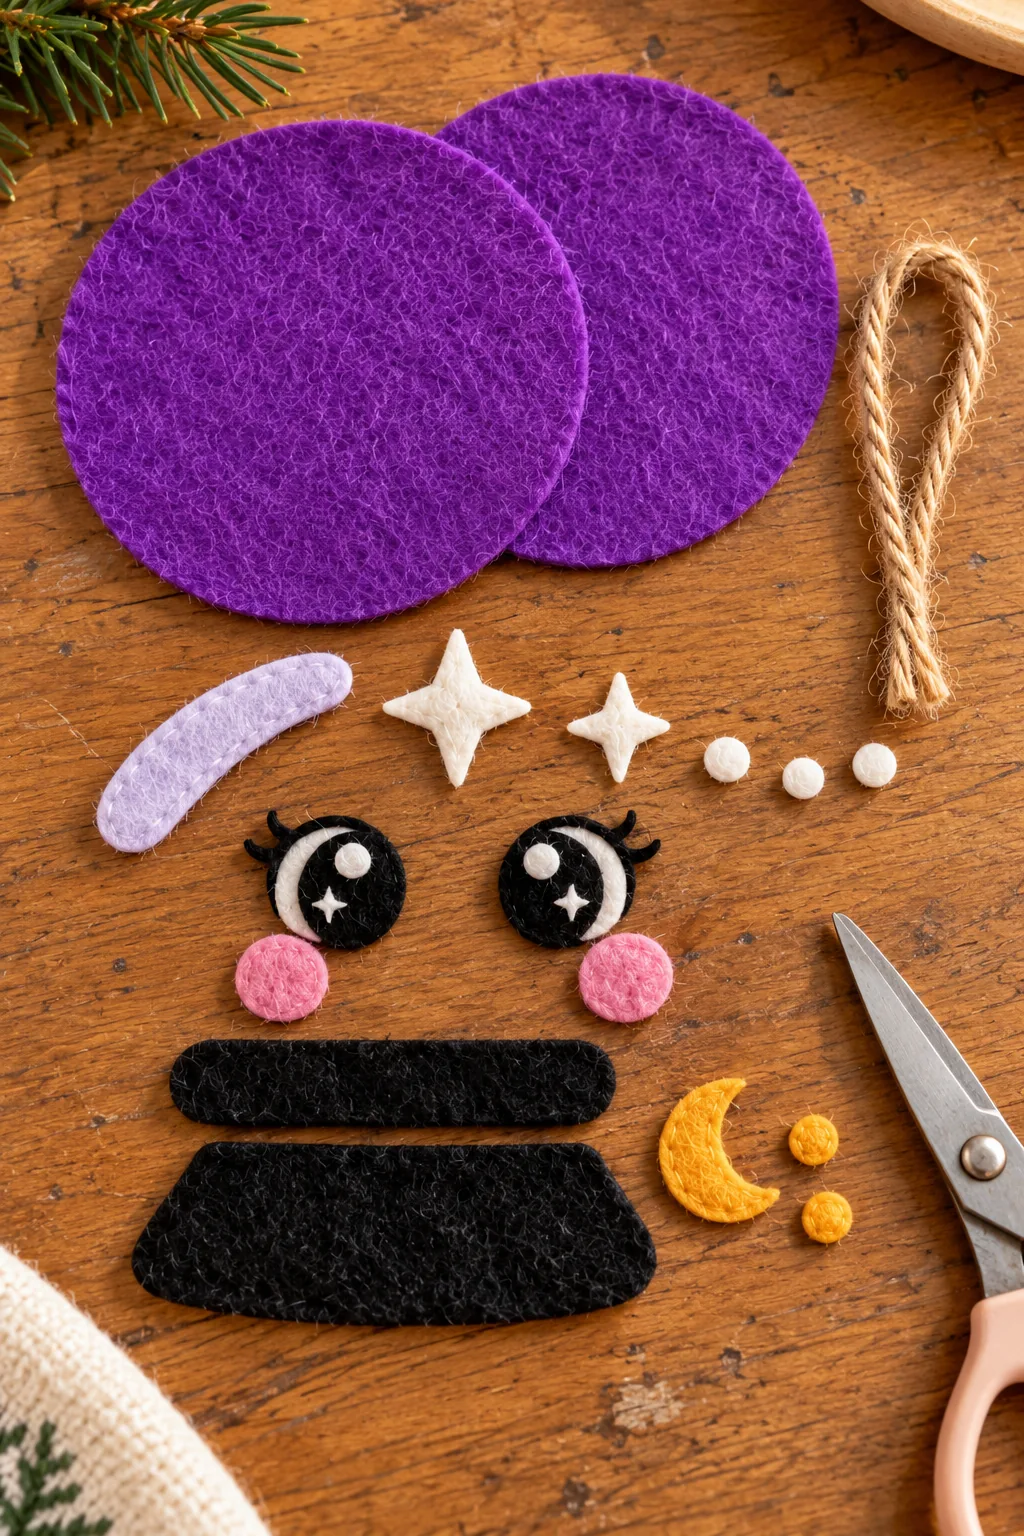
Check the pattern’s test square, then cut two purple ball circles. Cut one narrow black base top and one wider black base bottom. Prepare one pale curved highlight, one large and one small white star, three white dots, two pink cheeks, a gold moon, and two gold base dots. Cut two black eye circles and two small white crescent highlights. Leave the little smile and lashes to stitch with black thread.
Lay everything out before sewing. Place the big star toward the upper right, the curved highlight toward the upper left, and the cheeks below the eyes. Keep the purple back circle plain.
2. Sew the stars and shine to the front
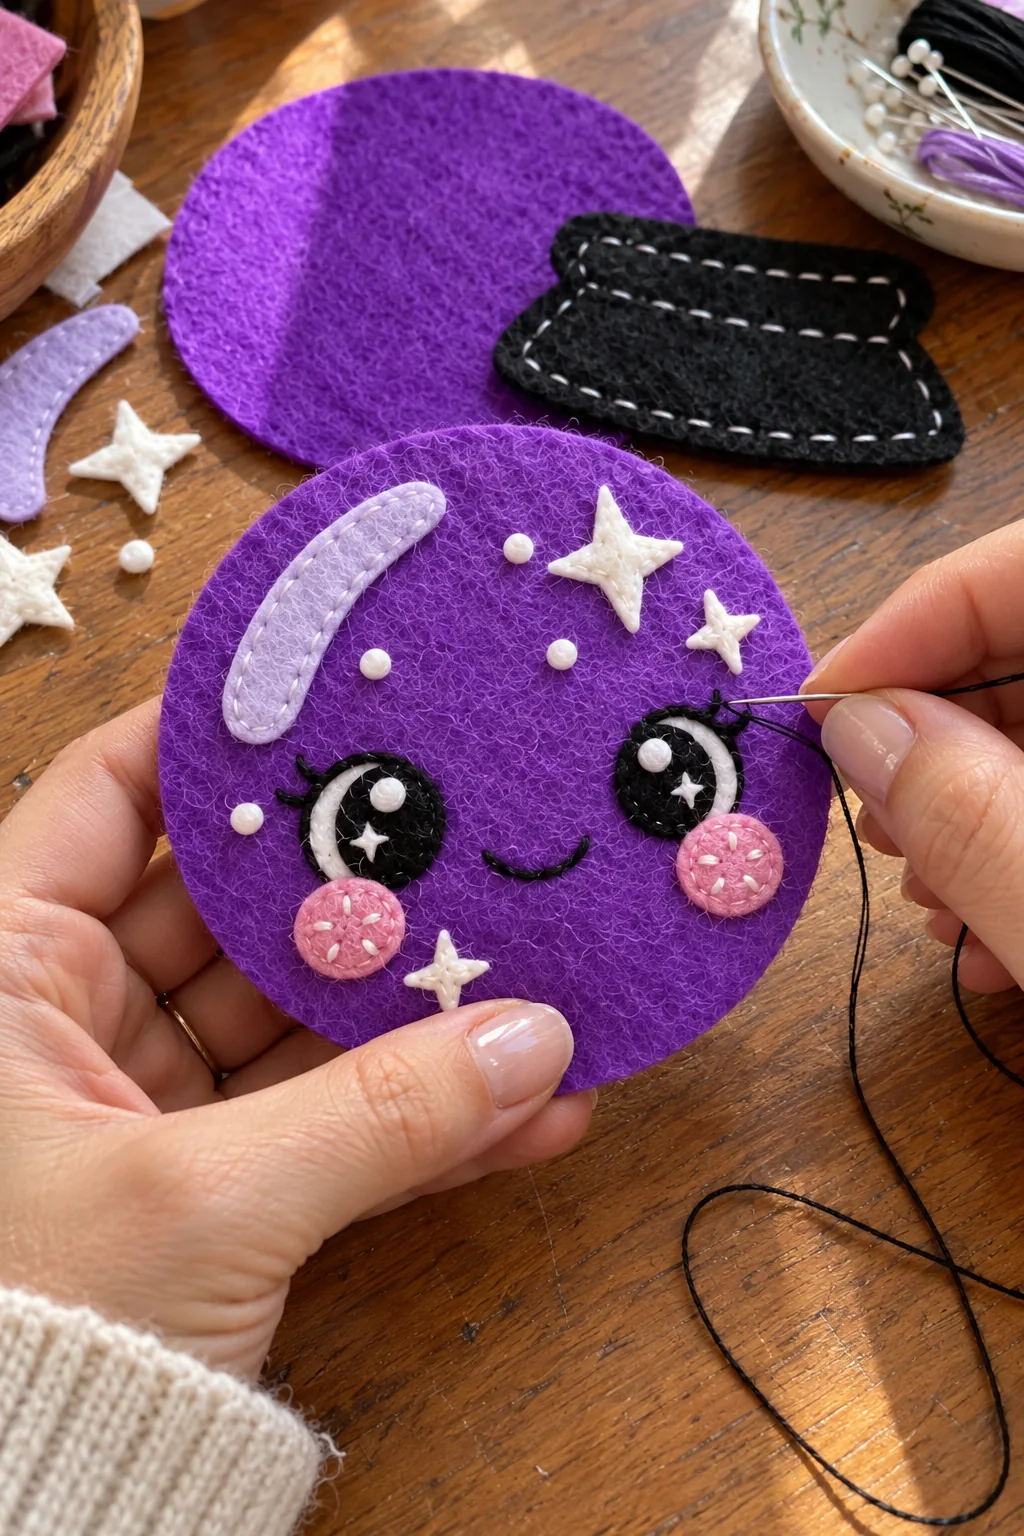
Lay the pale lilac highlight in the upper-left part of the ball front. Hold it with a pin or a tiny dot of fabric glue, then sew around its edge with short, light stitches. Add the two white stars and three white dots. A few extra embroidered dots are optional if you like a fuller night-sky look.
Do this while the front piece is still flat. It is much easier to keep the small appliqués neat before the ornament is padded.
3. Give the crystal ball its face
Place the two black eyes across the lower half of the purple circle, leaving room for a little smile between them. Add a curved white highlight along the inside edge of each eye. Stitch the eyes in place with small black stitches, then add tiny white eye sparkles. Embroider two short eyelashes at the upper outer corner of each eye.
Sew a gently curved black smile between the eyes. Place one pink cheek beneath each eye and stitch it down with pink thread. A few short white stitches on the cheeks give them the same playful look as the finished ornament.
4. Decorate the black stand
Center the gold crescent on the wider black base bottom and place one gold dot on either side. Sew each piece down with small matching stitches. If your dots are too tiny to cut cleanly, embroider two round gold dots instead.
Place the narrow black top band across the upper edge of the wider stand. Its top will sit just under the purple ball. Sew the band to the stand with black thread, or use contrasting white running stitches for the handmade look shown in the photos.
5. Add the hanging loop and close the ball
Fold the jute twine in half. Put both cut ends between the purple front and back at the very top, leaving a loop above the circles. Tack the ends securely to the back circle. Place the decorated front over the back, good sides facing outward, and align the edges.
Blanket stitch around the circle with white thread, about 3 mm in from the edge. When you have a small opening left, add just enough filling to give the ball a soft shape. Do not pack it tightly, or the face may pull out of place. Close the gap and hide the final knot between the felt layers.
6. Attach the stand
Center the finished black stand at the bottom of the purple circle. Let the ball overlap its upper band by about 5–8 mm. Sew through the stand’s top band and both layers of the ball with several firm stitches. Tug gently to make sure it will not swing loose. Hide the knot behind the stand.
Now straighten the hanging loop and give the ornament a final look. Trim any loose thread ends, gently fluff the cheeks, and hang your crystal ball from a sturdy branch.
Tips for a Neat Handmade Finish
Cut the eyes together. Fold a small piece of black felt and cut both eye circles at once so they look similar. They do not have to be perfectly identical.
Keep the face balanced. Pin the eyes, cheeks, and smile in place before sewing. Step back and check the expression while the front is still flat.
Use short stitches on curved edges. Smaller stitches follow the circular shape more easily and help the purple layers stay aligned.
Secure the loop well. The hanging cord carries the whole ornament. Stitch through both ends several times before closing the top seam.
Care and Storage
Spot clean with a barely damp cloth and let the ornament dry flat. Do not soak or machine wash it. After the holiday season, place it in a small box so the stand and felt stars do not get crushed. This decoration has small pieces and a hanging cord, so keep it away from babies and pets.
Frequently Asked Questions
Can I sew this ornament without a machine?
Yes. The entire ornament can be made by hand with running stitches, a backstitch for the smile, and a blanket stitch around the ball.
Do I have to add stuffing?
No. You can leave the ball flat. A small pinch of filling gives it a soft, rounded look without making it heavy.
What if I cannot cut the tiny eye details?
Embroider the little white sparkles and gold base dots instead. You can also use short white stitches for the dots in the sky.
Can I use another color?
Of course. Deep blue or pink felt can be lovely, as long as the eyes, stars, and stand still contrast with the ball.
What paper size is the pattern?
It is an A4 page. Print at actual size and measure the 20 mm square first. If printing on US Letter, make sure every outline fits without scaling.
Can I glue the decorations?
A tiny amount of fabric glue can hold small pieces while you sew, but stitching the face, stand, and hanging loop makes the ornament more secure.

Leave a Comment