


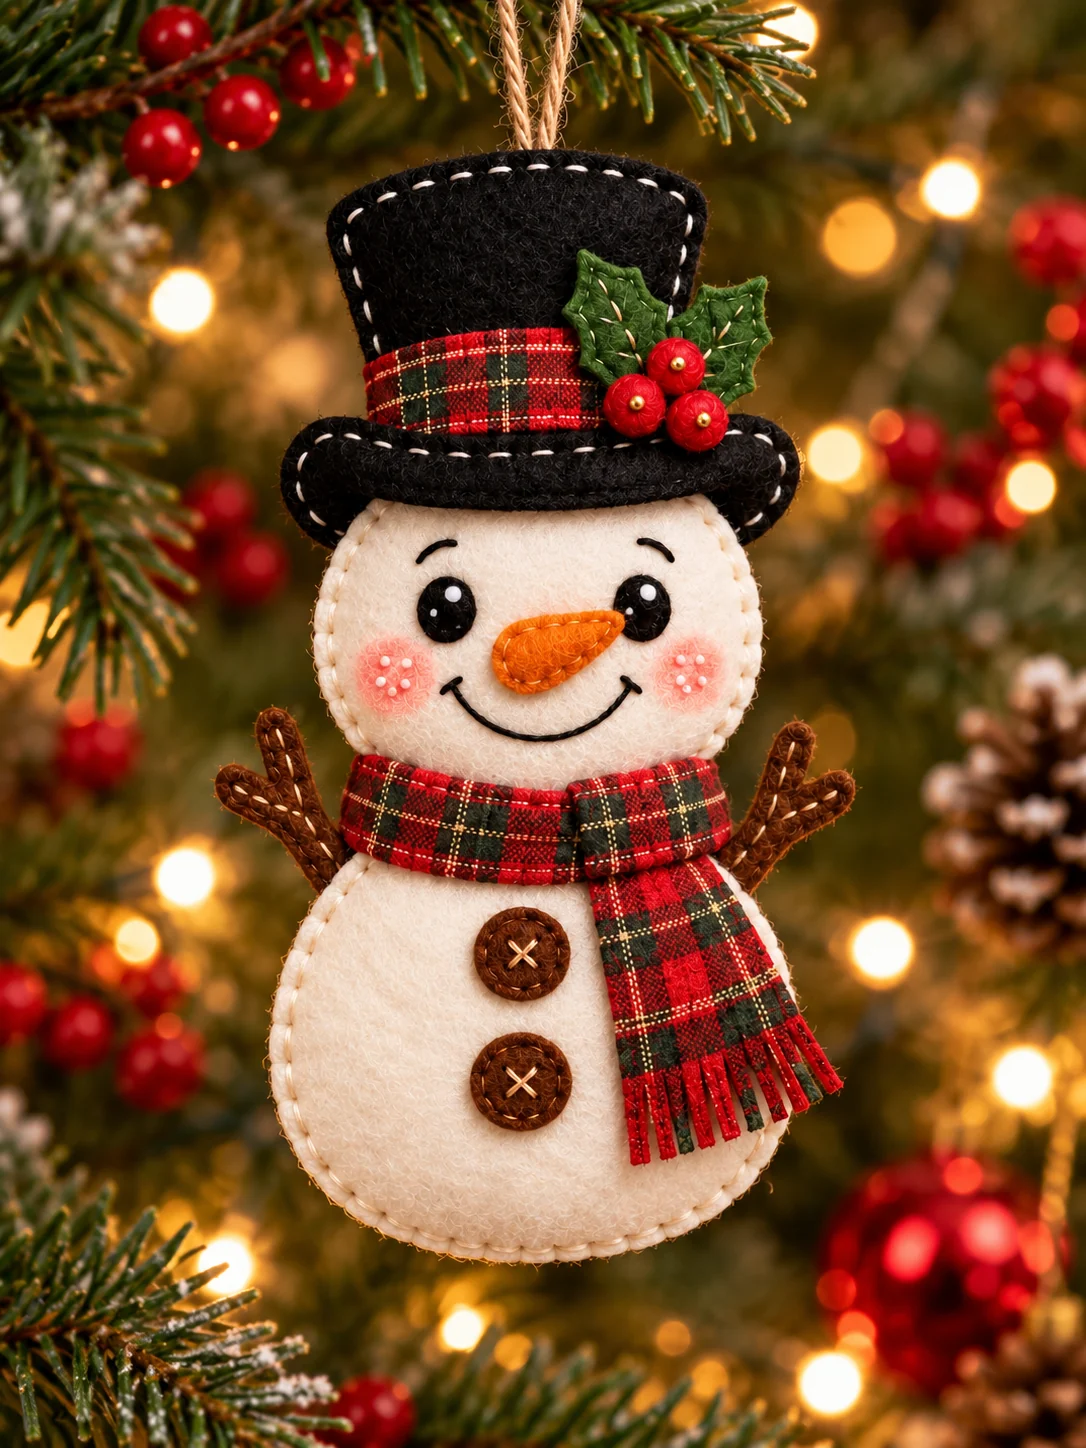
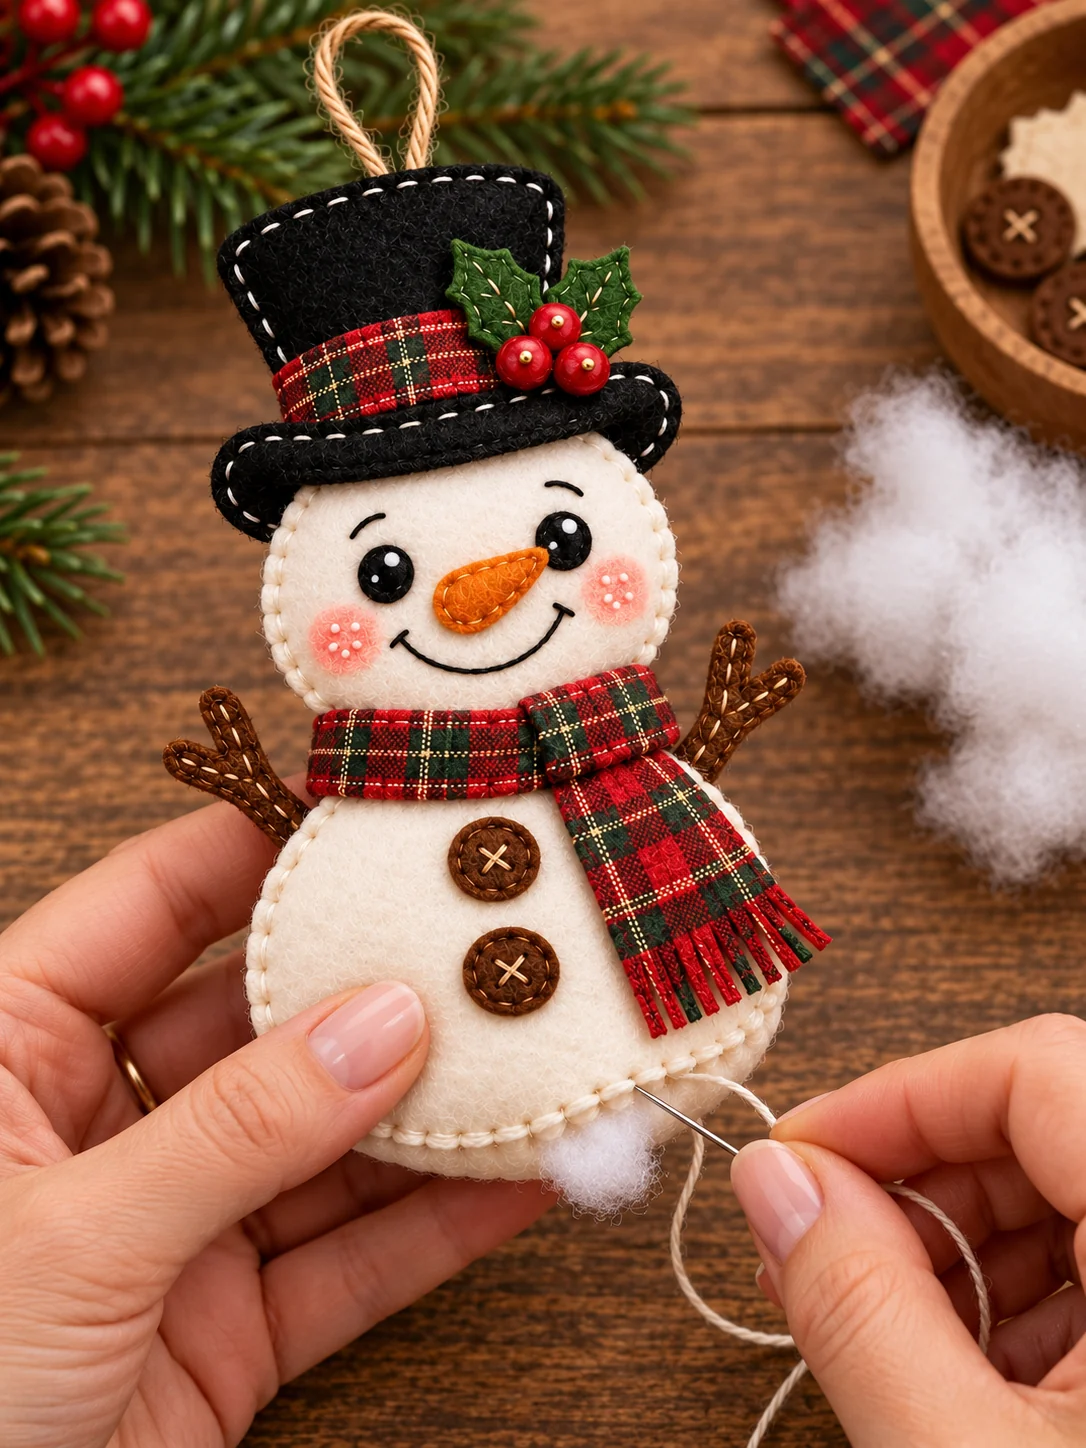
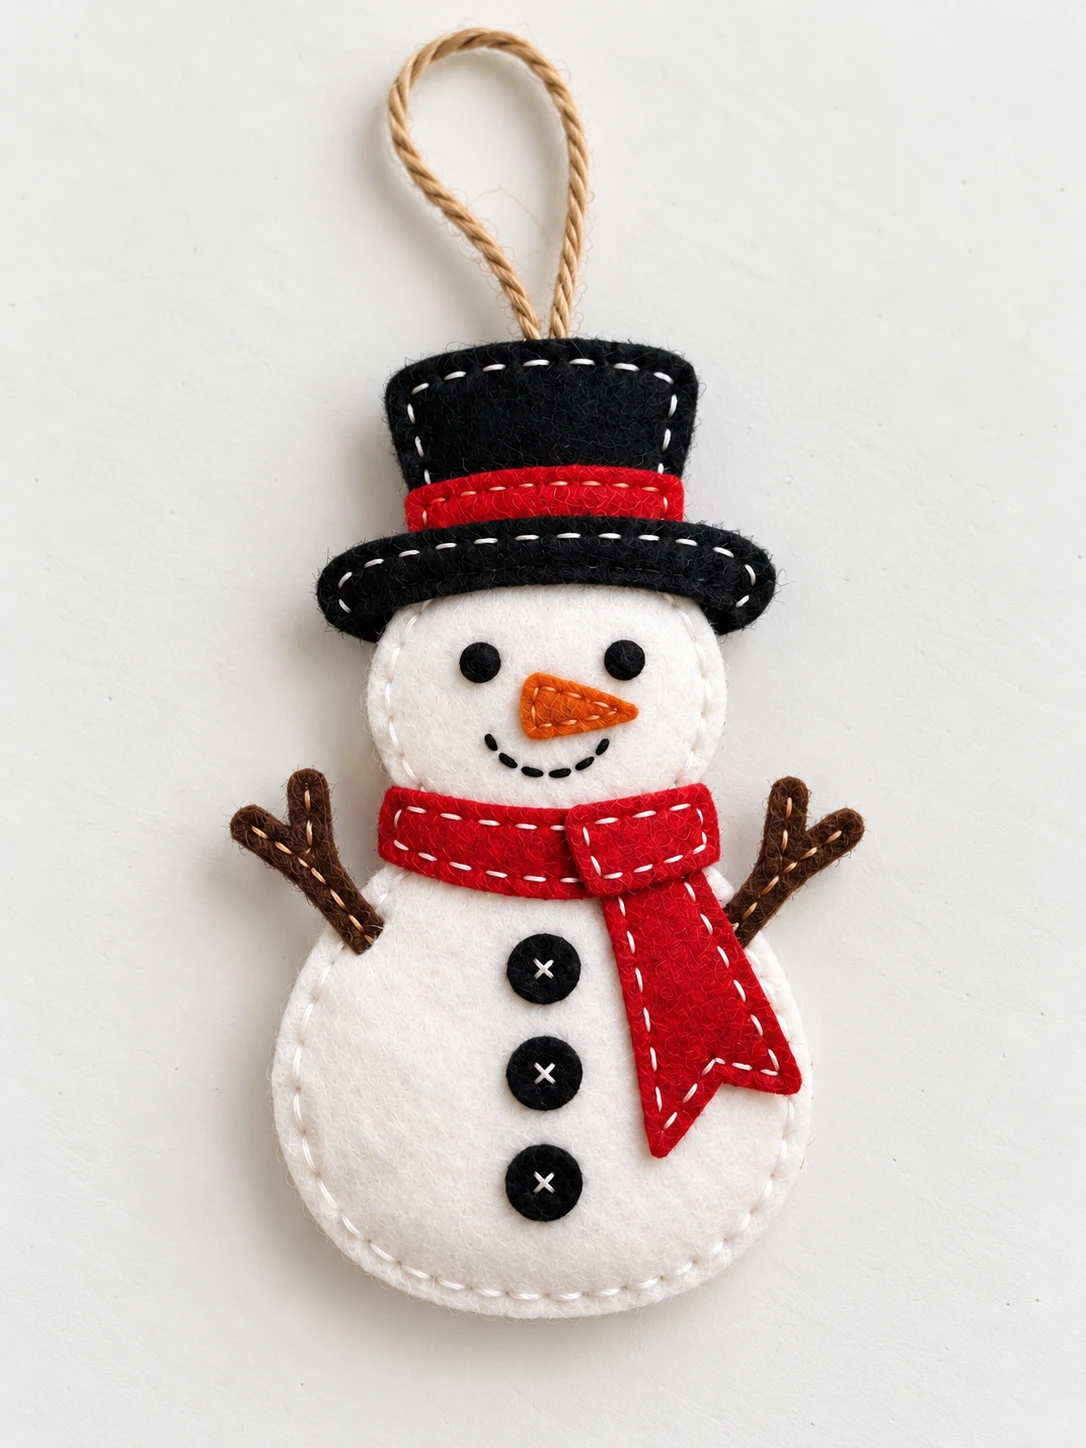
Every year, I find room for one more cheerful snowman on the Christmas tree. This little felt one has a tall black hat, a cozy plaid scarf, and a smile that makes the whole branch feel warmer.
I love the tiny holly berries on his hat and the stitched brown buttons. They look detailed, but the shapes are simple enough to sew slowly with scraps from other holiday projects.
If you have an evening to settle in with a needle and thread, make one with me. The free pattern below gives you the cutting shapes, and I’ll show how to build the face, body, hat, and hanging loop.
What Is This Felt Snowman Ornament?
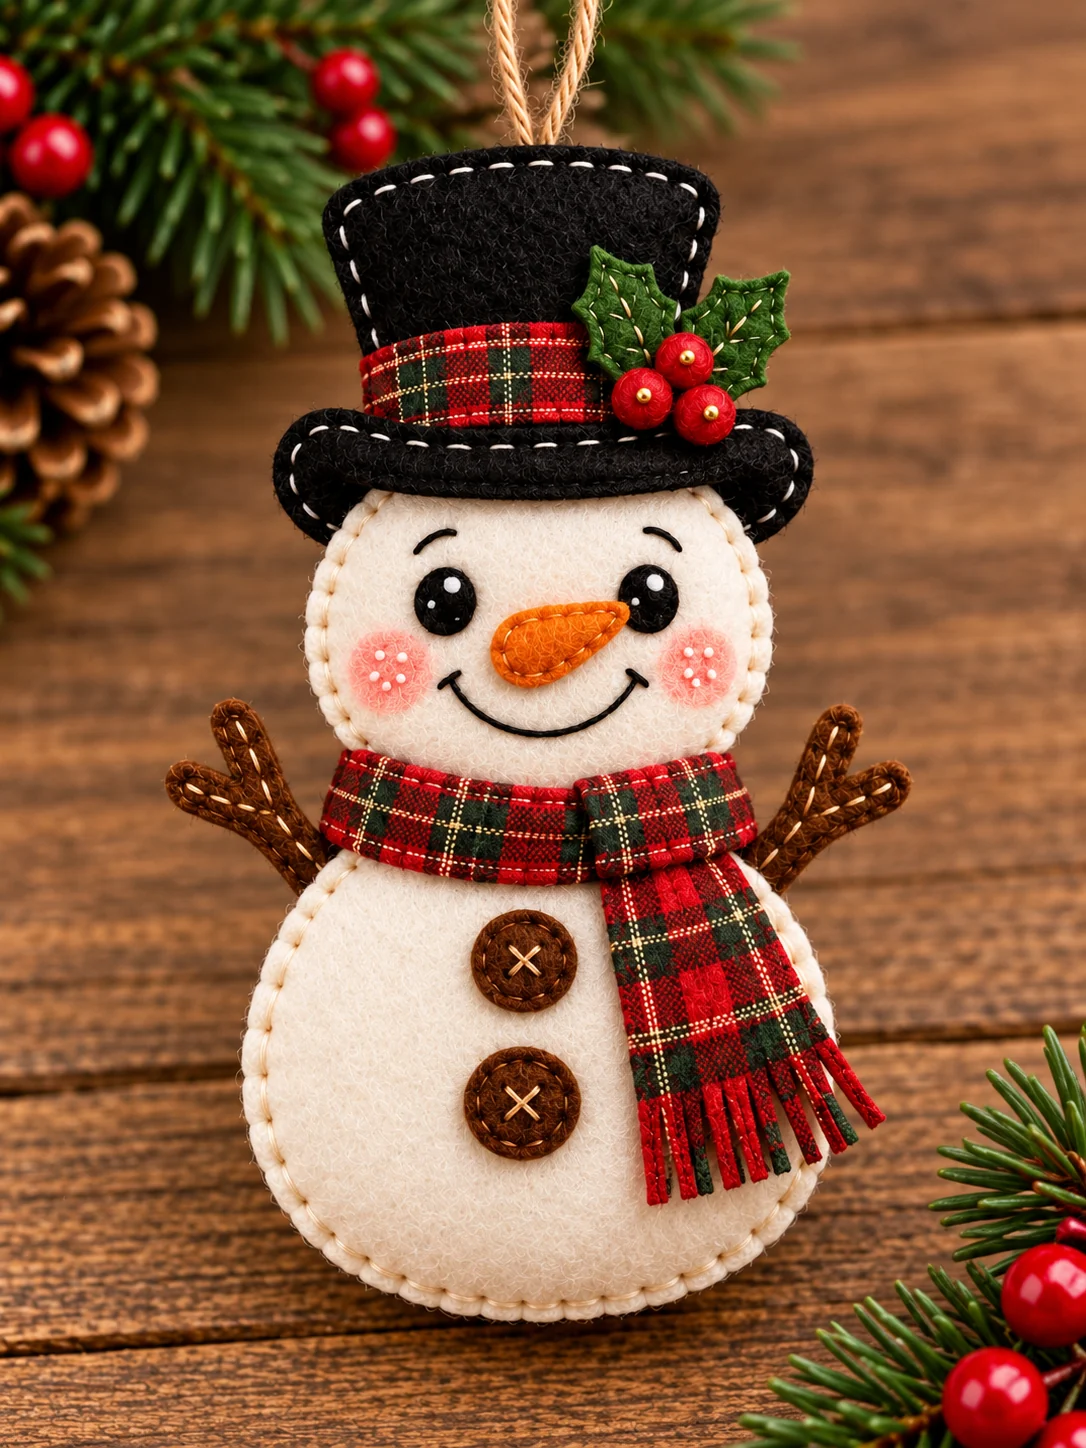
This snowman is a softly padded hand-sewn ornament with a round cream-white head and a larger round body. A black top hat sits above his carrot-orange nose, bright black eyes, rosy cheeks, and curved stitched smile. Brown felt twig arms peek from behind the body, with two brown buttons down the front. The red-and-green plaid scarf and hat band bring the colors together, while two green holly leaves and three red berries finish the hat. A twine loop at the top makes it ready to hang from the tree or tie onto a present. The design uses basic running and blanket stitches, with most details worked on flat pieces before assembly.
Free Printable Felt Snowman Pattern
Download the felt snowman ornament free pattern (PDF).
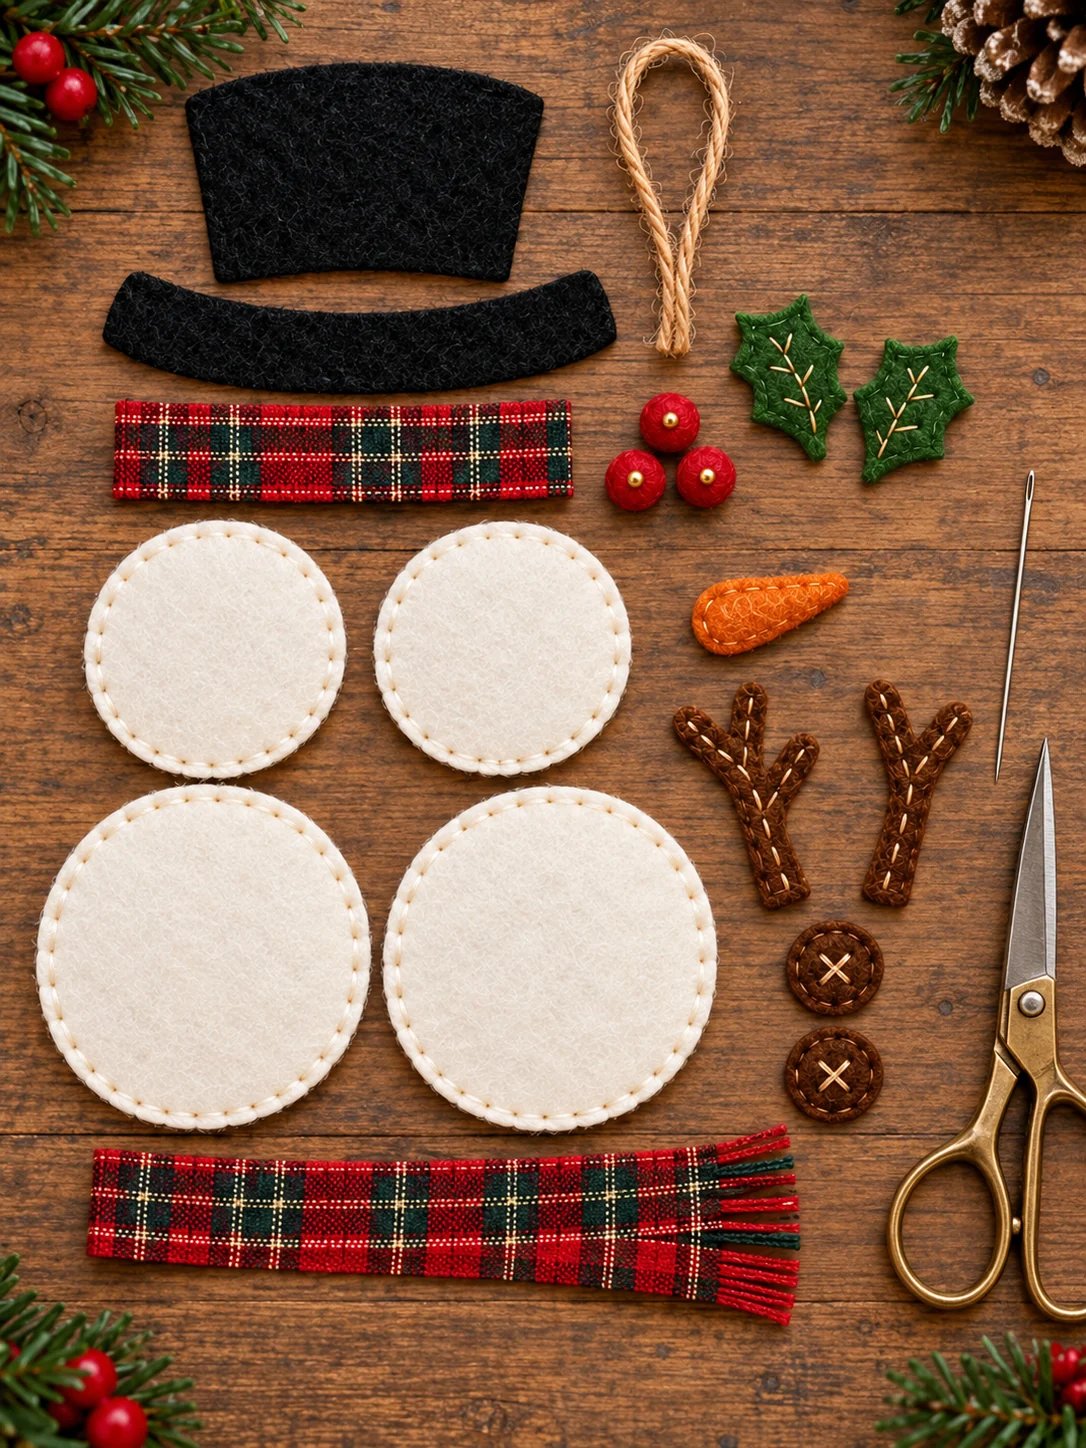
The one-page A4 printable includes outlines for the hat top, band, brim, head, body, nose, two twig arms, two buttons, scarf, two holly leaves, and three berries. Print at Actual Size or 100% with “fit to page” turned off. Cut along the solid lines; the dashed inner lines show the suggested stitch path and should not be cut as separate pieces. Hold the paper head and body together before tracing to see the finished proportions.
I checked the blueprint against the finished ornament and found one important correction. The source labels the head and body as one piece each, but a stuffed snowman needs a front and a back for both shapes. The PDF therefore adds a clear note to cut TWO head circles and TWO body circles from cream felt. The eyes, smile, brows, cheek blush, and white freckles can be embroidered or made with small felt scraps. For the plaid details, use a scrap of plaid felt or fabric cut with the same hat-band and scarf outlines.
Materials and Tools
Affiliate disclosure: This post contains Amazon affiliate links. If you buy through these links, I may earn a commission at no extra cost to you. As an Amazon Associate I earn from qualifying purchases.
- Cream or white felt for two head circles and two larger body circles
- Black felt for the top hat, brim, and tiny eyes
- Red-and-green plaid felt or fabric for the hat band and scarf
- Orange felt for one carrot nose
- Brown felt for two twig arms and two round buttons
- Green felt for two holly leaves and red felt for three berries
- Cream, black, orange, brown, green, and red thread or embroidery floss
- A sewing needle, small scissors, pins or clips, and a removable marker
- A small handful of polyester filling, a short twine loop, and the printed PDF
A firm felt gives the twig arms and hat a neat outline. If you use woven plaid fabric for the scarf, turn under the long edges or use a little fabric glue to prevent fraying; the fringe at the end is intentional. Keep the stuffing light so the head and body stay gently rounded. A dab of temporary glue can hold the tiniest berries while you take the first few stitches.
How to Make a Felt Snowman Ornament
1. Print and cut the pieces
Cut the paper shapes from the PDF. Trace and cut two white head circles and two white body circles, remembering the corrected quantities on the printable. Cut the black hat top and brim, one plaid band and scarf strip, orange nose, two brown twig arms, two brown buttons, two green leaves, and three red berries. Place the pieces on the table in the order you will use them. The black eyes may be cut from small scraps or embroidered later. Test the scarf around the neckline before stitching, leaving one end long enough to hang down with a fringed tip.
2. Give the snowman a friendly face
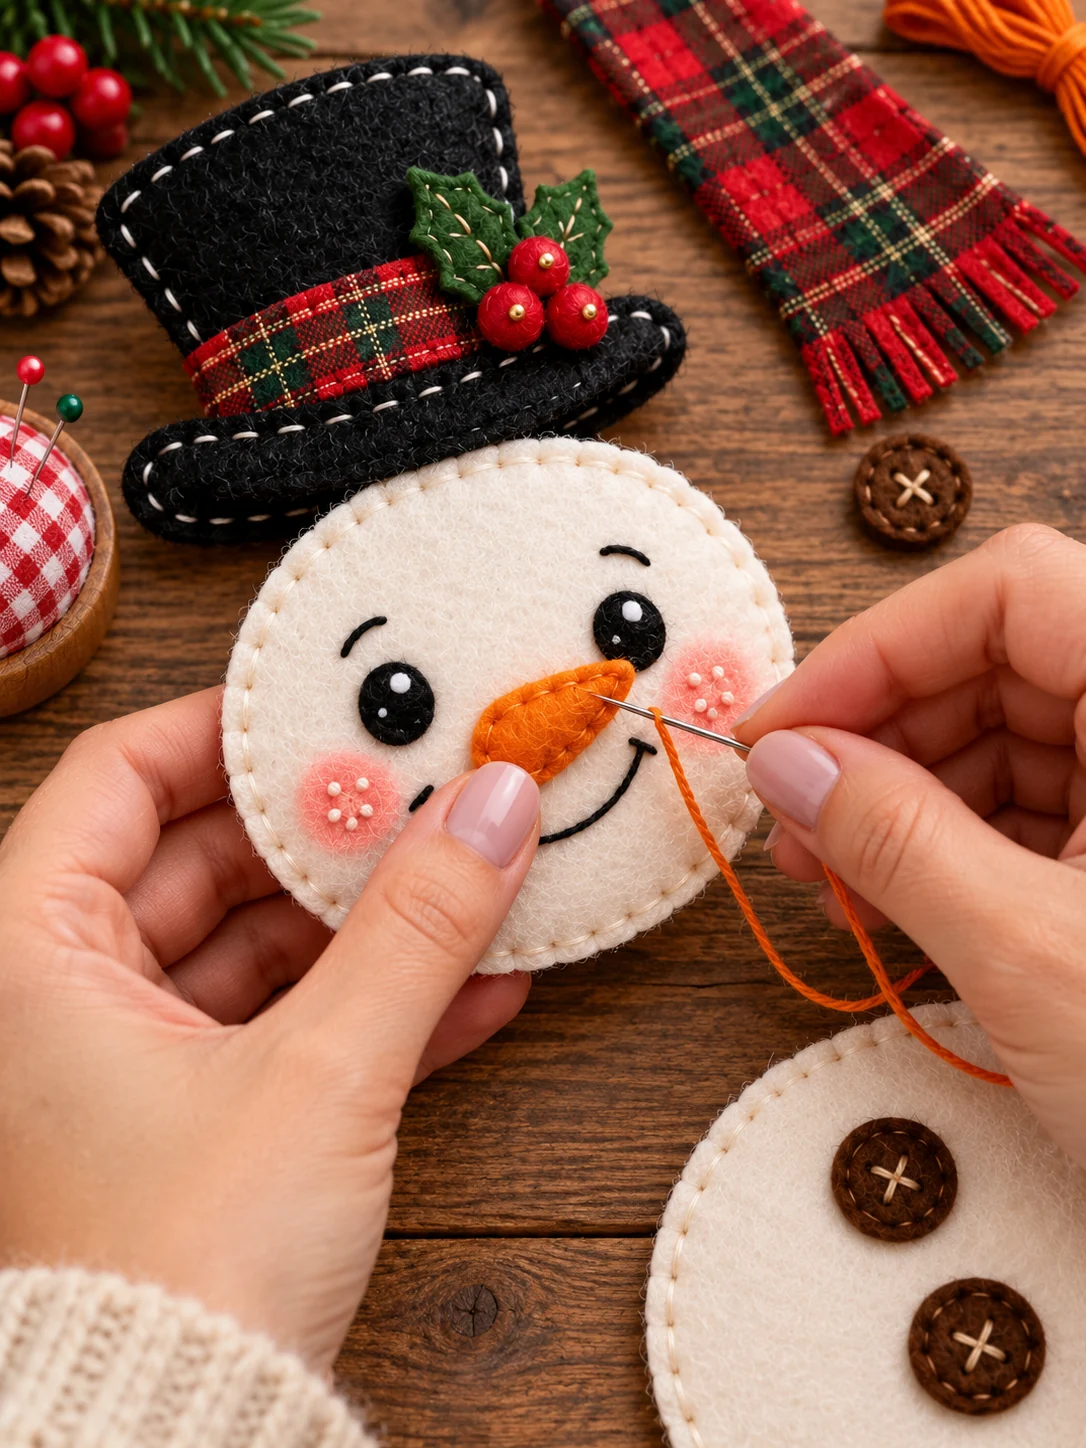
Work on one white head circle while it is still flat. Position two black eyes evenly above the carrot nose. Sew the eyes down, then add tiny white highlight stitches to make them shine. Place the orange nose at the center and stitch around its edge with orange thread. Draw a curved smile lightly with a removable marker and embroider it in black, adding a small upturned stitch at each end. Two short brows sit over the eyes. Use pink thread or a little blush for the cheeks, and dot them with a few small white stitches like the reference photo.
3. Make the hat and holly
Sew the plaid band across the black hat top, then place the curved black brim over its lower edge. Stitch both with short, even stitches. Add a small green vein stitch to each holly leaf, overlap the leaves at one side of the band, and secure three red berries over their stems. Pin the hat behind the head front, letting the brim overlap the top edge. Stitch firmly through the base so it will not tilt when the snowman hangs. Fold the twine into a loop and anchor its two ends behind the top of the hat or head with several stitches.
4. Sew the body details and twig arms
Position two brown buttons down the middle of the white body front. Sew a small cream cross at the center of each, catching the felt beneath. Place the twig arms behind the upper sides of the body and secure their narrow bases with a few stitches. Check from the front that both branches show and are balanced. If your arm felt is very soft, stitch two matching layers together for each arm or keep the branch fingers slightly wider. Leave the scarf loose until the head and body have been joined.
5. Stuff and join the snowman
Place the two head circles together with their good sides facing outward. Blanket stitch around the edge, leaving a small opening, add a little filling, then close. Repeat with the two body circles, catching the arm bases in the side seam. Make the body softly plump rather than firm. Overlap the bottom of the head slightly over the top of the body and sew the layers together through the back where the seam will be hidden by the scarf. Tug gently to make sure the join and the hanging loop are secure.
6. Wrap the plaid scarf
Wrap the plaid strip around the neck to cover the head-to-body join. Let one end fall down the front, and make narrow snips at its tip for fringe without cutting into the sewn part. Tack the scarf in place with a few hidden stitches at the back and beneath the hanging end. Fluff the hat brim, smooth the body, and check that the ornament hangs straight. A little asymmetry is lovely on a handmade snowman.
Helpful Sewing Tips
Sew the eyes, nose, smile, and buttons before stuffing. It is much easier to hide the knots on the reverse of a flat panel. For clean curves, keep the blanket stitches close together and rotate the felt in your hands after every few stitches. The white felt can show pencil marks, so use a removable fabric marker and trace on the back. If you prefer a flat ornament, skip the filling and join the pairs with the same outer stitch.
The scarf is also a handy place to use a favorite holiday fabric scrap. If its fringe pulls loose, use plaid felt instead or put a tiny dot of clear fabric glue just above the cut ends. For a child-friendly decorating session, an adult can cut and sew the small pieces while children choose colors and arrange the face. The tiny berries and twine loop mean the finished ornament is best kept out of reach of babies and pets.
More Christmas Felt Patterns
This snowman looks sweet beside the felt Christmas stocking ornament. For more character faces, try the felt reindeer cat pattern and the felt Santa cat ornament. Mix a few handmade designs on one branch or attach them to wrapped gifts.
Care and Storage
Dust the snowman gently with a soft brush and spot clean with a barely damp cloth if needed. Let it air dry flat. Do not soak the plaid fabric, felt, or tiny holly details. Store the ornament in a small box with tissue supporting the hat and twig arms, so heavier decorations do not bend them during the year.
Frequently Asked Questions
Why do I need two head and body pieces?
The supplied drawing shows one outline for each shape, but a stuffed ornament needs matching front and back layers. The printable includes a corrected cut-two note.
Can I use fabric for the plaid scarf?
Yes. A small plaid fabric scrap works beautifully. Turn under or secure the long edges so they do not fray, and leave the end fringe loose.
Can I make the snowman flat?
Yes. Leave out the filling and sew the front and back layers together. A flat version is easy to tie to gift wrapping.
What size paper should I print on?
The one-page PDF is designed for A4. Print at 100% or Actual Size and check the paper shapes before cutting the felt.

Leave a Comment