


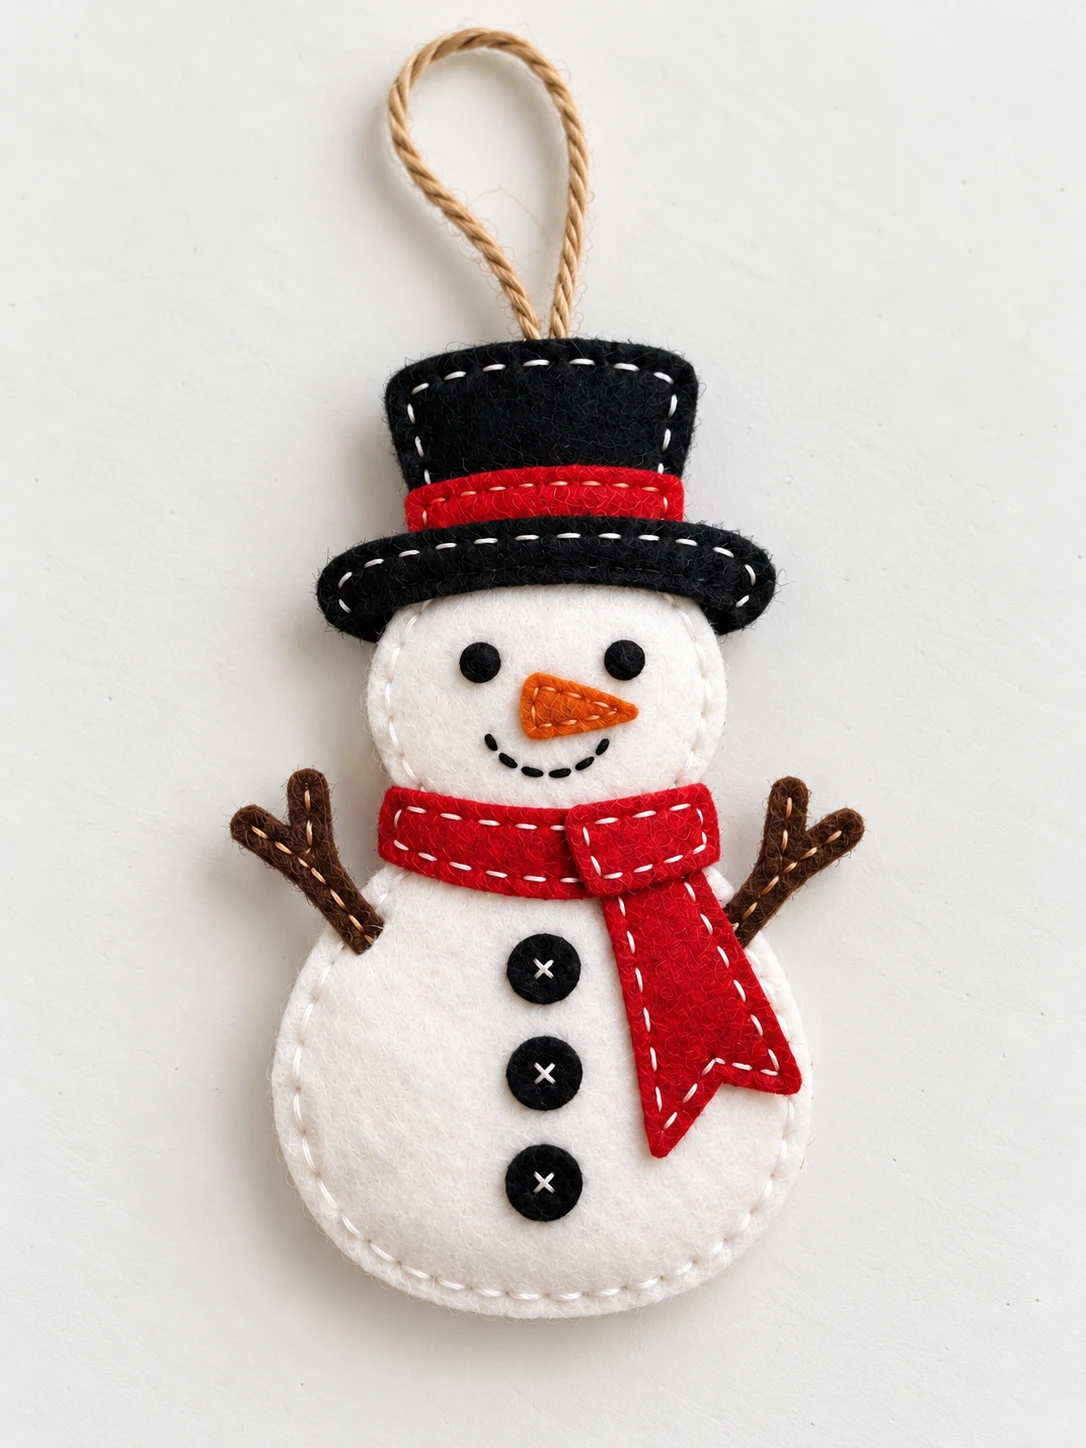
I love how a red scarf and a little black hat can give a simple felt snowman so much character. This winter ornament has a softly rounded white body, twig-shaped arms, a carrot nose, and three small black buttons.
In this tutorial, I’ll walk you through the cutting and sewing order, from the tiny facial details to the strong hidden hanging loop. Everything is sewn by hand, and the body needs only a light layer of stuffing.
The matching pattern has colored and black-outline templates, with measurements and cutting quantities. A separate illustrated guide shows the assembly. The flat assembled design measures 150 mm tall, including the hat and excluding the loop; the finished stuffed ornament may be slightly smaller.
Before You Start
Use firm craft felt approximately 1–1.5 mm thick. The cut edges remain visible, so there is no turning step. A 2 mm edge-stitch allowance is already included wherever two layers are joined. Do not enlarge the templates or add another allowance.
The hat is made from flat felt layers. It is not a hollow, sculpted top hat. This makes the construction easier to manage while keeping the familiar black crown and wide brim. The scarf wraps around the stuffed neck and is fitted after the body is closed.
This is a decoration, not a toy. Small felt pieces, stuffing, and the hanging cord should be kept away from young children and pets.
Materials You Will Need
- White felt: 180 × 130 mm
- Black felt: 160 × 100 mm
- Red felt: 150 × 85 mm
- Brown felt: 75 × 90 mm
- Orange felt: a 25 × 15 mm scrap
- A small handful of polyester stuffing
- 260 mm of twine, approximately 1–1.5 mm thick
- Matching embroidery floss, plus white and black for the details
- A hand-sewing needle, sharp scissors, and pins or clips
- A ruler and removable fabric marker
Use one or two strands of floss for the small details. Matching thread keeps joins discreet, while white running stitches on the scarf and buttons give the ornament a handmade finish.
Download the Snowman Pattern and Sewing Guide
The pattern PDF contains two A4 pages: one colored version and one black-outline version. Both contain identical full-size shapes, so print only the version you prefer. The separate five-page illustrated sewing guide includes the materials, cutting list, placement drawings, and assembly instructions.
Download the free snowman pattern PDF
Download the illustrated snowman sewing guide PDF
Print and Check the Measurements
Print on A4 paper, 210 × 297 mm, at 100% or Actual Size. Turn off Fit, Shrink, and borderless expansion. Before cutting anything, measure both sides of the calibration square. Each side must be 50 mm.
If the square is too small or too large, change the print settings and print again. Do not use a screenshot, blog photograph, or the reduced diagrams in the guide as a cutting template. The printable PDF controls the cutting scale.
All dimensions below describe the full cut-line width and height of each piece. They are not stitch-line dimensions. The xN labels mean the total number of felt pieces to cut from that template.
Felt Cutting List
| Piece | Color | Cut-line size | Quantity |
|---|---|---|---|
| Body | White | 80 × 114 mm | x2 |
| Hat crown | Black | 48 × 34 mm | x2 |
| Hat brim | Black | 72 × 16 mm | x2 |
| Hatband | Red | 38 × 8 mm | x1 |
| Scarf strip | Red | 136 × 16 mm | x1 |
| Angled scarf tail | Red | 22 × 43 mm | x1 |
| Carrot nose | Orange | 18 × 10 mm | x1 |
| Eyes | Black | 6 mm diameter | x2 |
| Buttons | Black | 10 mm diameter | x3 |
| Twig arms | Brown | 31 × 39 mm | x4 |
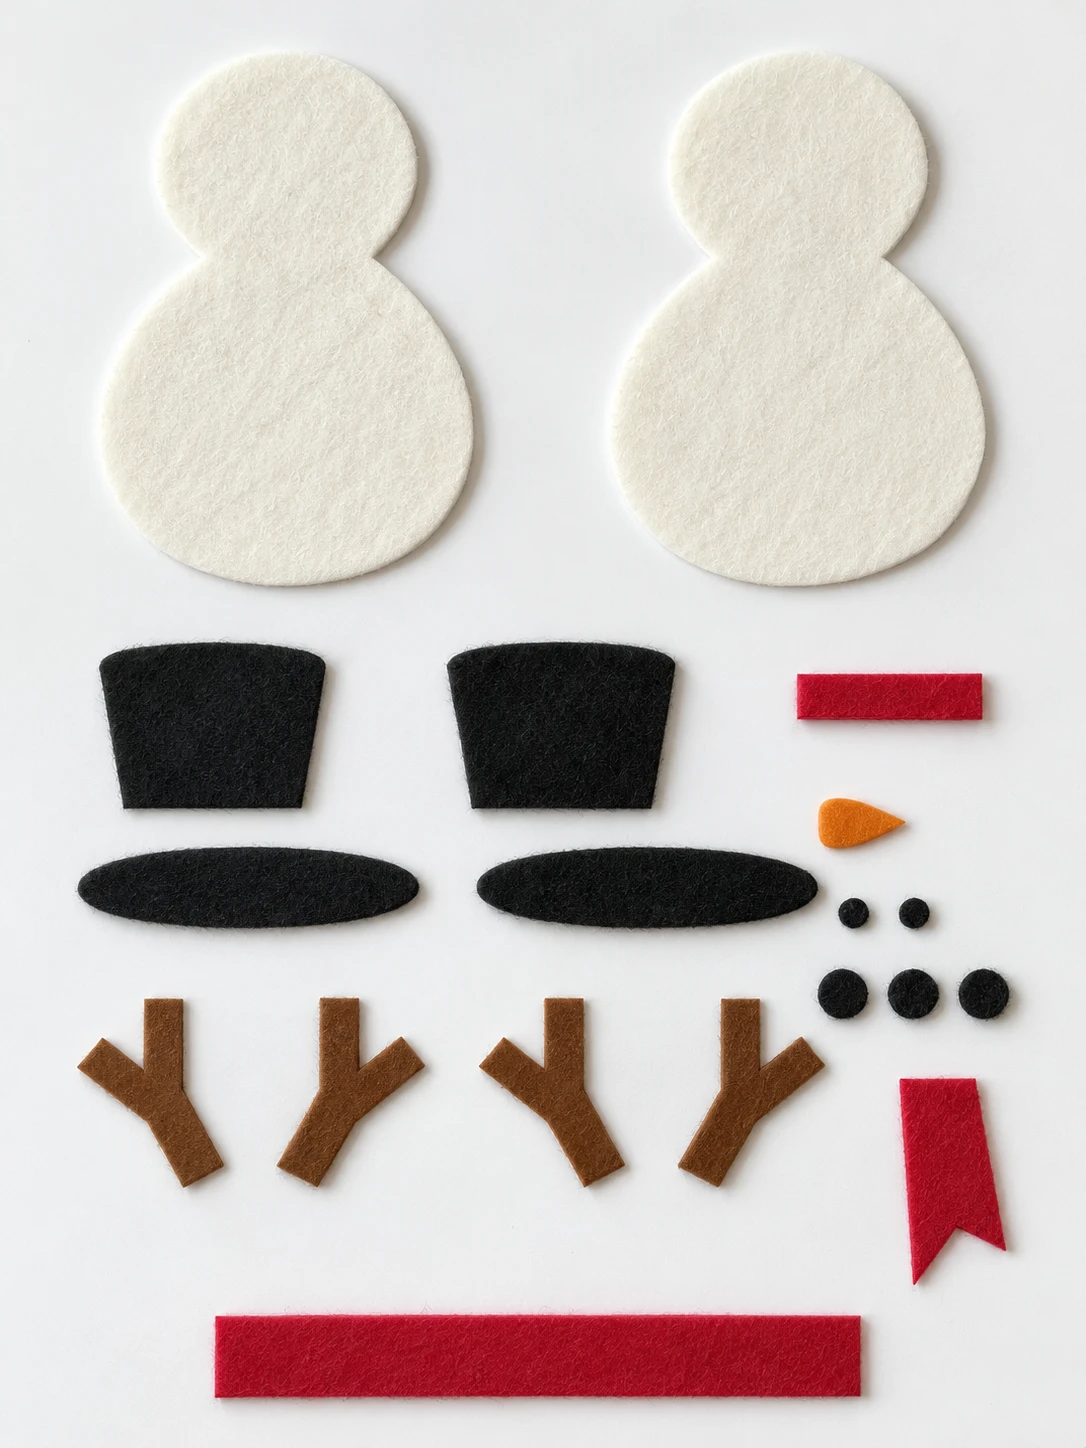
There are ten different templates and nineteen felt pieces altogether. For the arms, cut two as drawn and two with the template turned over. Pair matching outlines to make two double-layer arms. The other templates are used as drawn.
1. Cut and Organize the Pieces
Cut the paper templates along their solid outlines. Trace them carefully onto the felt and cut out the required quantities. Keep your scissors upright around the small curves, especially at the neck and the forks of the twig arms.
Lay all nineteen pieces on a plain table and compare them with the cutting list before sewing. Keep the two white body panels together, the crown and brim pairs together, and the tiny eyes and buttons in a small dish so they do not disappear.
Set one body panel aside as the back. Sew the facial features and buttons to the front panel only. This leaves the knots hidden inside the ornament when the body is assembled.
2. Sew the Face and Buttons
Use the body’s top edge and leftmost edge as your reference points. In the guide, x measures across from the left and y measures down from the top. Place the centers of the eyes at x 29, y 16 mm and x 51, y 16 mm. Secure each 6 mm circle with small black stitches.
Position the carrot nose with its bounding box beginning at x 36, y 20 mm and its point facing right. Sew around it with tiny stitches. Embroider a smile from approximately x 29, y 31 mm to x 52, y 31 mm, letting the middle curve down to around y 38 mm.
Place the three button centers on the body’s center line at x 40 mm. Their heights are y 65, 82, and 99 mm. Stitch each black circle securely, then add a small white cross through its center.
For tiny appliqué pieces, work approximately 1 mm from the edge. The 2 mm seam inset is for joining larger layers, not for sewing around the little eyes.
3. Prepare the Hatband and Scarf Details
On one black crown piece, position the red hatband 5 mm from the left edge and 18 mm below the top. Its 38 mm width leaves 5 mm of black felt visible on each side. Sew it in place before joining the crown layers.
If you like the white stitched detail, add a line of running stitches around the red scarf strip and angled tail, approximately 2 mm inside their edges. Keep both pieces flat and unstuffed. Leave the scarf fitting until the body is filled.
4. Anchor the Hanging Loop
Fold the 260 mm twine in half. On the inside of the back body panel, position its two tails at x 36 and x 44 mm. Run each tail from y 5 to y 30 mm, giving a 25 mm stitched-down length.
Knot the tips and couch each tail firmly to the felt with several closely spaced stitches. Secure the thread below the knots as well. The cord should emerge at the top center of the body, then travel between the hat layers and out through the crown.
This arrangement anchors the hanger to the body itself. Do not attach the loop only to the top edge of the felt hat, where a few small stitches would carry the whole ornament.
5. Make the Arms and Join the Body
Pair the four brown pieces into two matching double-layer arms, wrong sides together. Sew approximately 2 mm inside their edges. Leave the final 8 mm of each lower stem unsewn to form an insertion tab. Keep the arms unstuffed.
Place the white body panels wrong sides together. Insert each arm tab 8 mm between the panels at the side near y 62 mm. The twig forks should point upward and outward. Pin the arms, then sew across each tab twice when you reach it.
Sew around the body with small whipstitches or blanket stitches, staying 2 mm inside the cut edge. Leave a 25 mm opening along the lower edge for stuffing. At the top, stitch snugly on either side of the twine without piercing or cutting it.
Add small tufts of stuffing to the head first, then the belly. Keep the neck softly filled so the scarf can wrap comfortably around it. Close the opening with the same stitch and bury the finishing knot between the layers.
6. Assemble and Attach the Hat
Place the crown pieces wrong sides together with the hanging cord between them. Sew the top and sides 2 mm inside the edges, leaving a small gap at the top center for the cord. Join the lower crown edges with small stitches. Do not turn or stuff the crown.
Relative to the body’s reference box, the crown begins at x 16, y −36 mm. The brim begins at x 4, y −9 mm and reaches down to y 7 mm. This gives a 7 mm overlap with the head and a 7 mm overlap with the crown.
Place one brim piece on each side of the head, sandwiching the crown’s lower 7 mm between them. Sew through brim, crown, and brim across this overlap. Then secure the lower central brim edge through the head at y 4–5 mm with several strong stitches. Finish the exposed brim edges and check that the cord remains centered and free.
7. Fit the Scarf and Tail
Wrap the 136 × 16 mm red strip around the stuffed neck at about y 37–53 mm. Do not pull it tight. Mark where the ends meet, allow another 15 mm for the overlap, and trim only the excess length.
If the stuffed neck is too full to leave that overlap, remove a little stuffing and close the body again. Fitting the strip to the actual neck is more reliable than forcing the ends together.
Position the angled tail with its top near x 47, y 49 mm. The longer point faces downward and the shorter point faces right. Tuck its top 4 mm behind the front-right scarf overlap, then sew through the overlap, tail, and underlying scarf.
Add a few hidden stitches between the scarf and neck to prevent twisting. Keep the tail flat so its angled shape stays visible.
Final Checks Before Displaying
- Check that the outer seam is closed and no stuffing shows.
- Check the eyes, nose, buttons, hatband, and scarf for loose edges.
- Confirm both arm tabs are securely caught in the body seam.
- Gently test the hanging loop and its stitched-down anchors.
- Check that the crown and brim are firmly joined to the head.
- Remove pins, temporary marks, and loose thread ends.
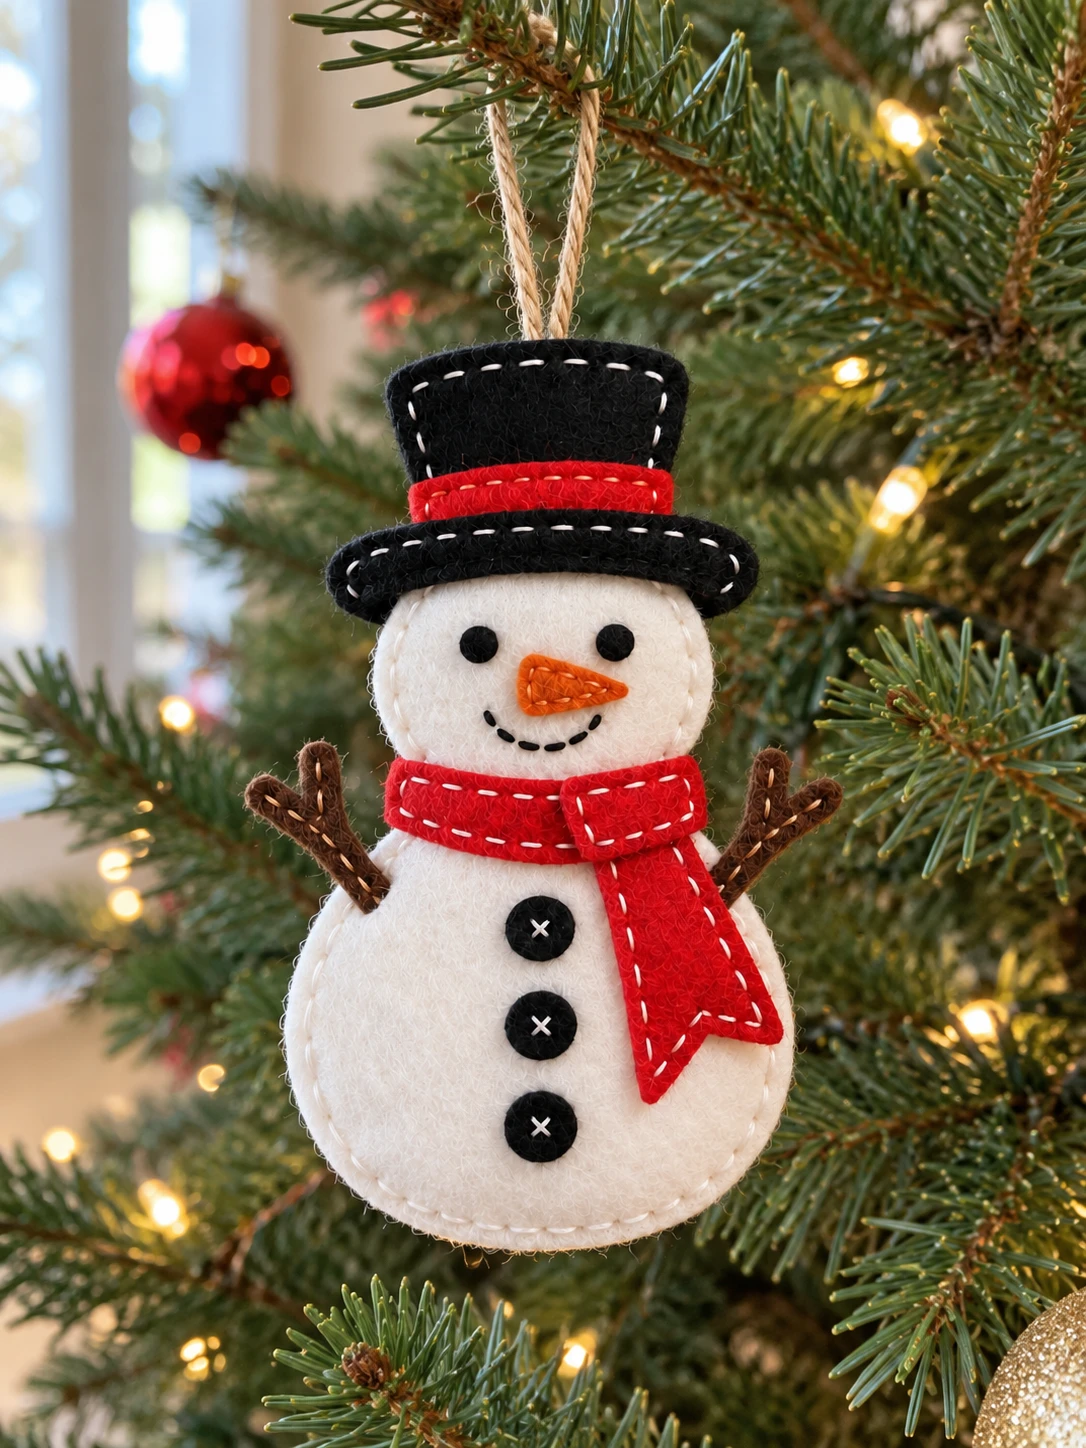
The flat assembled cut-line height is 150 mm from the hat top to the body bottom. The loop is extra. Light stuffing and hand sewing can slightly change the finished dimensions, so treat 15 cm as the intended finished size rather than an exact measurement for every sewn ornament.
Frequently Asked Questions
Do I need both pattern pages?
No. The colored page and black-outline page contain the same shapes at the same scale. Print one of them and check the 50 mm calibration square.
Why are there four arm pieces?
Each finished arm has two layers. Cut two pieces as drawn and two reversed, then pair matching shapes to make one left arm and one right arm.
Should the hat be stuffed?
No. The crown and brim are flat, double-layer felt assemblies. Only the white body receives a light filling.
Are the measurements in centimeters?
The pattern and cutting table use millimeters. Ten millimeters equal one centimeter, so the 150 mm assembled height is 15 cm and the 50 mm print-check square is 5 cm.
Can I change the scarf color?
Yes. You can choose another color of the same felt thickness while keeping the shapes and dimensions unchanged. Use matching thread or a contrasting running stitch for a different finish.
More Felt Christmas Projects
For another little handmade decoration, try the Winter Gift Gnome felt ornament. You can also browse these 20 easy felt Christmas ornaments to sew for more seasonal ideas.

Leave a Comment