


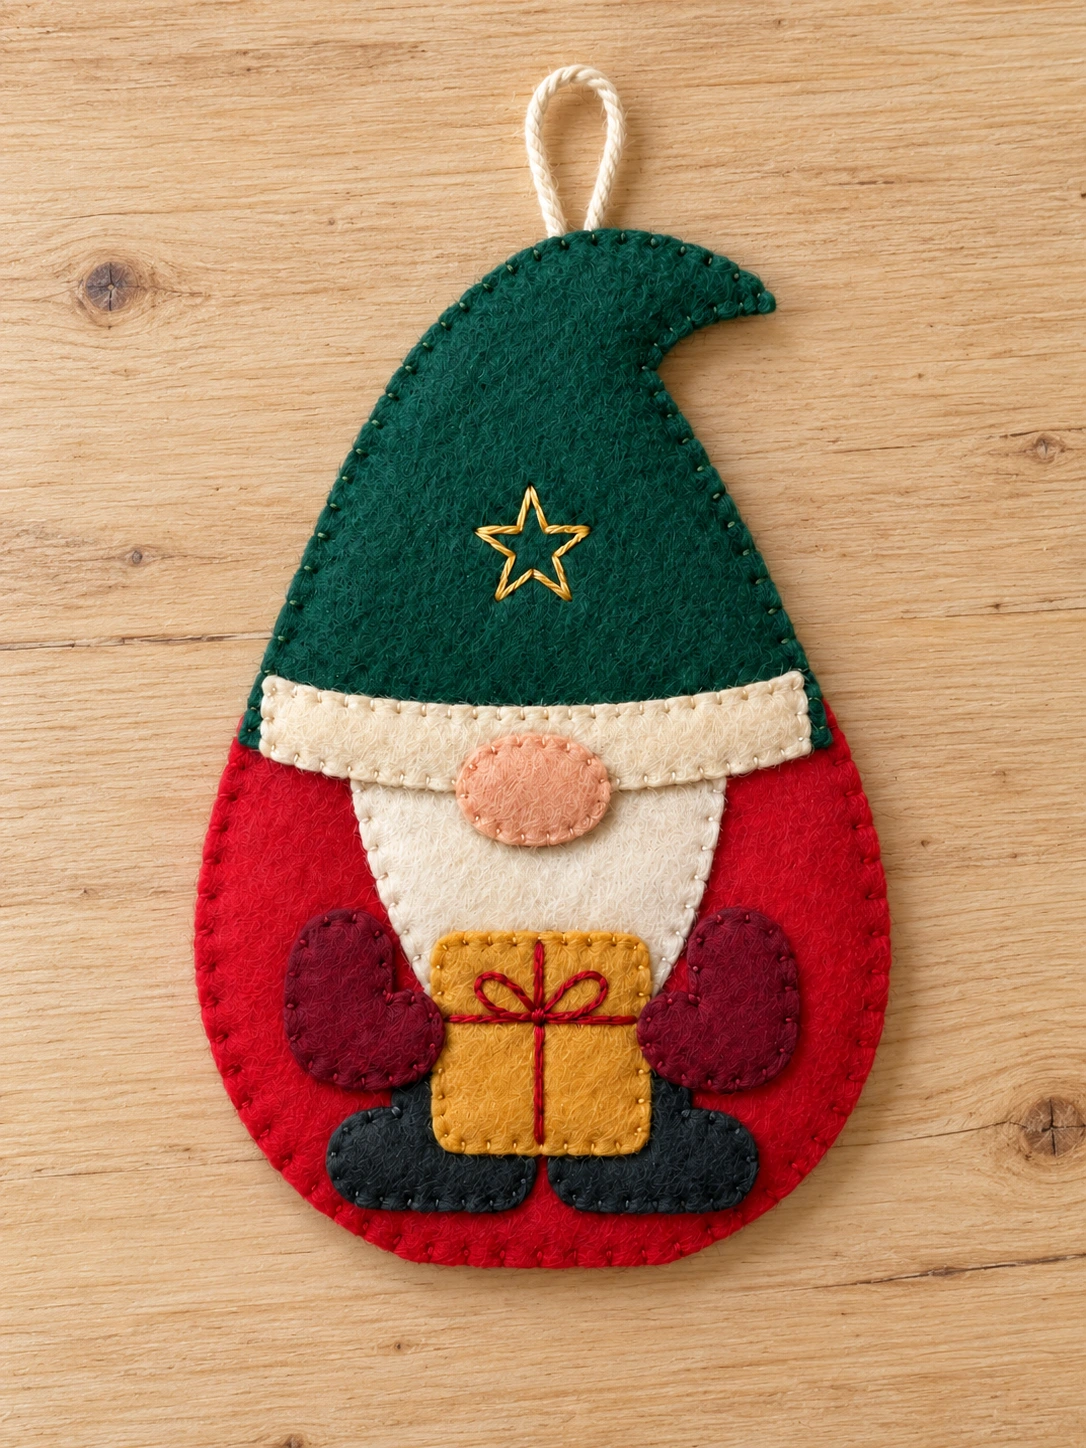
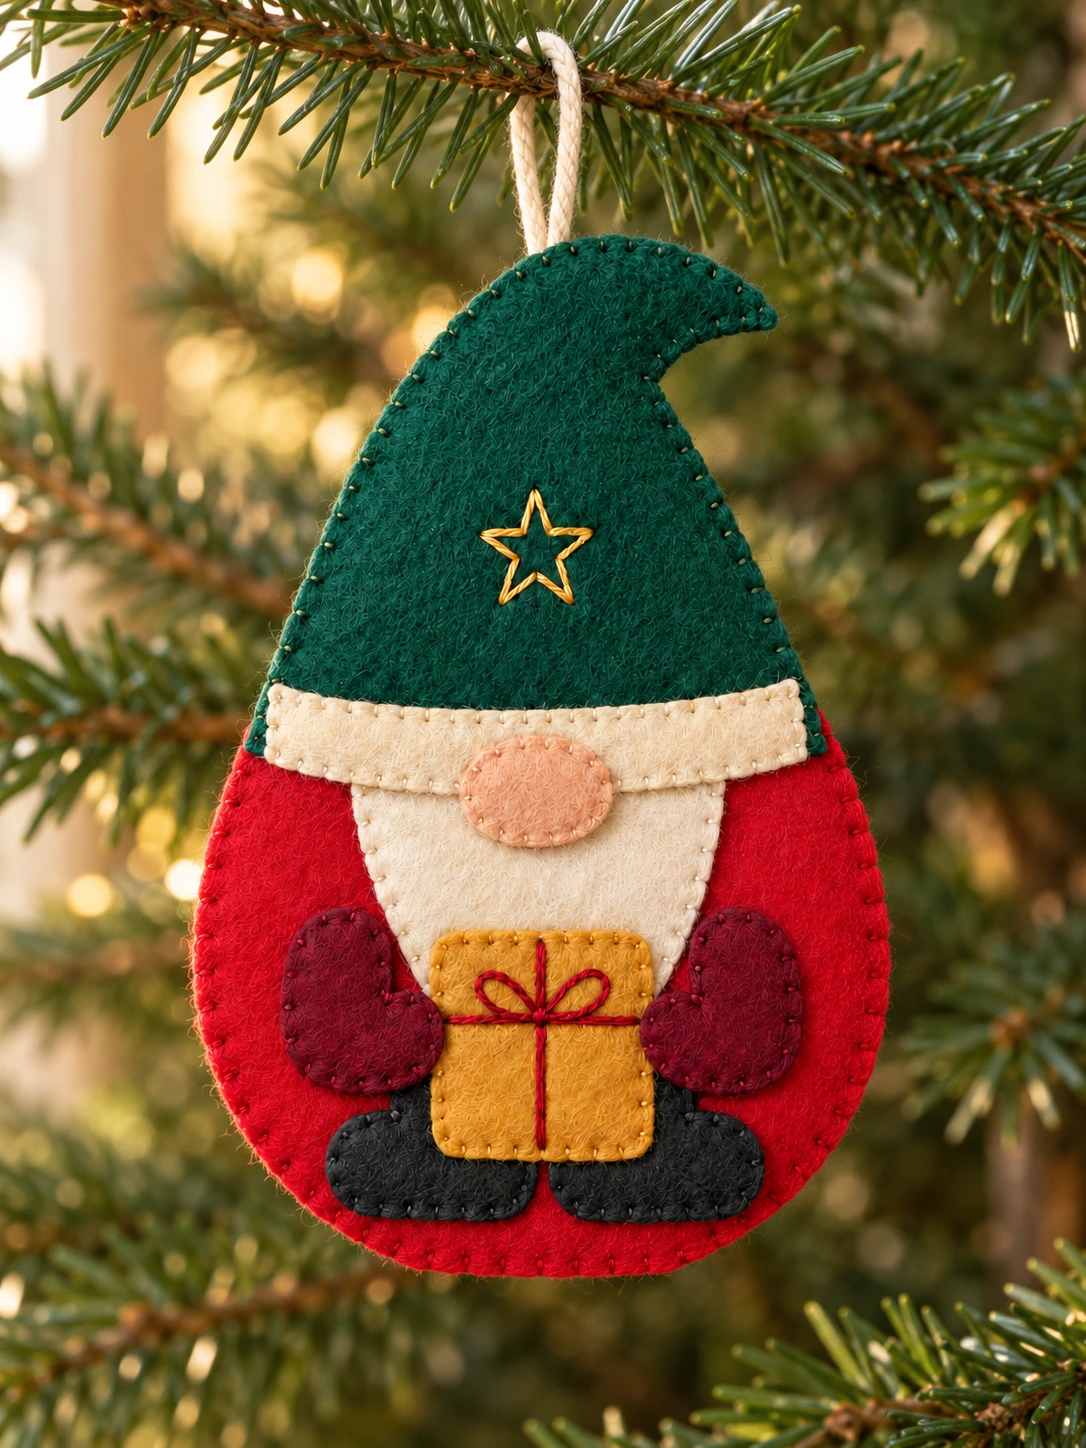
A bent forest-green hat, a soft ivory beard, and a tiny gold present give this Winter Gift Gnome such a lovely festive look. The burgundy mittens curl around the gift, while a little embroidered star adds a bright detail to the hat.
In this tutorial, I’ll walk you through cutting the felt, decorating the front, and sewing the ornament together by hand. The body gets just a little stuffing, while the hat and small appliqué pieces stay flat. There is no sewing machine needed.
The free pattern and separate sewing guide give you the full-size shapes, measurements, and assembly order. The finished cut size is 100 × 150 mm, excluding the hanging loop. Gather your felt scraps, keep the guide nearby, and let’s make a cheerful little gnome for your winter display.
Before You Start
Choose firm, non-fraying craft felt, approximately 1–1.5 mm thick and the same on both sides. All allowance is included in the pattern. The raw edges stay on the outside, and you will sew the bases wrong sides together without turning the ornament.
Use two strands of embroidery floss. Sew approximately 2 mm inside the cut edges, with stitches about 3 mm apart. Shorten the stitches around curves. Use running stitch for the appliqués and blanket stitch for the outer seam.
This is a decorative ornament, not a toy. Small parts, stuffing, and the hanging loop make it unsuitable for play. Keep needles and loose pieces away from children and pets.
Materials You Will Need
- Red felt: one 200 × 200 mm sheet for both full-silhouette bases
- Forest-green felt: one 100 × 100 mm piece for the hat
- Ivory felt: one 100 × 100 mm piece for the cuff and beard
- Charcoal felt: one 70 × 30 mm scrap for the boots
- Burgundy felt: one 55 × 30 mm scrap for the mittens
- Gold felt: one 40 × 35 mm scrap for the gift
- Peach felt: one 30 × 20 mm scrap for the nose
- Matching embroidery floss, plus gold and red for the details
- A hand-sewing needle, sharp scissors, and pins or clips
- A ruler and removable fabric marker
- A small pinch of fiberfill and a blunt stuffing tool
- 80 mm of ribbon or cord, 2–3 mm wide
The gold star and red gift ribbon are embroidered details. You do not need extra felt shapes for them.
Download the Free Winter Gift Gnome Pattern and Sewing Guide
Save both PDFs before you begin. The four-page pattern contains the full-size cutting templates. The separate five-page sewing guide includes the materials, piece key, placement drawing, stitch reference, and sewing instructions.
Download the free Winter Gift Gnome pattern PDF
Download the Winter Gift Gnome sewing guide PDF
Choose either colored pattern pages 1–2 or black-outline pages 3–4. These are equivalent sets with exactly the same shapes and sizes, so you only need to print one set. The placement drawing in the sewing guide is reduced and should not be used for cutting.
1. Print and Check the Scale
Use A4 paper in portrait orientation and select 100% or Actual Size. Turn off Fit, Shrink, and Scale to Page. Print pattern page 1 or 3 first, then measure both sides of the calibration square between the centers of the printed lines.
Each side must measure exactly 50 mm. If either side differs, correct the print settings and print again before cutting your felt. Once the square is correct, print the second page of your chosen set.
Felt Cutting List and Placement
All sizes below are width × height in millimeters. Positions locate each piece’s top-left corner from the top-left corner of the base’s bounding box: x measures across and y measures down. The right boot and right mitten are mirrored.
| ID | Piece | Cut | Color | Size | Position |
|---|---|---|---|---|---|
| A | Full silhouette | 2 | Red | 100 × 150 mm | Front and back |
| B | Bent hat | 1 | Forest green | 90 × 84 mm | x 5, y 0 mm |
| C | Curved cuff | 1 | Ivory | 86 × 14 mm | x 7, y 70 mm |
| D | Pointed beard | 1 | Ivory | 58 × 59 mm | x 21, y 76 mm |
| E | Oval nose | 1 | Peach | 24 × 16 mm | x 38, y 76 mm |
| F | Boot | 2 | Charcoal | 30 × 18 mm | Left: x 19, y 127 mm; right: x 51, y 127 mm |
| G | Gift | 1 | Gold | 32 × 29 mm | x 34, y 110 mm |
| H | Mitten | 2 | Burgundy | 23 × 26 mm | Left: x 12, y 104 mm; right: x 65, y 104 mm |
2. Cut the Felt and Arrange the Front
Cut along each paper template outline. Trace the shapes onto the felt, then cut away the marker line. Turn the boot and mitten templates over when tracing their second pieces. There are eight different templates and eleven felt pieces altogether.
Keep the plain red back aside. Build all the decoration on the red front, in this order: boots, beard, hat, cuff, gift, mittens, and nose. Each appliqué stitch should pass through the decorated front only. Secure the thread ends on its reverse.
Use the placement drawing to check the arrangement. Center the cuff, beard, gift, and nose along the gnome’s center line. The boot toes point outward, and the mitten thumbs face inward over the gift.
3. Sew the Boots and Beard
Place the charcoal boots 5 mm above the flat bottom edge of the red front, leaving a 2 mm gap between their inner edges. Check that they form a mirrored pair with the toes pointing outward. Sew around both boots with matching floss.
Center the ivory beard with its tip 15 mm above the base bottom. Sew around the beard, including its top edge. That upper edge will be covered by the hat later, but it still needs stitching to the front.
4. Decorate and Fit the Hat
Before attaching the forest-green hat, embroider a gold five-point star approximately 14 mm across. Its center sits 51 mm from the base’s left edge and 45 mm down from the top when the hat is in position. Use short backstitches around the star outline.
Align the hat with the top and side edges of the base. Sew its curved lower edge to the red front. Hold the shared outer edges in place with loose basting; the final outer seam will secure the hat perimeter.
Sew the ivory cuff over the hat’s lower edge, keeping it centered at the position in the cutting table. Keep the hat flat as you work so its bent tip retains the pattern’s shape.
5. Add the Gift, Mittens, and Nose
Embroider a red ribbon cross and a small bow on the gold gift before attaching it. Place the gift on the front with its bottom 11 mm above the base bottom, then sew around it.
Add the burgundy mittens over the sides of the gift, with both thumbs facing inward. Sew them in place. Finally, sew on the centered peach nose across the cuff edge.
Keep the gift, mittens, and nose flat and unstuffed. Check the front arrangement now, while you can still reach the reverse to secure any thread ends, before bringing the two red bases together.
6. Secure the Hanging Loop
Fold the 80 mm length of cord or ribbon in half. Place its two cut ends on the inside of the plain red back, about 58 mm from the left edge, so the loop exits near the top.
Bury each tail 15 mm below the cut edge. Tack each tail firmly with several small stitches, keeping the loop outside. The two buried tails use 30 mm of the cord, leaving 50 mm of exposed cord to form the loop. This is the remaining cord length, not the loop’s height.
7. Join, Lightly Fill, and Close
Place the decorated front and plain back wrong sides together, with their cut edges aligned. Blanket-stitch around the outside, catching all edge layers and the cord tails.
Leave about 30 mm open along the curved right edge, from 96 mm to 126 mm below the top. Through this opening, add small wisps of fiberfill to the body only, using the blunt stuffing tool. Keep the bent hat flat.
Close the opening with the same blanket stitch. Hide the final knot between the layers and trim the thread. Remove the temporary basting once the final seam is secure, then gently check that the hanging loop and small pieces are firmly attached.
Final Checks Before Hanging
- Check the outer seam for gaps and loose stitches.
- Check the nose, mittens, gift, cuff, beard, and boots for loose edges.
- Gently check both sewn-in loop tails.
- Make sure the body is lightly filled and the bent hat stays flat.
- Check that temporary basting and loose thread ends are removed.
The finished cut size is 100 mm wide × 150 mm high, excluding the hanging loop. Keep your finished gnome as a decoration, out of reach of children and pets.
Frequently Asked Questions
Do I need to print all four pattern pages?
No. Print colored pages 1–2 or black-outline pages 3–4. Both sets contain the same eight templates at the same size. The five-page sewing guide is a separate download.
Should I add seam allowance?
No. All allowance is included. Cut along the paper outlines, cut away the felt marker line, and stitch approximately 2 mm inside the cut edges.
Which parts should I stuff?
Add only small wisps of fiberfill to the body. Keep the bent hat flat and the gift, mittens, and nose unstuffed. All the decorative pieces are sewn to the front before the bases are joined.
Why are there eleven felt pieces but only eight templates?
The full silhouette is cut twice for the front and back. The boot and mitten templates are also used twice, with the second of each reversed. The remaining five templates are cut once each.
Are the star and gift ribbon separate felt pieces?
No. Embroider the gold star on the hat and the red ribbon cross and bow on the gift before attaching those pieces to the red front.
Enjoy Your Winter Gift Gnome
The little present, warm-colored mittens, and bent green hat make a sweet combination for a winter ornament. Take your time with the embroidery, keep the filling light, and enjoy adding this little gnome to your seasonal display.

Leave a Comment