


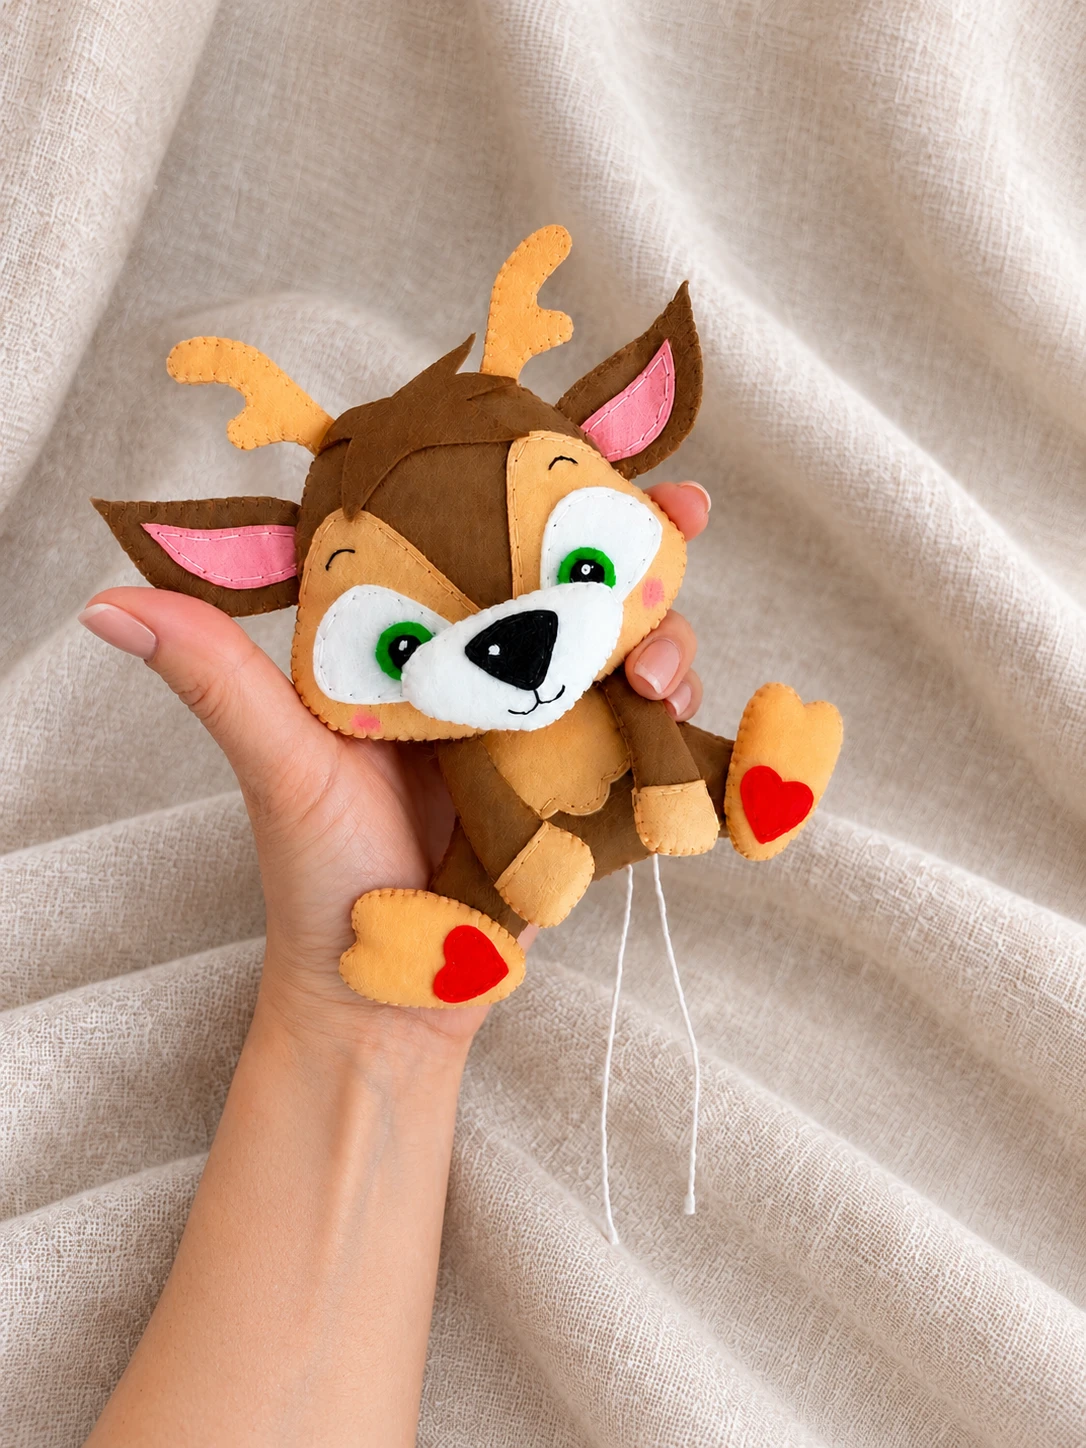
I made this little felt fawn, and today I’m sharing the steps so you can sew one too. With its soft antlers, pink ears, and tiny heart details on the feet, it makes a sweet woodland decoration.
The finished fawn shown here is 13 cm tall. It is sewn from soft felt, gently stuffed, and finished with a hanging cord for a decorative mobile or hanging ornament.
Below, I’ll walk you through the pattern pieces, simple hand stitches, and assembly, with a photo for every step. Gather your felt and thread, and let’s get started.
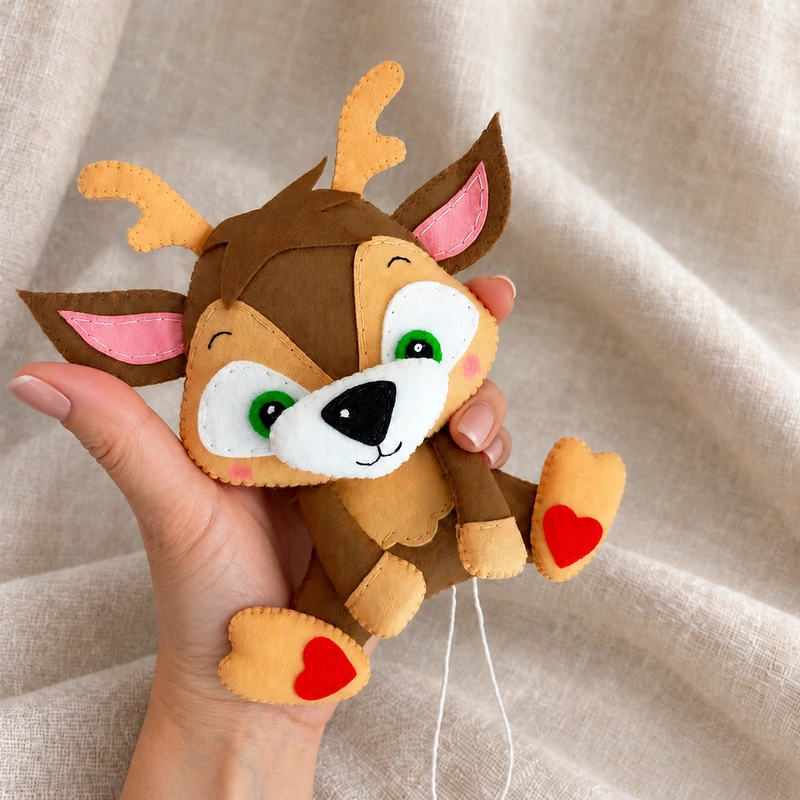
Materials and Tools
Affiliate disclosure: This post contains Amazon affiliate links. If you buy through these links, I may earn a commission at no extra cost to you. As an Amazon Associate I earn from qualifying purchases.
For this project, you’ll need:
- Felt in beige, brown, black, green, pink, red, and white. The fawn in this tutorial uses soft Spanish-made felt that is 100% polyester and 0.5 mm thick.
- Sewing thread in beige, brown, pink, black, red, and white.
- A sewing needle and scissors.
- Polyester stuffing or synthetic wadding for padding the pieces.
- A hot glue gun and a glue stick.
- Moment Crystal glue, or another textile glue you prefer.
- Cord for hanging the finished fawn.
- A self-disappearing fabric marker.
- Blush for the cheeks.
- White fabric paint for the highlights.
- A happy mood and a little time to enjoy making!
You’ll use two hand stitches: backstitch to attach the flat details and embroider the face, and blanket stitch to join the edges of the paired felt pieces. Keep the matching thread colors nearby as you work through the different sections.
Prepare the Pattern and Cut the Felt
Step 1. Choose Your Fawn’s Size
The sample fawn is 13 cm tall, but you can choose another size to suit your decoration. Resize the pattern in your printer settings, or adjust its size on screen if you are tracing it from a monitor. Keep all the pieces at the same relative scale.
Use the pattern illustration to identify the shapes before cutting. The small hearts, inner ears, and face details are easier to keep track of if you arrange them beside the larger pieces.
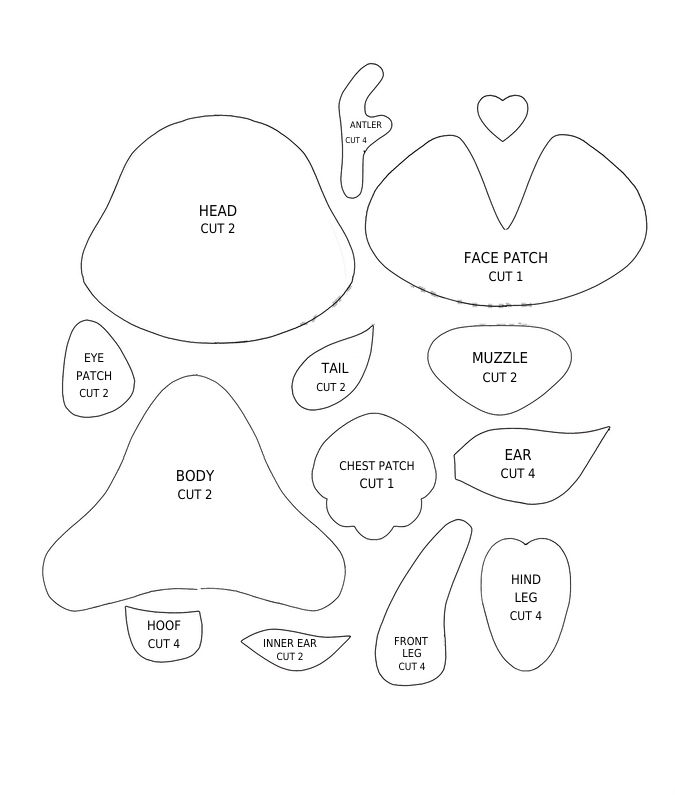
Download the English pattern PDF. Print at 100% or Actual Size, with Fit to Page turned off, to preserve the source document’s pattern dimensions. The source has no calibration reference, so the finished 13 cm height is not guaranteed.
Step 2. Trace the Pattern Pieces
Trace the pattern pieces onto the appropriate felt colors with a self-disappearing fabric marker. Take a moment to check the number of pieces needed for each shape before moving on to cutting.
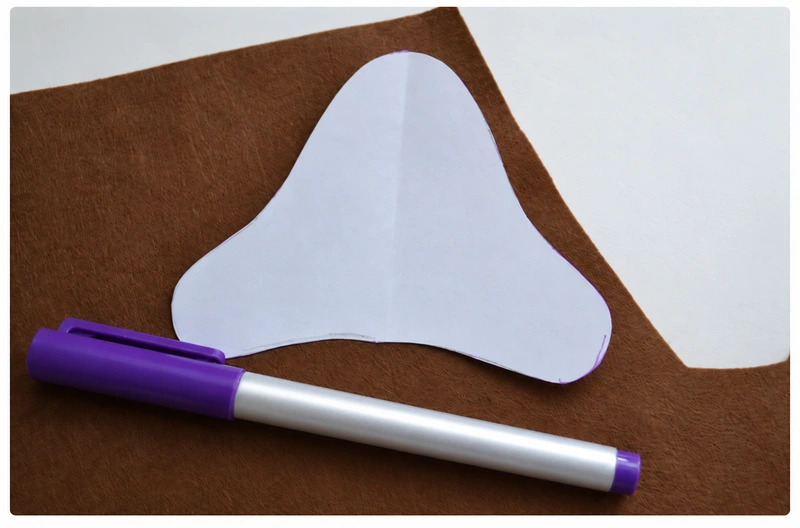
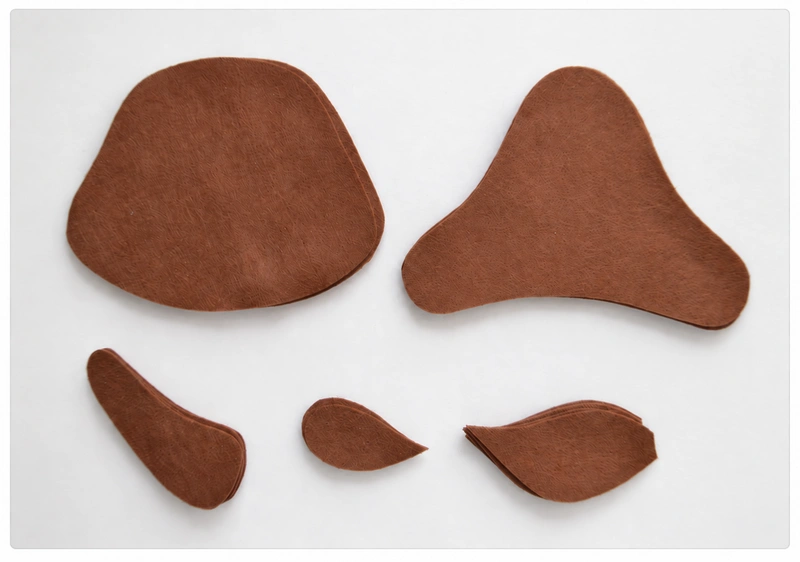
Step 3. Cut the Brown Pieces
Cut along the traced lines. From brown felt, cut two head pieces, two body pieces, two tail pieces, four front-leg pieces, and four outer-ear pieces. The pieces will be joined in pairs, so keep their matching shapes together.
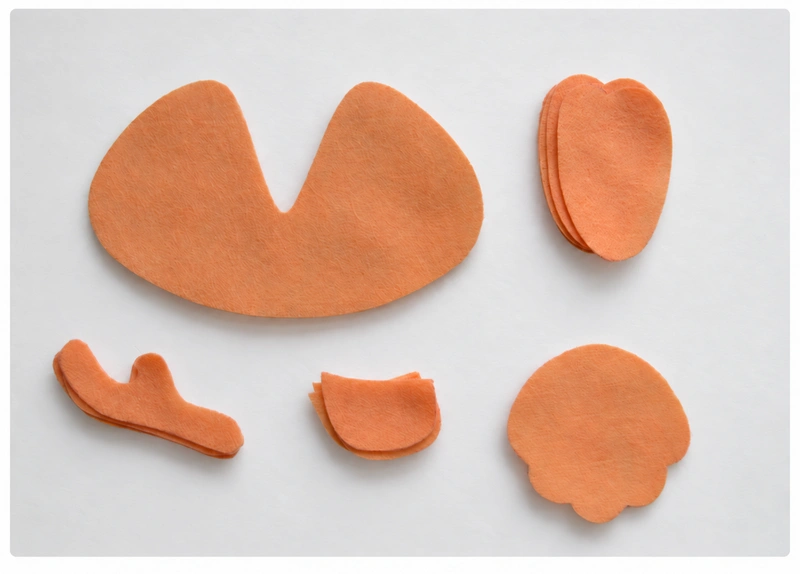
Step 4. Cut the Beige Pieces
From beige felt, cut four antler pieces, four hoof pieces, and four hind-leg pieces. You’ll also need one chest patch and one large face patch. This face patch sits on the brown head behind the white eye patches and muzzle.
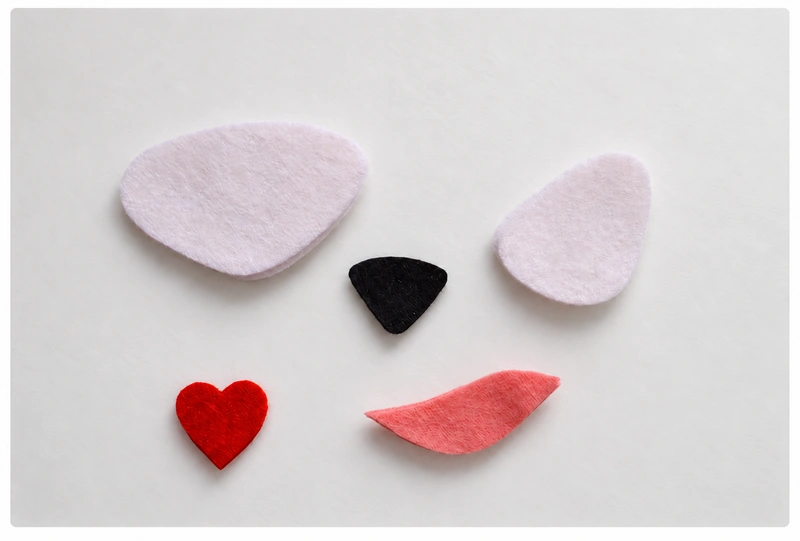
Step 5. Cut the Smaller Details
From white felt, cut two muzzle pieces and two eye patches. Cut two red hearts for the little heel details and two pink inner-ear pieces. For the nose, cut a triangle from black felt, then round off its corners for a softer shape.
Sew the Flat Details
Step 6. Position the Chest and Face Patches
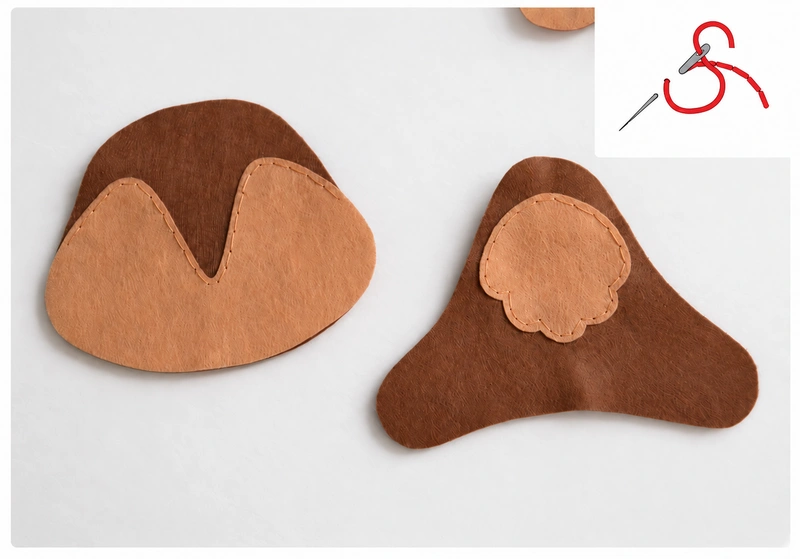
Lay the beige chest patch on one brown body piece. Place the large beige face patch on one brown head piece. Check their positions against the photo before sewing, with the shapes sitting neatly inside the brown outlines.
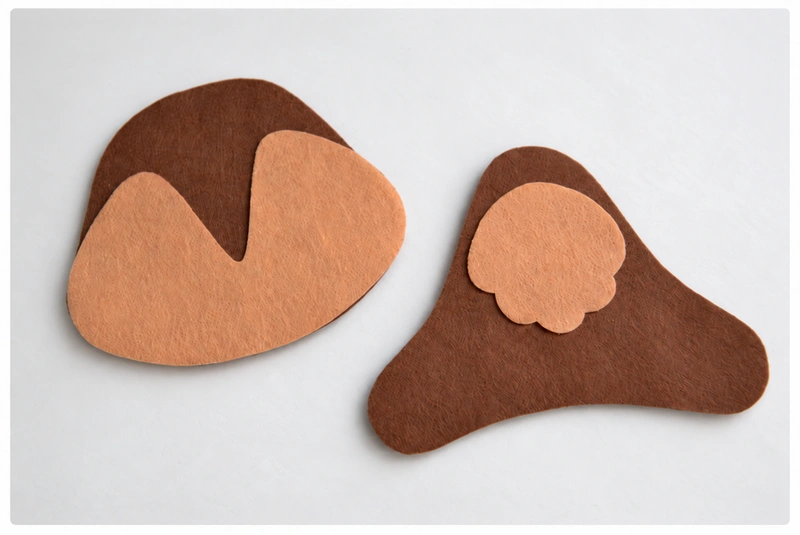
Step 7. Sew the Beige Patches
Use beige thread and backstitch to attach both patches. Follow their outlines as shown in the photo and stitch diagram. Make small, even stitches, keeping the felt flat rather than pulling the thread so tightly that the edges pucker.
Step 8. Position the Hooves
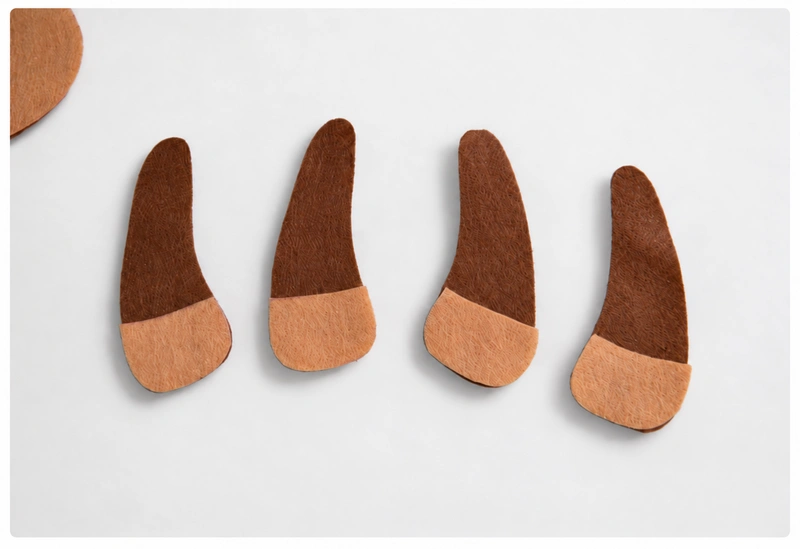
Place one beige hoof piece at the bottom of each brown front-leg piece. There are four front-leg pieces and four hoof pieces at this stage. Match the lower edges so the beige sections will line up when you pair the legs.
Step 9. Sew the Tops of the Hooves
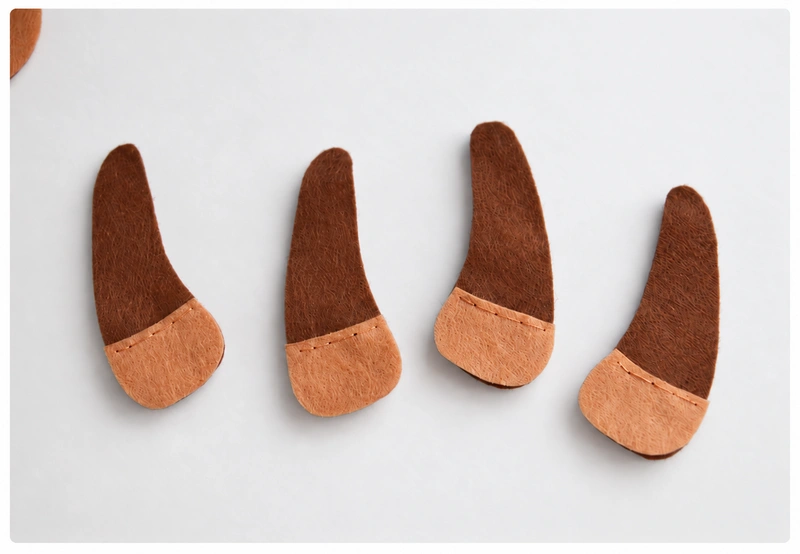
Backstitch along the upper edge of each beige hoof to attach it to its brown leg piece. Leave the outer edges for the next stage, when the two layers of each leg will be joined together.
Step 10. Join the Hoof Sections
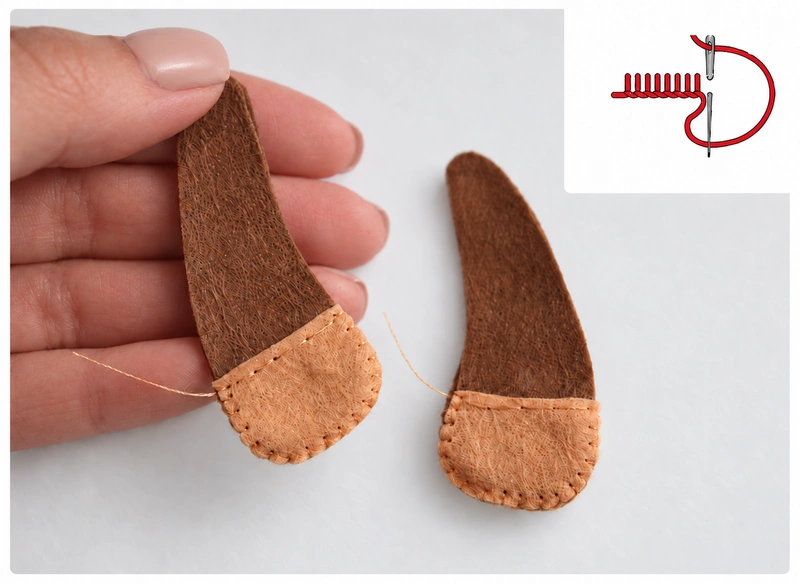
Pair the front-leg pieces with the hoof details facing outward. Using blanket stitch, sew around only the beige hoof section of each pair. Leave the brown sections open for now; you’ll sew and stuff them later.
Step 11. Sew the Antlers
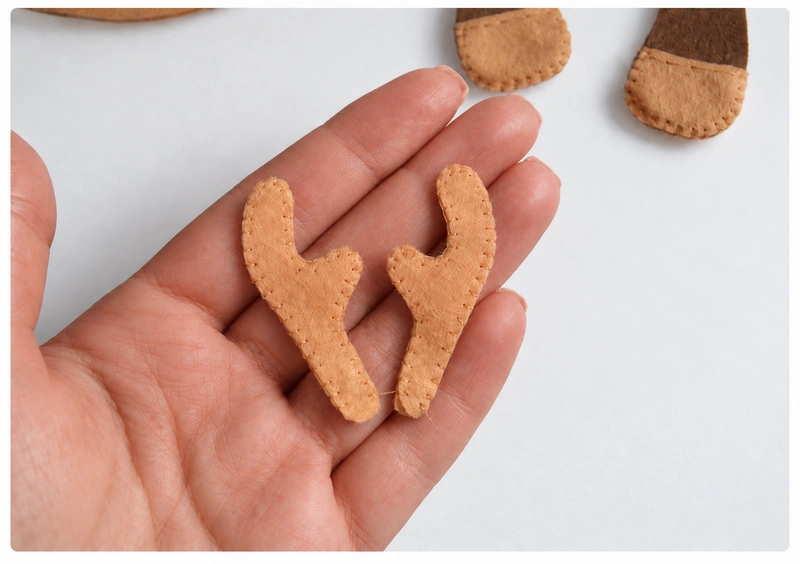
Match the four beige antler pieces into two pairs. Blanket stitch around each pair, following the small curves and tips. Work slowly through the narrow sections so the edges stay aligned and the antlers keep their shape.
Step 12. Add the Pink Inner Ears
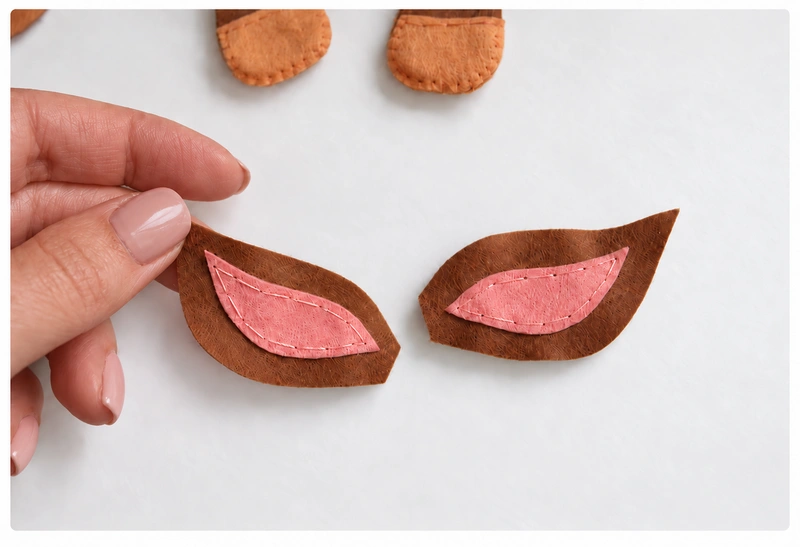
Place a pink inner-ear piece on each of two brown outer-ear pieces. Sew around the pink shapes with pink thread and backstitch. Leave a visible brown border around each one, as shown in the photo.
Step 13. Join the Ears and Tail
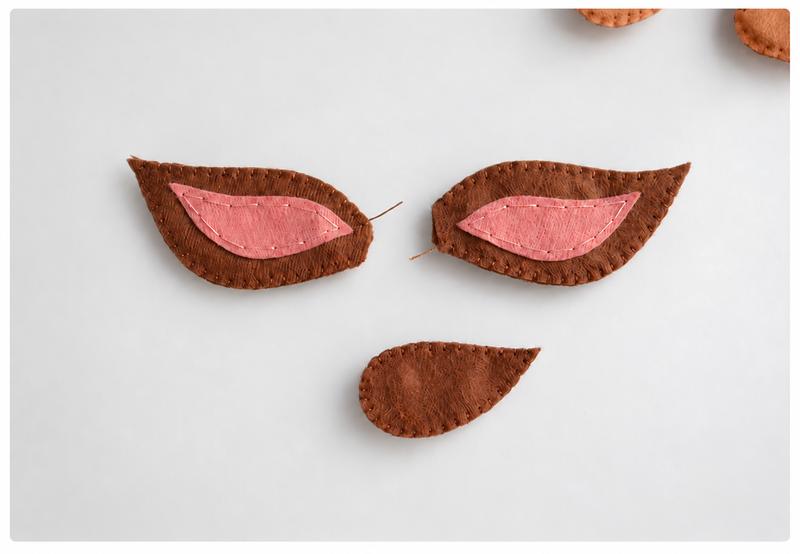
Pair each decorated ear with a plain brown ear piece, keeping the pink detail on the outside. Blanket stitch the ears with brown thread. Pair the two tail pieces and blanket stitch them together with the same thread.
Step 14. Sew the White Eye Patches
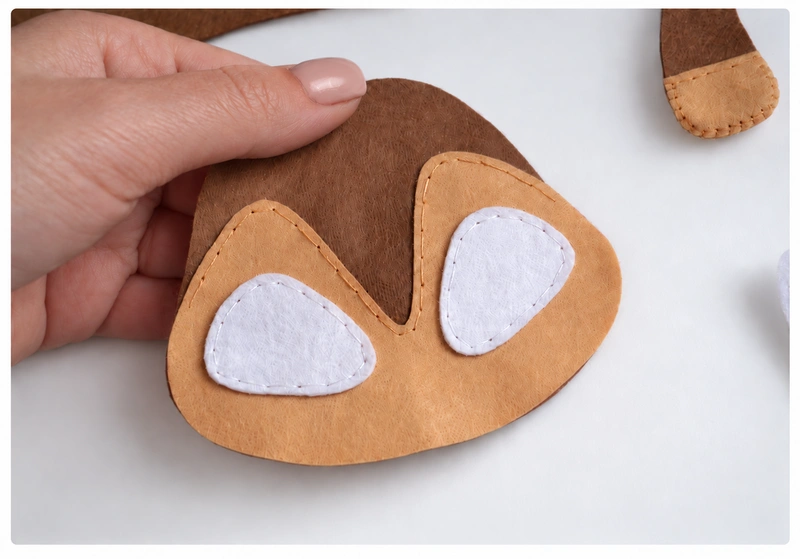
Position the two white eye patches on the beige face patch. Attach them with white thread and backstitch. These white shapes form the background for the green and black eyes, which will be added near the end.
Step 15. Add the Red Hearts
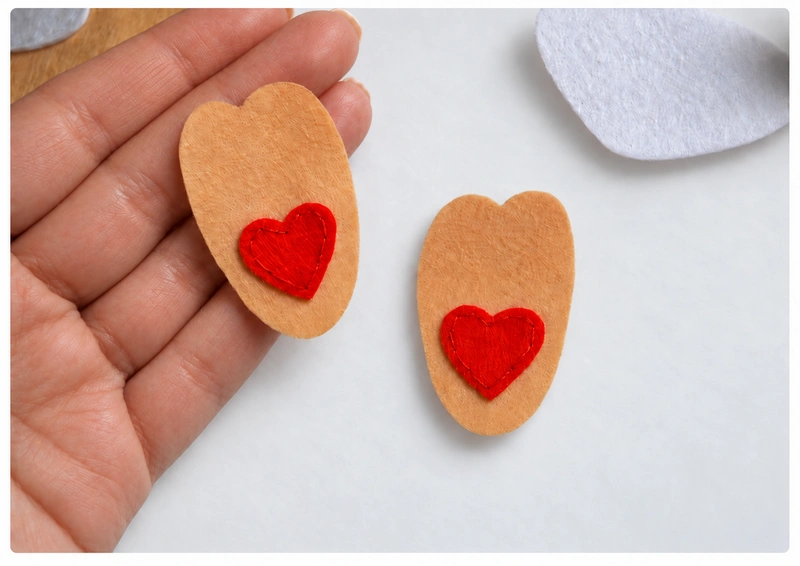
Place a red heart on each of two beige hind-leg pieces. Sew the hearts in place with red thread and backstitch. These decorated pieces will become the visible fronts of the fawn’s hind feet.
Step 16. Mark the Face and Position the Nose
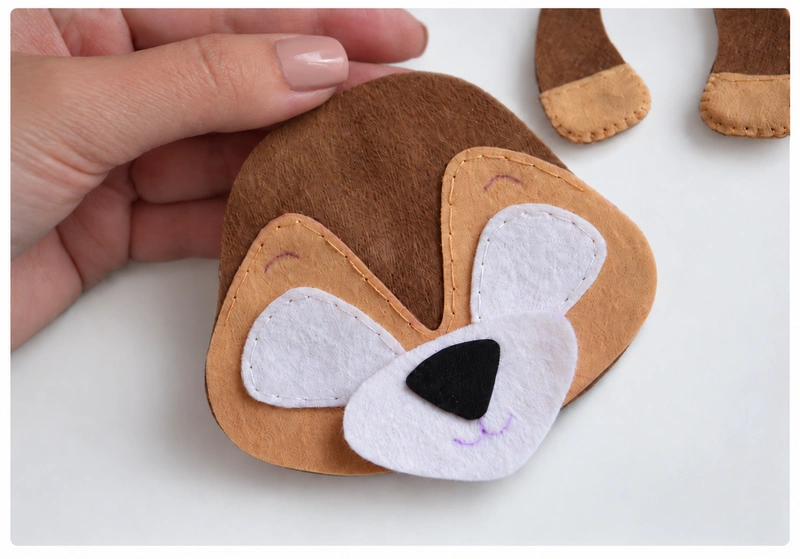
Draw the eyebrows on the head and the mouth on one white muzzle piece with the disappearing marker. Use a tiny drop of textile glue to hold the black nose on that muzzle piece, making it easier to sew neatly.
Step 17. Sew and Embroider the Face
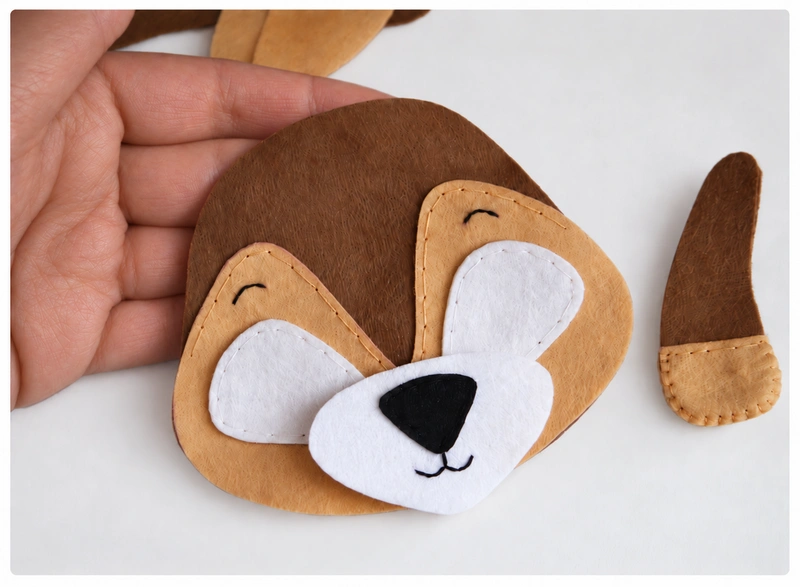
Backstitch the black nose to the white muzzle with black thread. Then use a doubled black thread and the same backstitch to embroider the marked eyebrows and mouth. Follow the curved lines carefully to give the face its gentle expression.
Sew and Stuff the Fawn
Step 18. Pair the Body Pieces
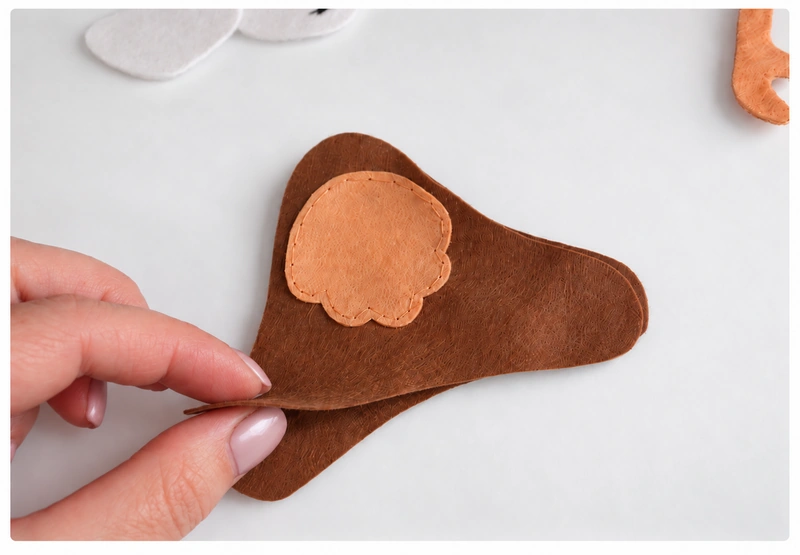
Place the two brown body pieces together with their edges aligned. Keep the beige chest patch facing outward. Check the outline all the way around before you begin sewing so neither layer slips out of place.
Step 19. Sew Around the Body
Using brown thread, blanket stitch around the body. Stop before you close the entire outline, leaving an opening for the stuffing. The opening needs to be large enough to add the filling without stretching the felt.
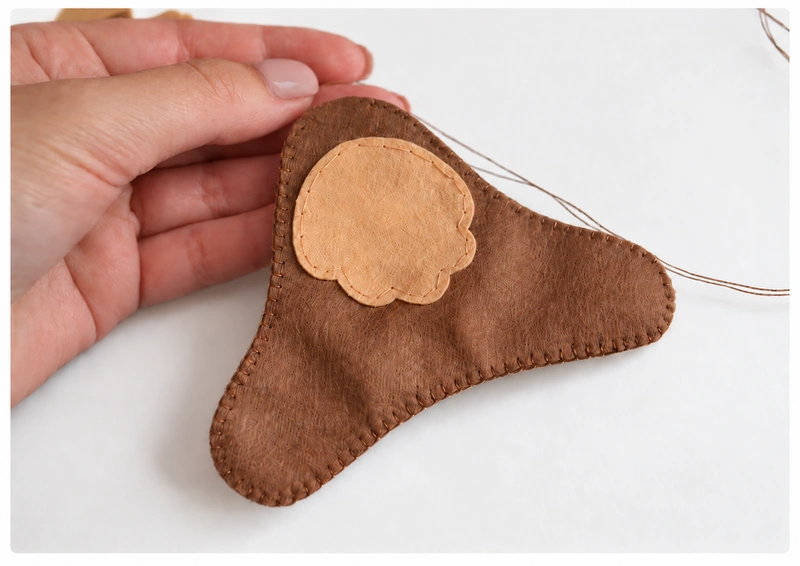
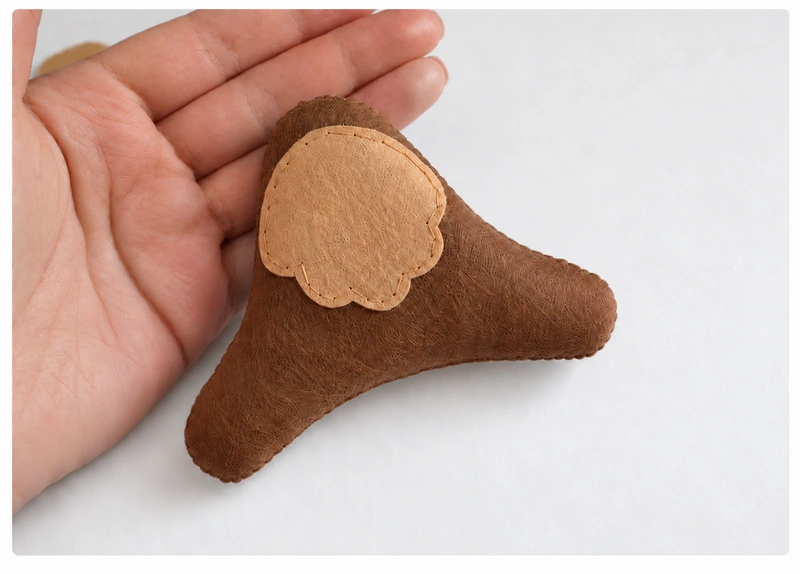
Step 20. Stuff and Close the Body
Add polyester stuffing through the opening, spreading it into the curved sections of the body. Once the body is evenly padded, finish the remaining blanket stitches to close it. Keep the shape softly rounded rather than tightly packed.
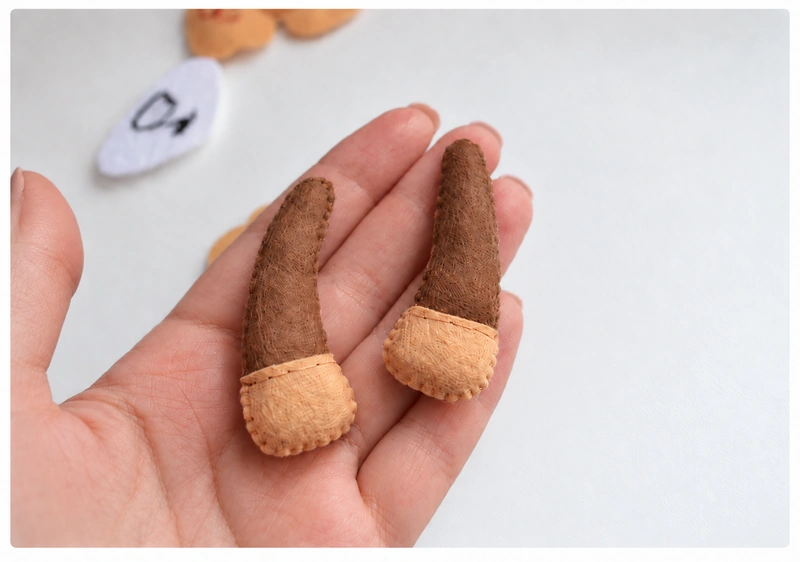
Step 21. Finish the Front Legs
Return to the front legs with their already-sewn beige hooves. Blanket stitch the remaining brown edges, leaving an opening in each leg. Add stuffing, then close the openings using the same method as for the body.
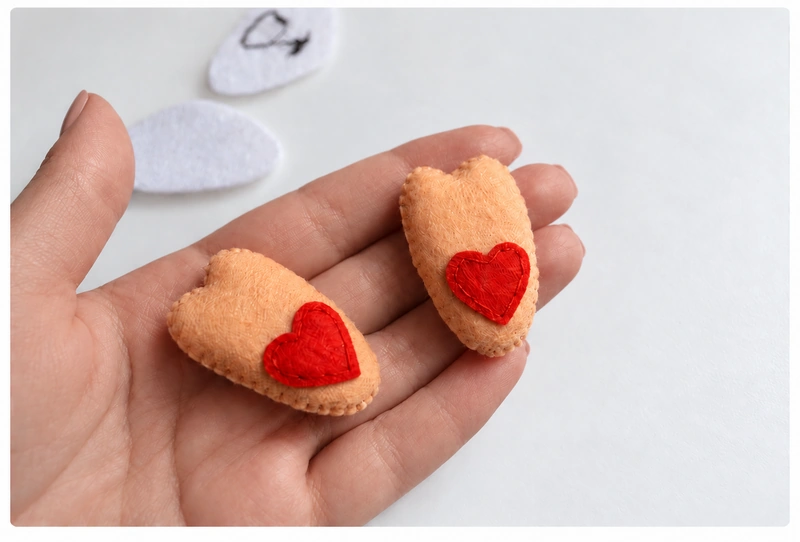
Step 22. Sew and Stuff the Hind Legs
Pair each heart-decorated hind-leg piece with a plain beige piece. Blanket stitch around each pair, leave an opening, add stuffing, and sew the opening closed. Keep the red hearts facing outward on the finished feet.
Step 23. Sew and Stuff the Muzzle
Pair the two white muzzle pieces with the stitched nose and mouth facing outward. Blanket stitch around them, leaving a small opening for stuffing. Add enough filling to give the muzzle a rounded shape, then close the remaining edge.
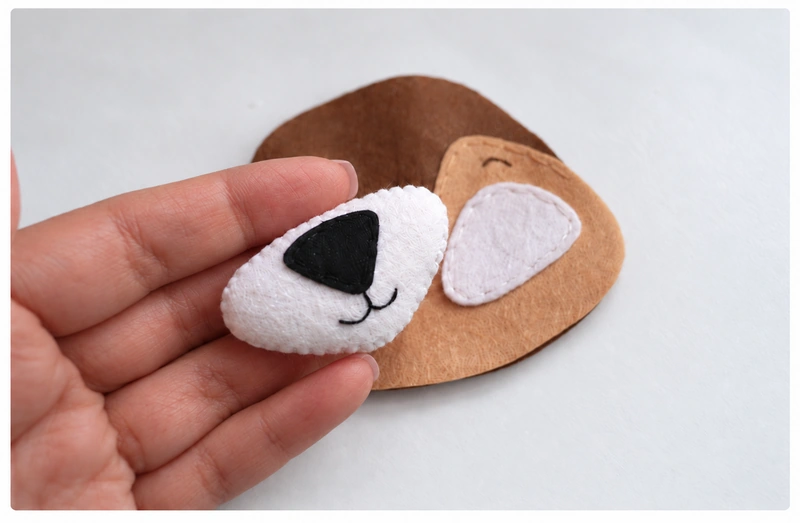
Step 24. Position the Ears and Antlers
Before sewing the head, arrange the ears and antlers on the inside of the back head piece. Use tiny drops of glue to hold their bases in place. Check the placement against the photo, with the ears at the sides and the antlers above them.
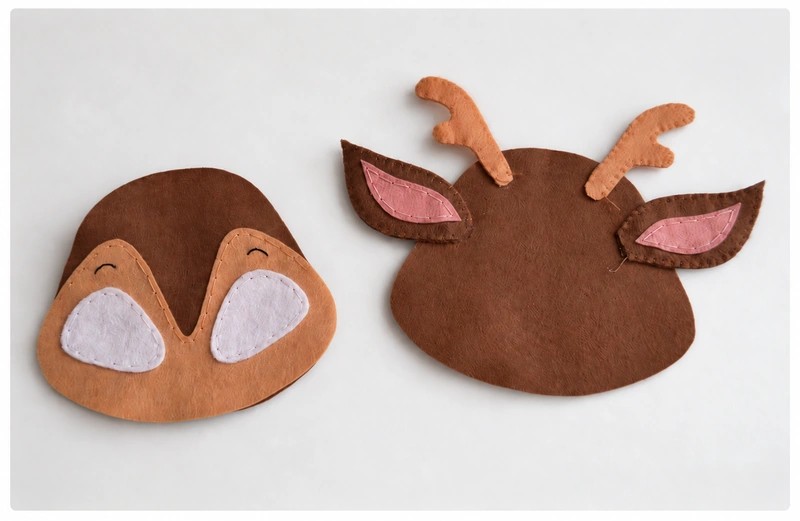
Step 25. Sew the Head and Add the Hanging Cord
Place the decorated front head piece over the back piece. Blanket stitch around the head, enclosing the bases of the ears and antlers as you go. At the crown, insert the hanging cord and catch it securely in the seam. Leave an opening for stuffing.
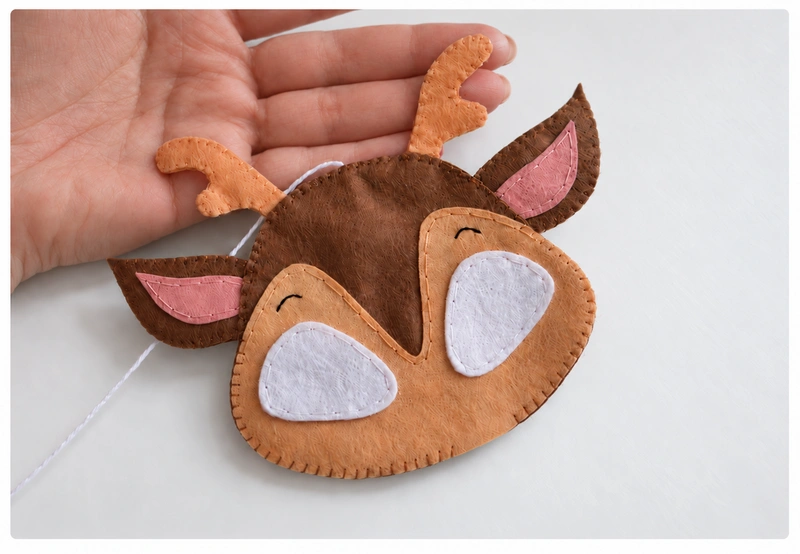
Step 26. Stuff and Close the Head
Fill the head with polyester stuffing, gently distributing it to keep the face evenly rounded. Finish the blanket stitching to close the opening. Now the head, body, legs, and muzzle are ready to be assembled.
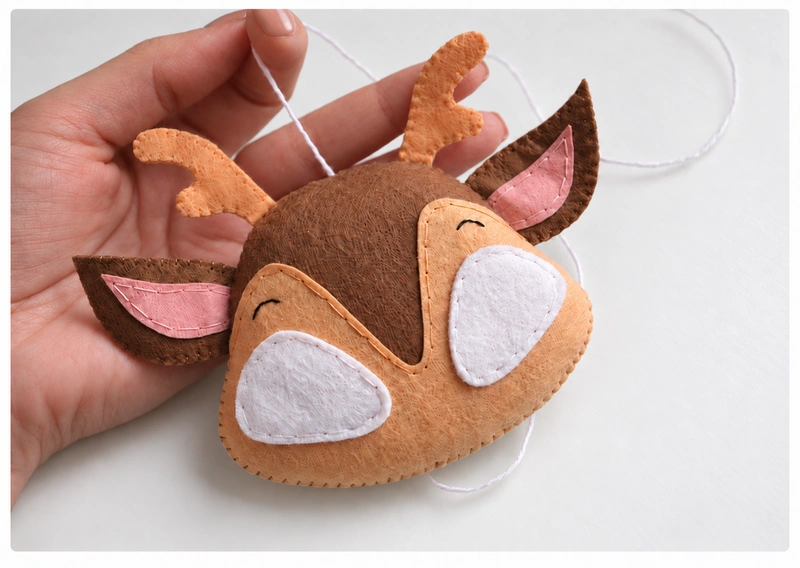
Assemble and Decorate Your Felt Fawn
Step 27. Attach the Head to the Body
Heat the glue gun. Position the head above the chest patch, checking how the two shapes sit together, then attach the head to the body with hot glue. Hold the pieces in position while the glue sets, keeping your fingers away from the hot glue.
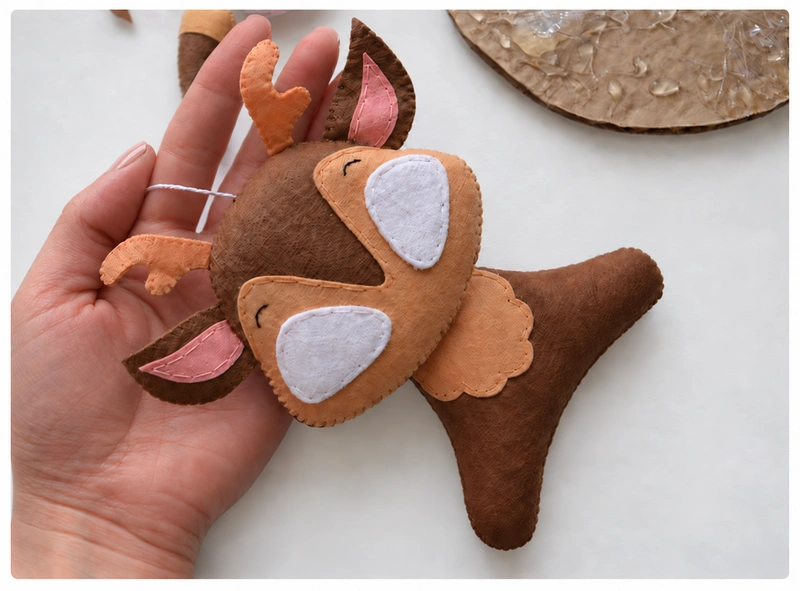
Step 28. Attach the Legs and Muzzle
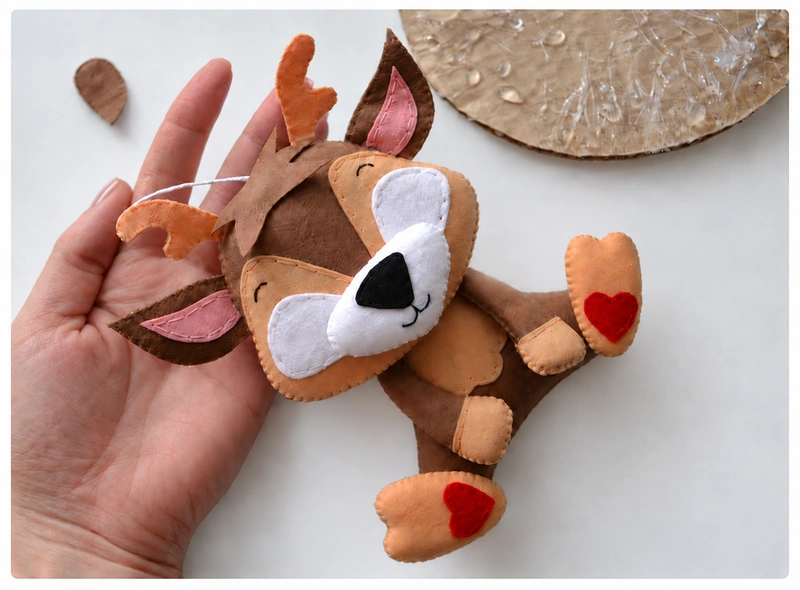
Glue the front legs, hind legs, and padded white muzzle into place, using the photo as a guide. The fawn shown here also has a little brown felt forelock. To include this detail, cut a small tuft from brown felt and glue it onto the forehead.
Step 29. Attach the Tail
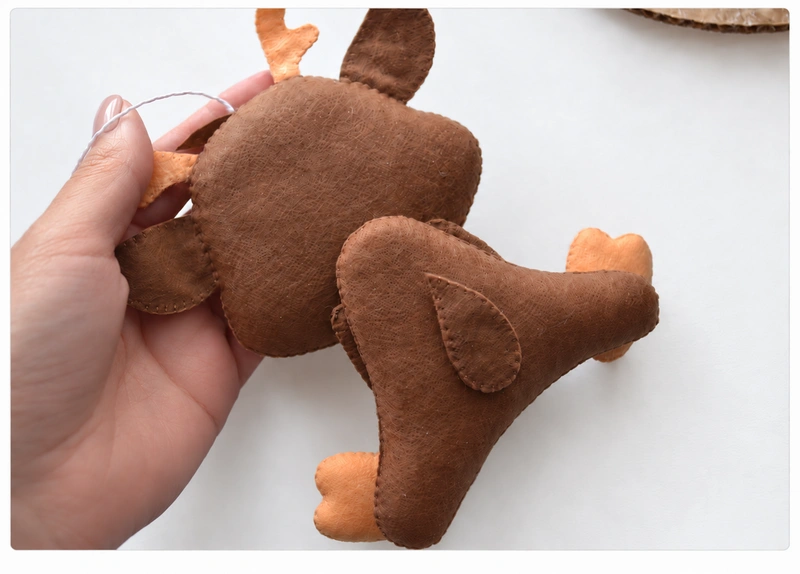
Turn the fawn over and glue the completed brown tail to the back of the body. Check that it sits neatly before allowing the glue to set. The photo shows the placement from behind.
Step 30. Make and Attach the Eyes
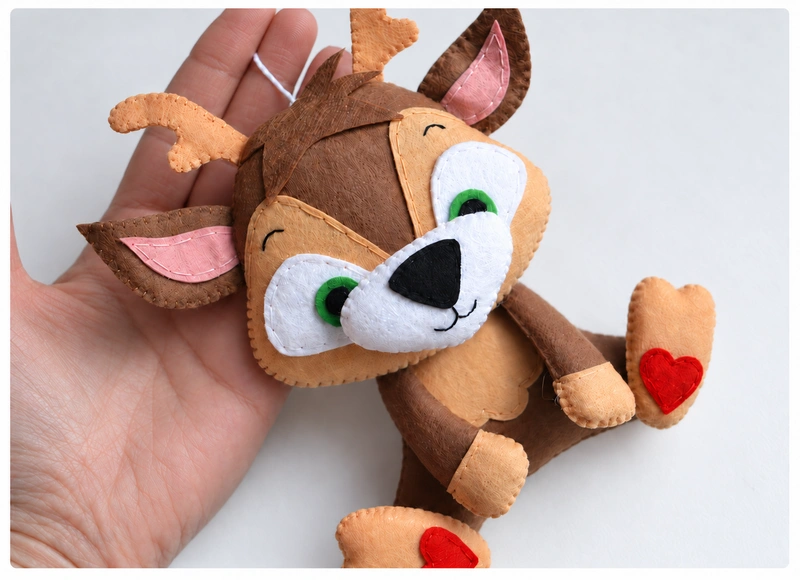
Cut two black felt circles, each 5 mm in diameter, and two green felt circles, each 1 cm in diameter. Glue a black circle to the center of each green circle. Use textile glue to attach these eyes to the white eye patches.
Step 31. Add the Beige Spots
Cut several small beige felt spots and glue them to the back of the head. Arrange them near the top as shown in the photo. This little finishing detail gives the back of your fawn a lovely woodland touch, too.
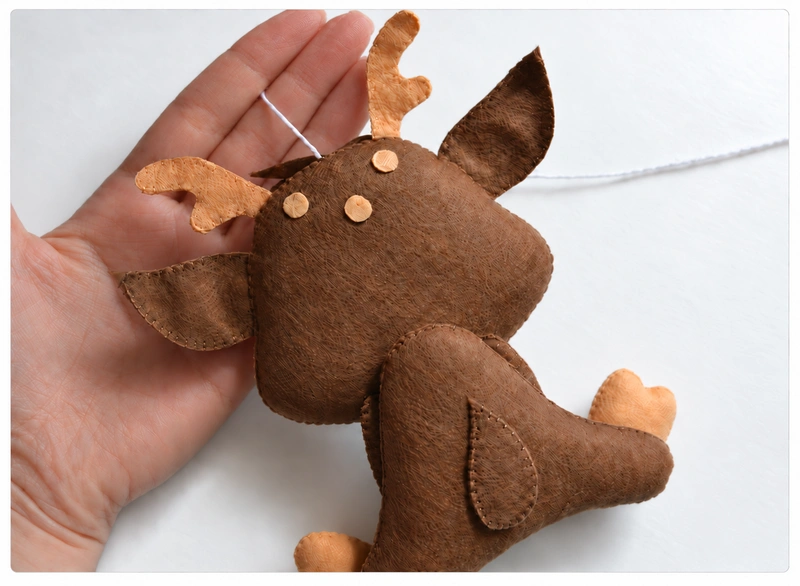
Step 32. Add Rosy Cheeks and Highlights
Apply a little blush to give the fawn rosy cheeks. Then use white fabric paint to add tiny highlights to the eyes and nose. These small white marks bring the face to life. Let the paint dry according to its instructions before handling those areas.
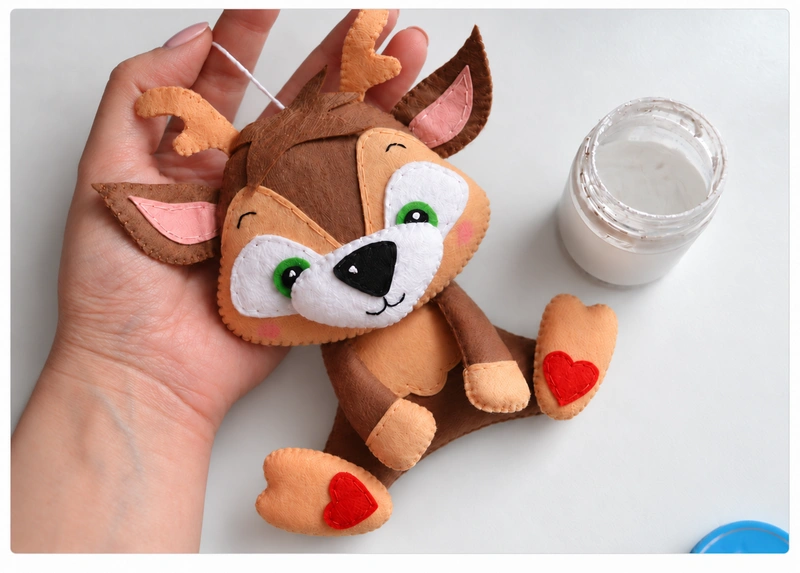
Step 33. Enjoy Your Finished Fawn
Your little felt fawn is finished! Take a moment to enjoy the pink ears, tiny heart details, and sweet expression. Once the glue and paint are fully dry, it’s ready to become part of your decorative woodland mobile.
Keep the finished decoration out of children’s reach. The hanging cord and small glued-on details make this a decorative project rather than a toy for a baby to hold or chew.
Frequently Asked Questions
How Big Is the Finished Fawn, and Can I Resize It?
The sample fawn is 13 cm tall. If you choose another size, resize every pattern piece together so they still fit. The 5 mm black pupils and 1 cm green eye circles are the measurements used for the sample shown here.
Do I Need a Sewing Machine or a Special Needle?
No sewing machine is used in this tutorial. You’ll need a hand-sewing needle that works comfortably with your thread and felt. The two stitches to practice are backstitch for the flat details and face, and blanket stitch for joining the paired pieces.
Do I Need Both Textile Glue and Hot Glue?
The tutorial uses textile glue to hold the nose temporarily and attach the eyes, and a hot glue gun for assembling the larger pieces. Moment Crystal is the textile glue named in the source, but another suitable textile glue may be used. Follow your chosen adhesive’s instructions.
How Should I Care for the Finished Felt Fawn?
Handle the fawn gently and avoid soaking or machine washing it. The blush, paint, stuffing, and glued details need care. For cleaning, follow the felt, paint, and adhesive manufacturers’ instructions, and test any gentle spot-cleaning method on spare materials first.

Leave a Comment